---
title: HFS
tags: Guide, HFS, EN
GA: UA-155999456-1
---
{%hackmd @docsharedstyle/default %}
# Hyper File System (HFS)
GPFS High-Speed Storage Service (hereinafter referred to as GPFS) is a scalable and high-performance parallel file system that allows simultaneous access to the same file or different files on different nodes and provides high-speed and secure data storage for container services and HPC high-speed. The computing task provides efficient, secure and flexible data access and concatenation.
## HFS Introduction
### Service items that can use HFS
On [<ins>TWCC</ins>](http://www.twcc.ai), GPFS will be mounted to the same directory of all GPU nodes at the same time. Therefore, when users upload files to GPFS through the file transfer node, they can [<ins>TWCC</ins>](http://www.twcc.ai) **Development Container Service**, **Task Container Service** and **HPC High Speed Computing Task Service (Web Interface, Command Line Interface)* * Access to content in the GPFS file system. The default storage system for these three services is GPFS, so you can use GPFS data directly with a wired container and HPC high-speed computing tasks.
:::info
:paperclip: **Note:** See [<ins>Pricing</ins>](https://www.twcc.ai/doc?page=price#%E9%AB%98%E9%80%9F%E6%AA%94%E6%A1%88%E7%B3%BB%E7%B5%B1-Hyper-File-System-HFS) for the pricing and space resizing steps.
:::
### HFS file transfer node information
The service provides a HFS file transfer node and mounts the /home and /work paths. The information provided by the system for the HFS file transfer node, mount path and free quota is as follows. If the space is not enough, you can purchase more storage on Member Center <i class="fa fa-question-circle fa-question-circle-for-service" aria-hidden="true"></i>](https://man.twcc.ai/@twsdocs/howto-service-access-service-zh).
| Project | Content |
| -------- | -------- |
| HFS Transfer Node | xdata1.twcc.ai|
| HFS nickname | 22|
|Mount path|Free quota|
| -------- |-------- |
|/home/<host account name>|100 GB|
|/work/<host account name>|100 GB|
## Transfer files using SFTP + Filezilla
Log in to the HFS file transfer node via the HPC account, then you can upload the file to the GPFS file system via SFTP protocol, or download the file from GPFS to the local device. end. The following example shows how to upload a file using SFTP.
The following is an example of the Windows operating system + [FileZilla](https://filezilla-project.org) (macOS is a similar operation)
### Step 1. Connection, login service
- Users of the TWCC development container service can connect to containers via Jupyter Notebook or SSH
- TWCC task container, HPC (Web interface, command line interface) users can log in to the node through HPC (command interface)
:::info
:paperclip: **Note:** For login methods, see:
- [<ins>Development Container</ins>]((https://www.twcc.ai/doc?page=container&euqinu=true#%E9%80%A3%E7%B7%9A%E4%BD%BF%E7%94%A8%E6%96%B9%E5%BC%8F)) - Connection method
- [<ins>HPC (command interface)</ins>](https://www.twcc.ai/doc?page=hpc_cli#2-Log-in-to-the-Login-Node) - Login to the Login Node
:::
### Step 2. Save the SSH private key to the machine
- After logging in, enter the following command to read the SSH private key
```bash=
Cat ~/.ssh/id_dsa
```
- To log in to the TWCC development container Jupyter -> Terminal for example
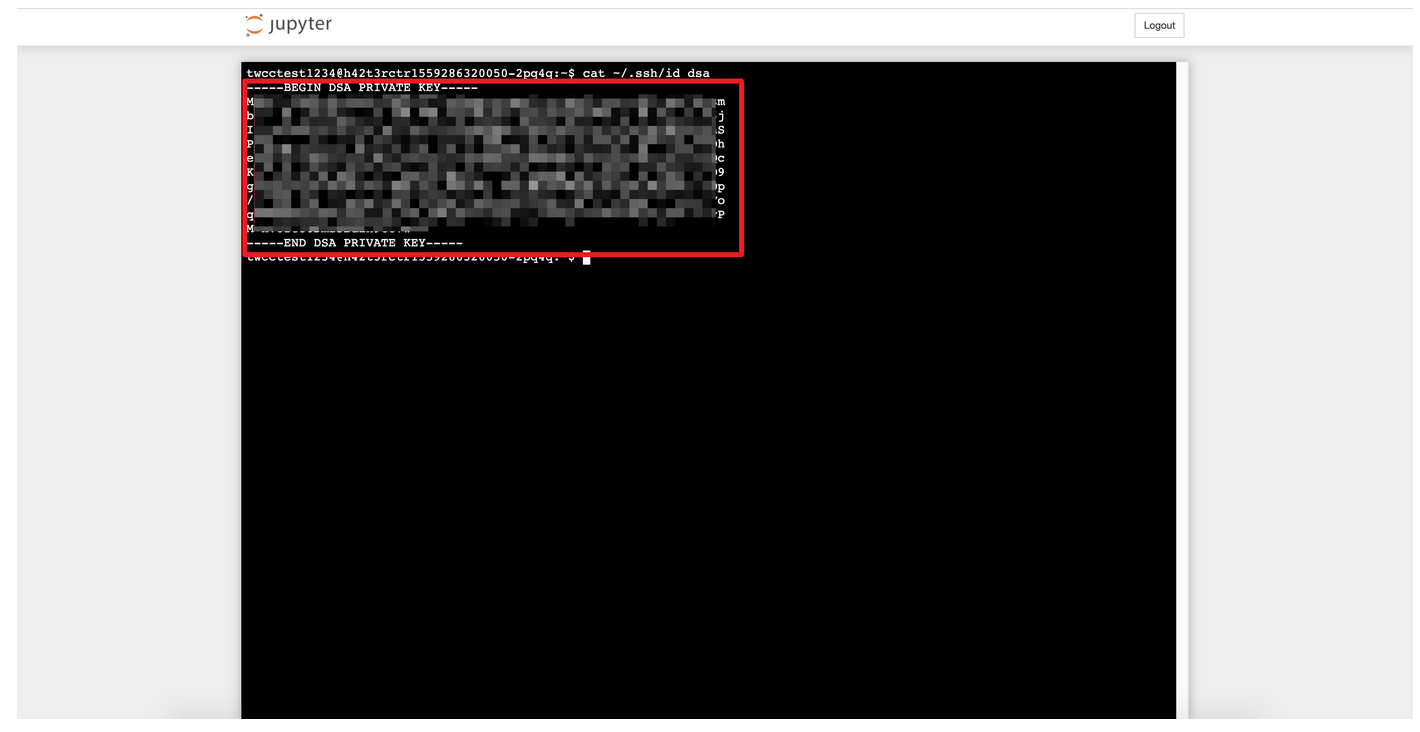
- Log in to TWCC HPC login node ln01.twcc.ai as an example
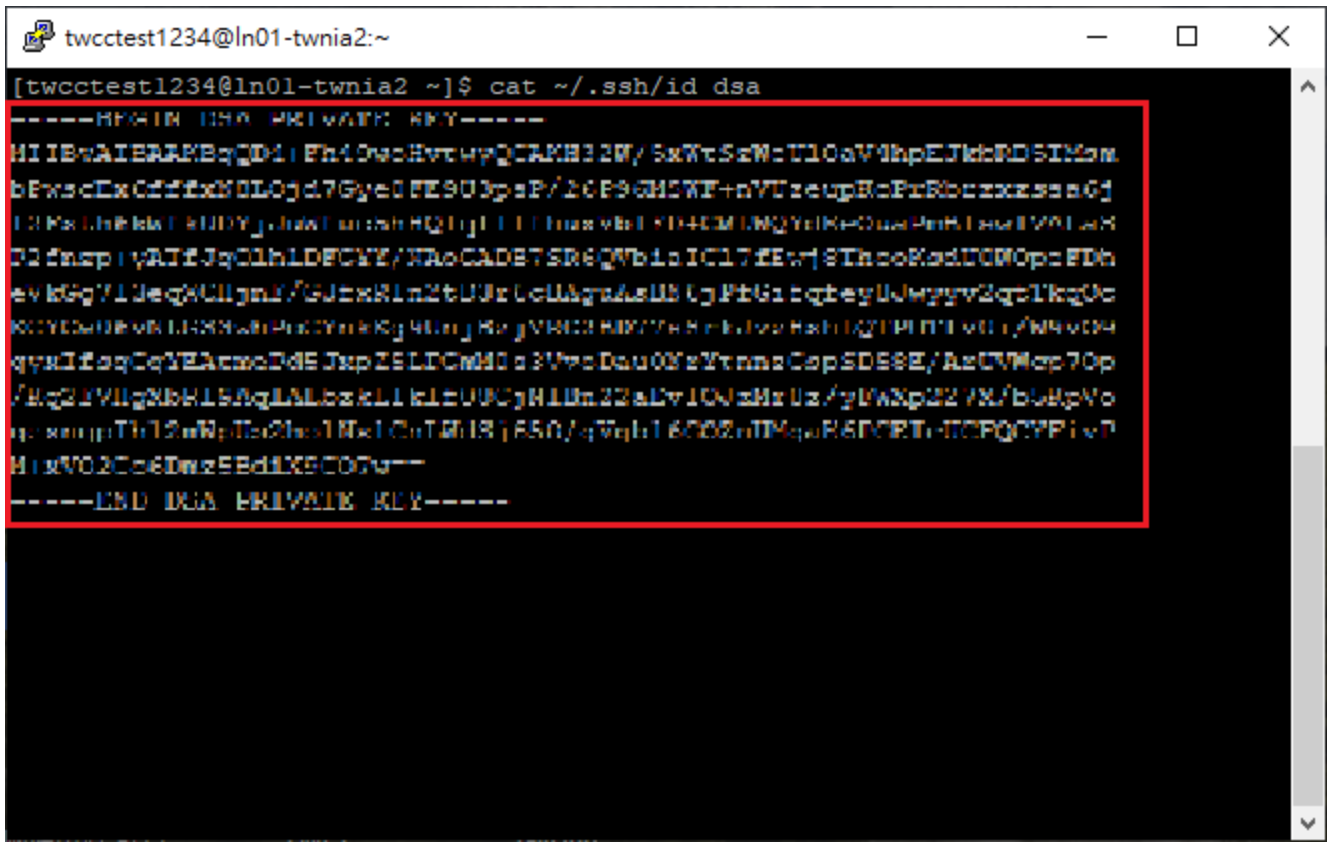
- Save the SSH private key to the machine, copy all the red parts, and open the notepad (with head and tail information)
:::info
:paperclip: **Note:** For macOS users, please use the "Text Editing" software.
:::
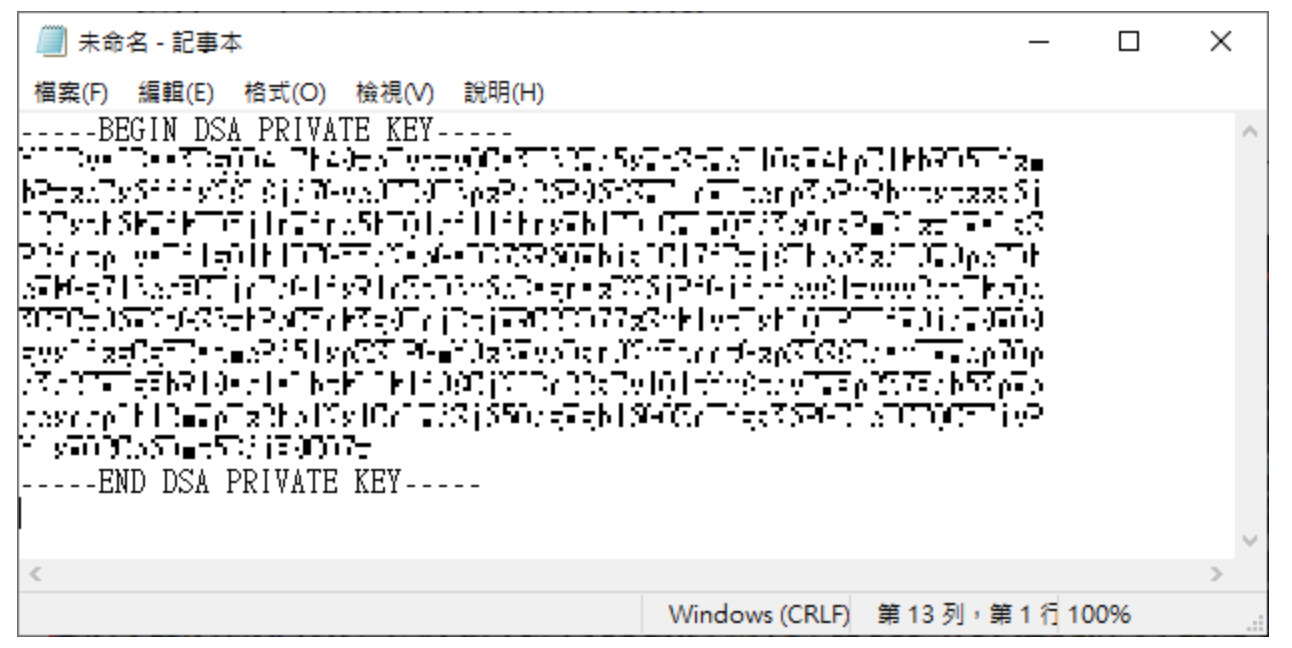
```bash=
-----BEGIN DSA PRIVATE KEY----- (This line also needs to be copied)
...
...
-----END DSA PRIVATE KEY----- (This line also needs to be copied)
```
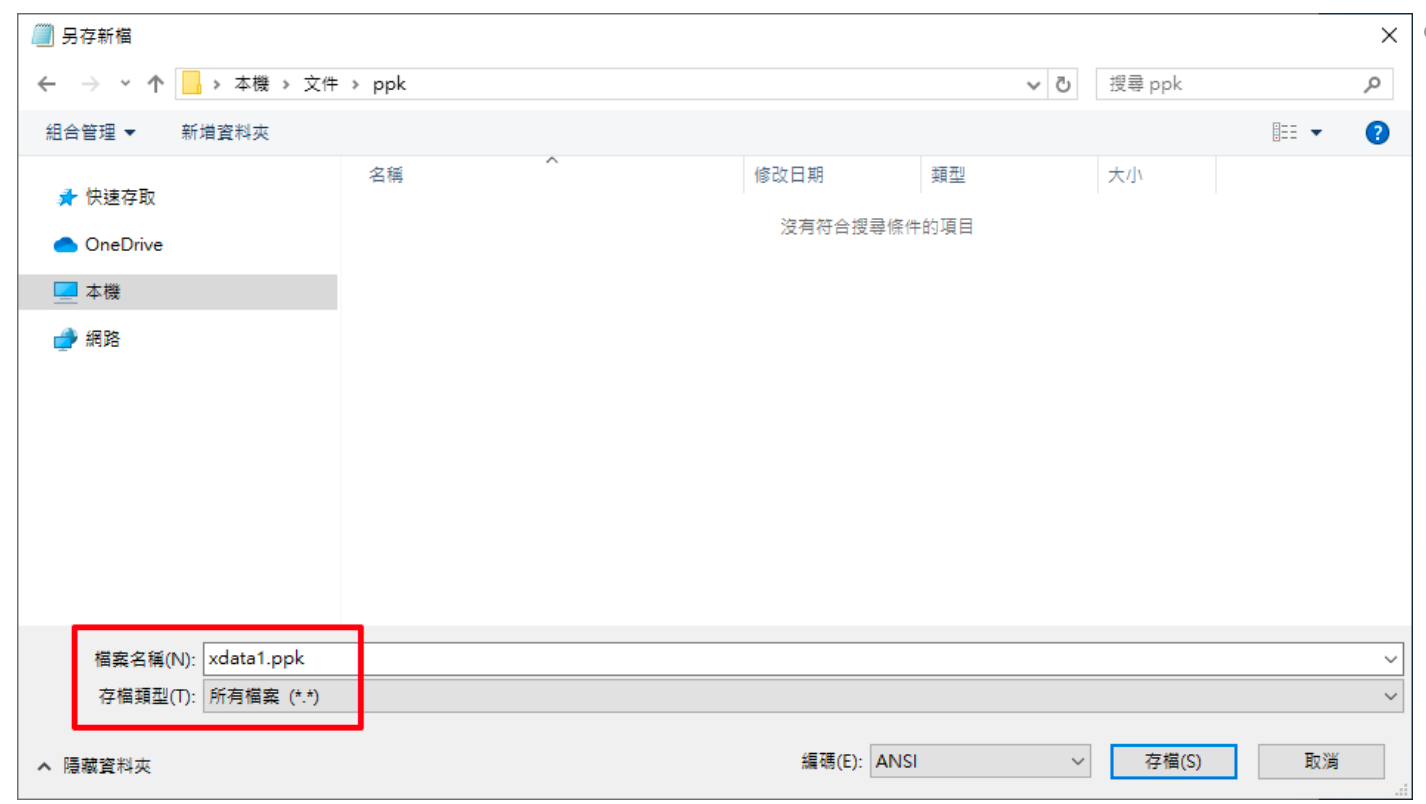
- Added ppk folder under the file
- And take the name of the notepad file as xdata1.ppk, change the archive type to all files, and archive.
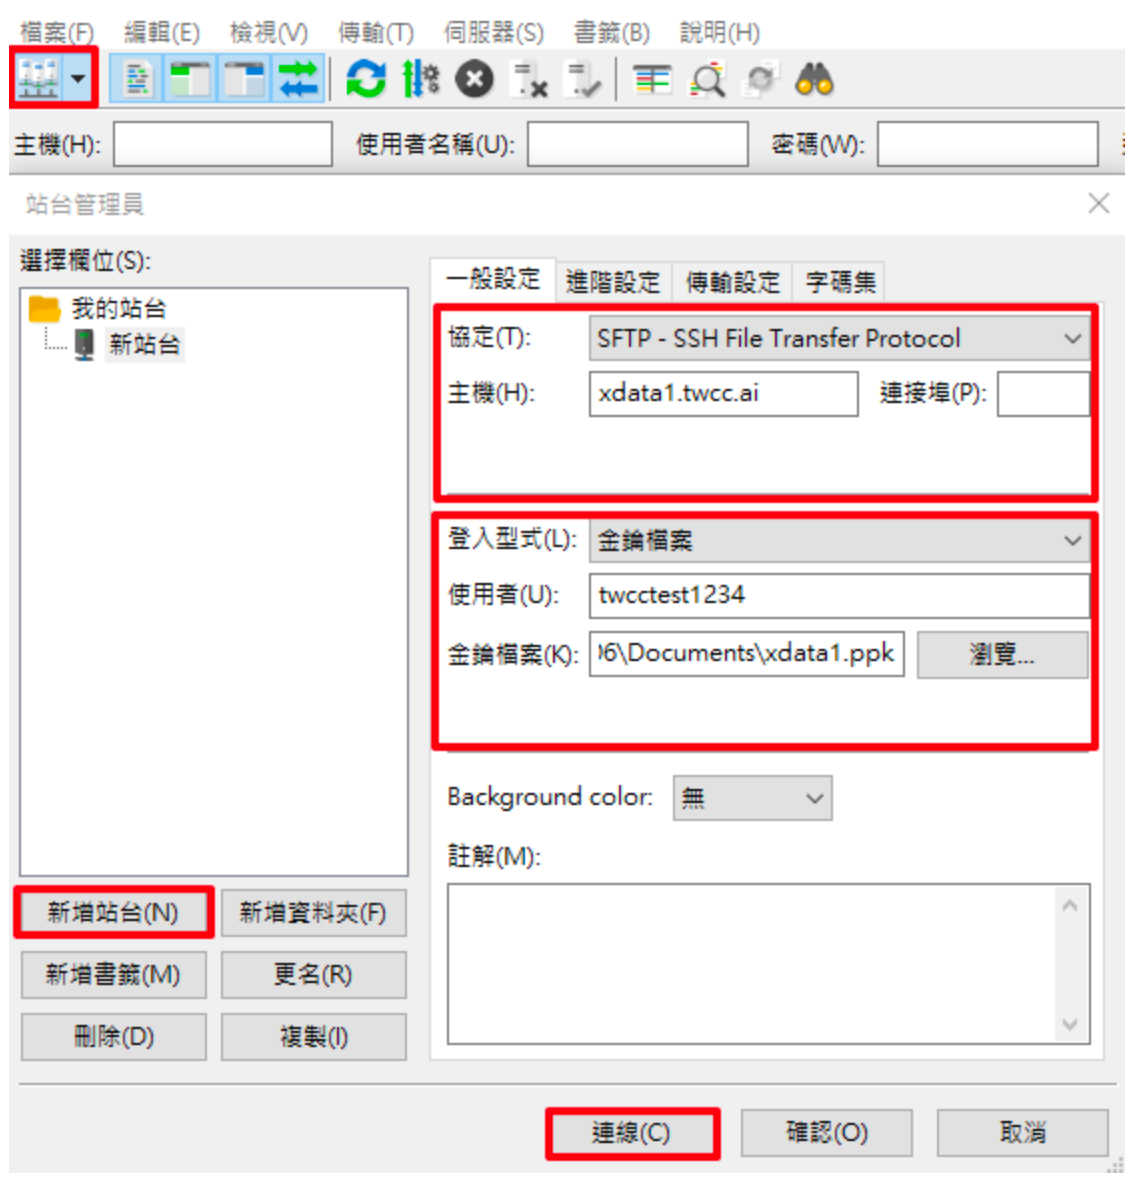
### Step 3. Log in to the Data Transfer Node with FileZilla + Key.
- Click on the station administrator in the upper left corner, add the new station in the lower left, and jump out of the menu as shown below.
- Input and selection, refer to the figure below
```
Agreement: SFTP
Host: xdata1.twcc.ai
Login type: Key file
User : Host account
Key file: path to the key file
```
- Click "Connect" to login successfully.
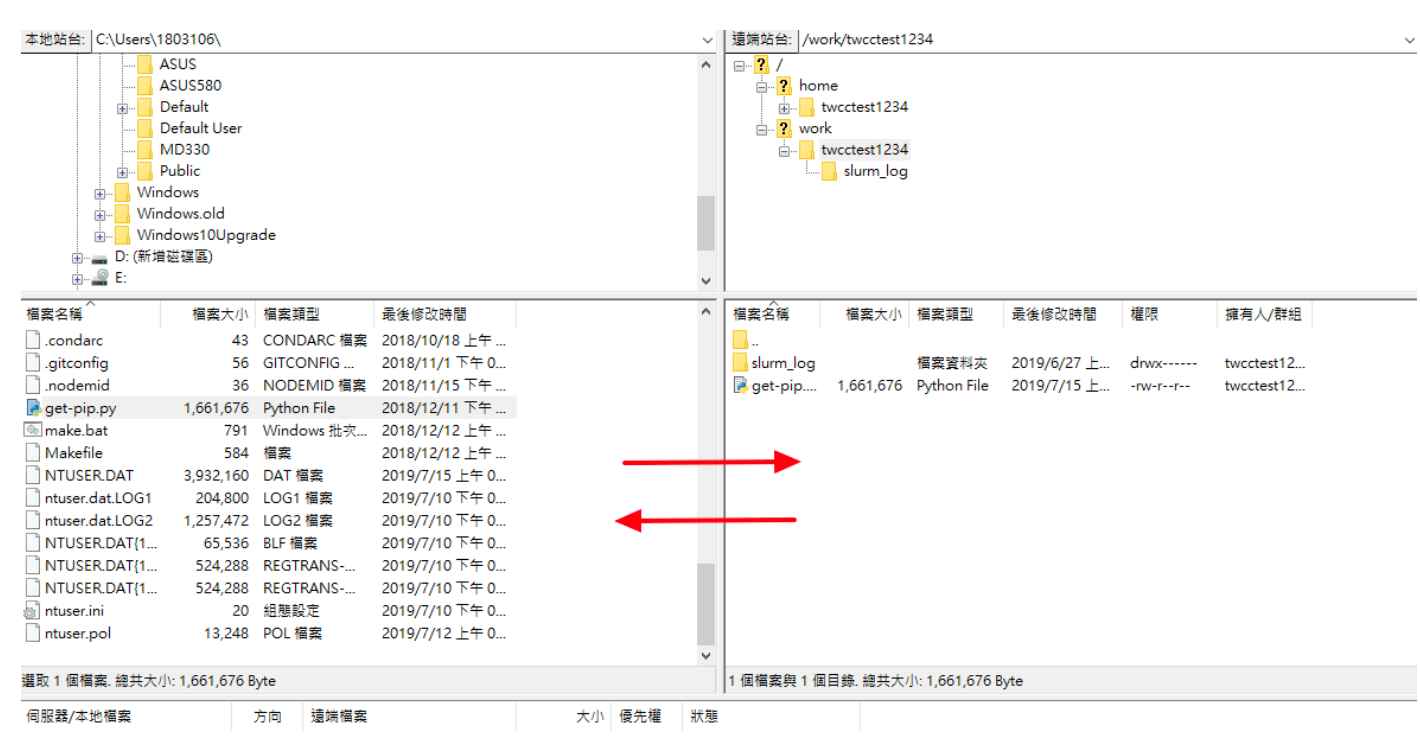
- After successful login, the "remote station" on the right is the data in the GPFS file system, and the "local station" on the left is the data of your machine.
- The default directory is the user's /home directory, and the bottom is the data under the /home directory.

### Step 4. File Management
#### Switch directory
- Switch the directory to the /work directory by changing the path "home" to "work" on the "remote station"

#### Uploading and downloading files
- You can upload your own files to GPFS by "drag and drop", or download files from GPFS to this machine.
- Information on data transmission at the bottom left
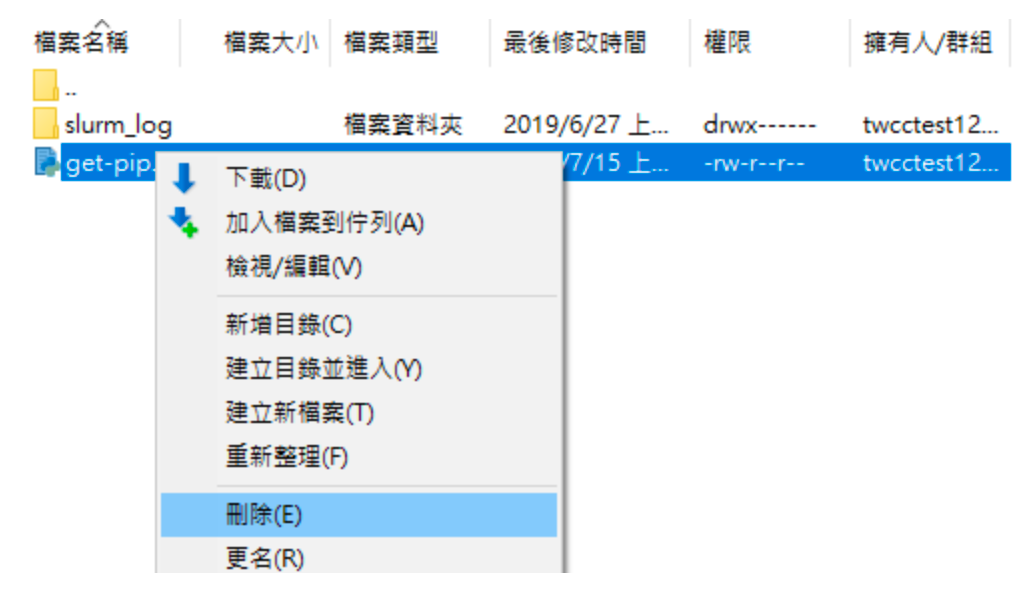
#### Deleting files
- Right click on the file and select "Delete"
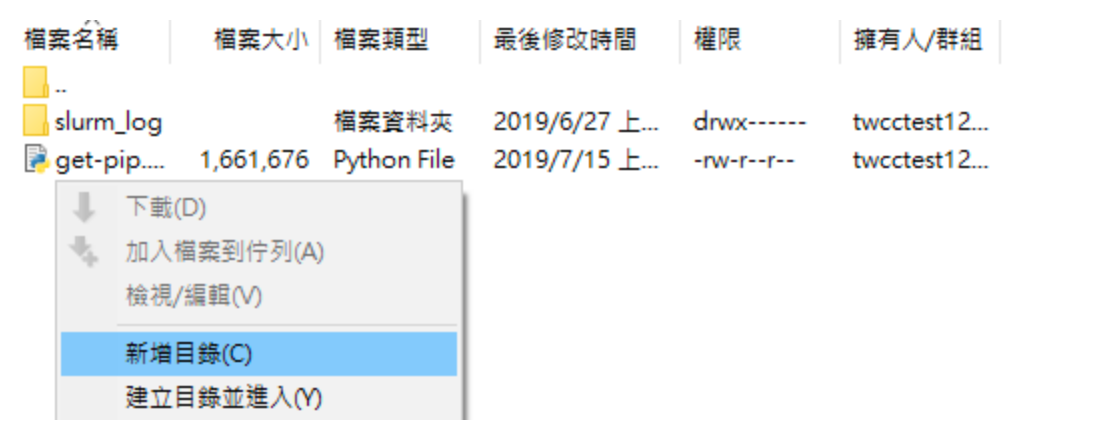
#### Add Folder
- Right click on the blank space of the directory and select "Add Directory"
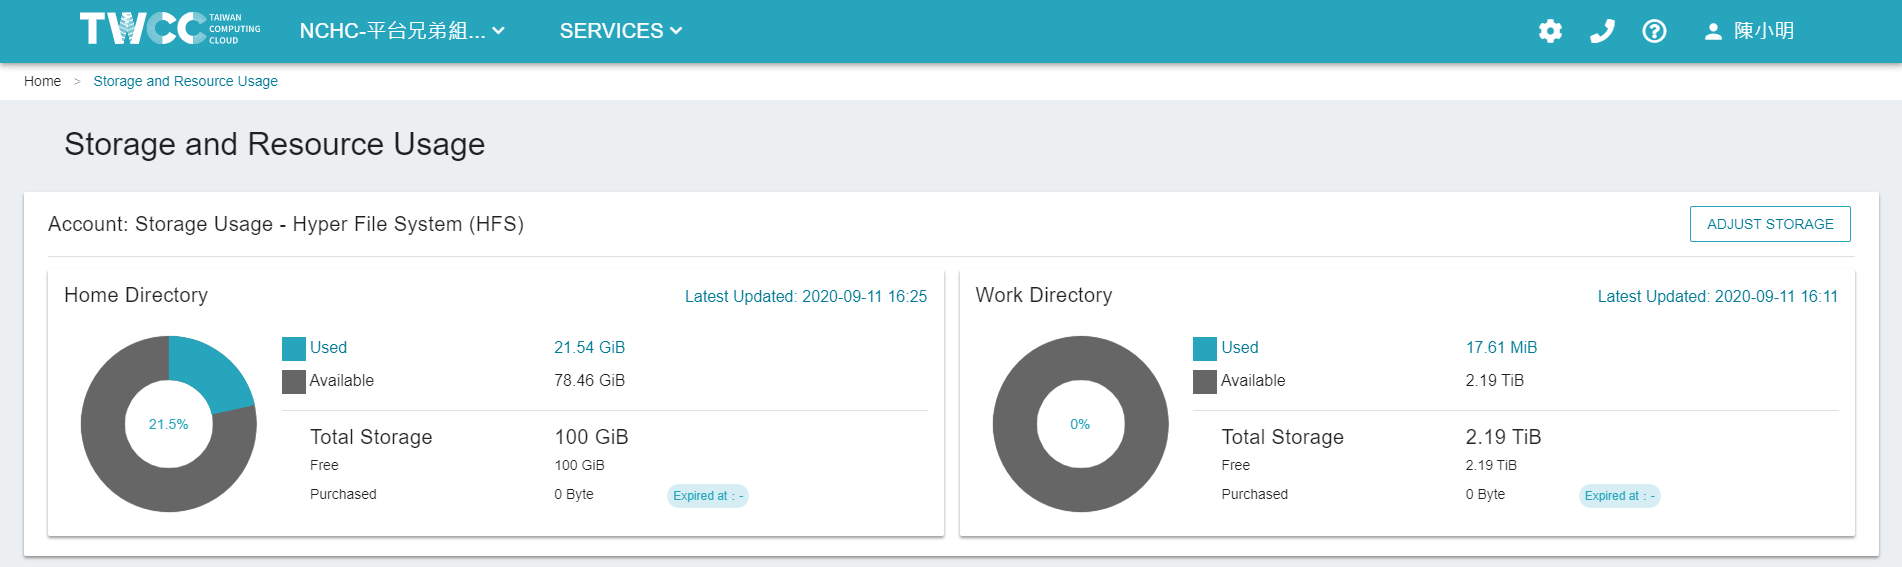
## View capacity
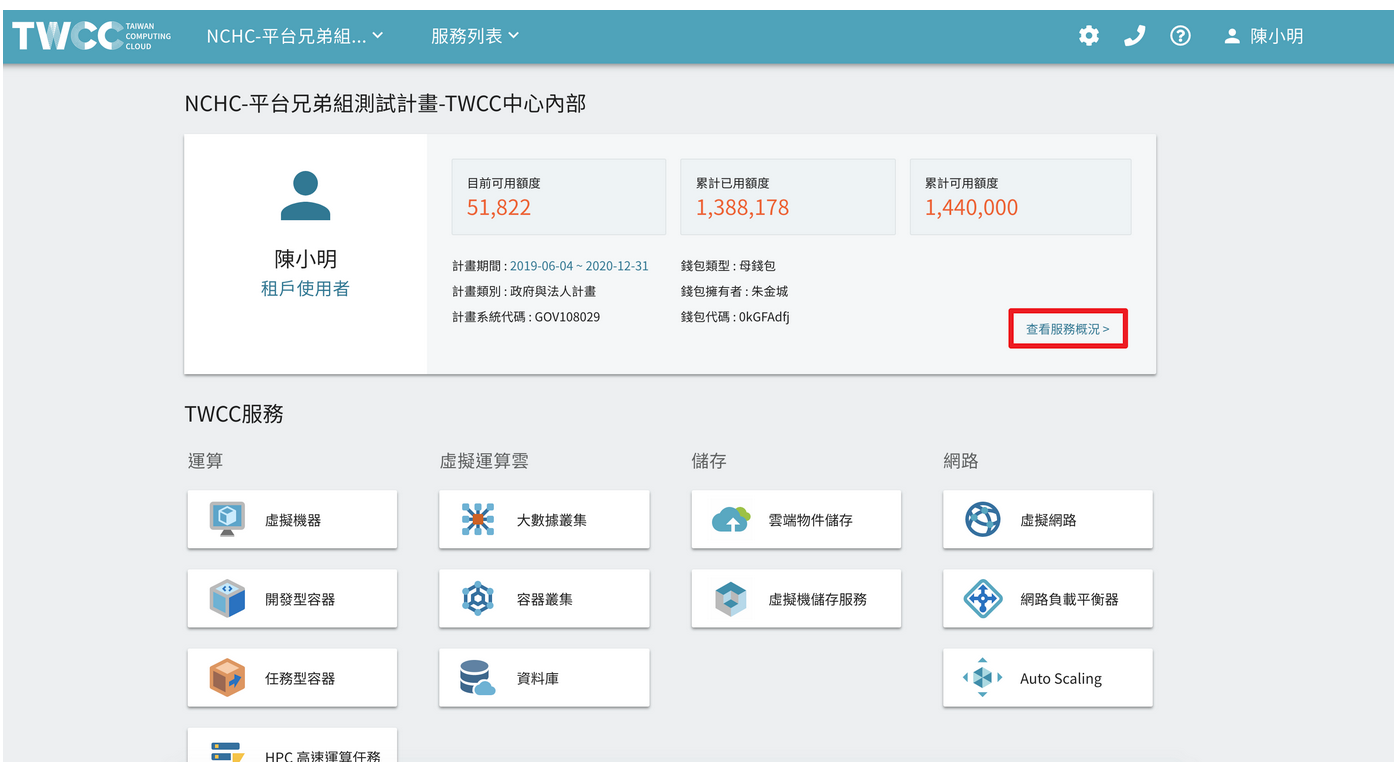
- After logging in to TWCC, click on "View Service Profile" to view GPFS storage capacity.
- You can view the total storage capacity of the Home, Work directory, used and usable capacity, and distinguish between free and additional purchase capacity.
<!--
## 使用 SFTP
透過 [iService](https://iservice.nchc.org.tw) 註冊的主機帳號登入 GPFS 檔案傳輸節點,可將檔案以 SFTP 協定上傳至 GPFS 檔案系統中,亦可將檔案從 GPFS 中下載到本地端。以下範例說明如何使用 SFTP 上傳檔案。
### 登入 SFTP
* 開啟命令提示字元視窗,依照以下範例輸入 SFTP 主機登入資訊。登入的帳號及密碼為 [iService](https://iservice.nchc.org.tw) 中所設定之主機帳號與密碼。
* 成功登入 SFTP 互動模式後即可開始使用,輸入 help 可查詢常用的指令。
<div style="background-color:black;color:white;padding:20px;">
C:\Users\Janice_Chiang>sftp janice2019@xdata1.twcc.ai
janice2019@xdata1.twcc.ai's password:
Connected to xdata1.twcc.ai.
sftp>
</div>
### 查詢目前路徑與檔案
* 分別以 pwd 與 lpwd 取得伺服器端與本地端的目前路徑
<div style="background-color:black;color:white;padding:20px;">
sftp> pwd
Remote working directory: /home/janice2019
sftp> lpwd
Local working directory: C:\Users\Janice_Chiang
sftp>
</div>
* 更改本地端目錄,列出目錄下的檔案
<div style="background-color:black;color:white;padding:20px;">
sftp> lcd d:\testdata
sftp> lls
磁碟區 D 中的磁碟是 DATA
磁碟區序號: 7230-EBC6
d:\testdata 的目錄
2019/05/22 下午 03:30 <DIR> .
2019/05/22 下午 03:30 <DIR> ..
2019/05/22 下午 03:26 25,741 logo.png
1 個檔案 25,741 位元組
2 個目錄 676,444,684,288 位元組可用
</div>
### 上傳檔案
* 將 logo.png 上傳至 /home/janice2019 下,即 GPFS 掛載點子目錄中。
<div style="background-color:black;color:white;padding:20px;">
sftp> put logo.png
Uploading logo.png to /home/janice2019/logo.png
logo.png
sftp> ls
logo.png
</div>
### SFTP 常用指令
以下列舉常用的 SFTP 指令供參考:
| 指令 | 說明 |
| -------- | -------- |
| bye 或 exit 或 quit | 結束 SFTP |
| cd | 變換遠方端伺服器的目錄 |
|chmod|更改檔案或目錄的權限|
|del 或 rm|刪除檔案|
|dir 或 ls|列出遠方端伺服器目錄下的檔案名稱|
|get|下載檔案|
|put|上傳檔案|
|open|連接主機|
|lcd|變換本地端機器的目錄|
|lpwd|列出本地端機器目前所在的目錄名稱|
|pwd|列出遠方端伺服器目前所在的目錄名稱|
|mkdir|新增一個遠方端伺服器的目錄|
|rmdir|刪除遠方端伺服器的目錄|