---
title : Interactive Container
tags: Guide, CCS, Interactive, EN
GA: UA-155999456-1
---
{%hackmd @docsharedstyle/default %}
# Interactive Container
## Create interactive containers
TWCC Interactive Container can quickly deploy a development environment of containers. TWCC offers various AI frameworks; you can select one according to your needs to build your container and rapidly develop your applications in the container's built-in Jupyter Notebook. TWCC will automatically mount two directories ( /home and /work) of Hyper File System (HFS) to your container; you may also use Cloud Object Storage to store training data and models.
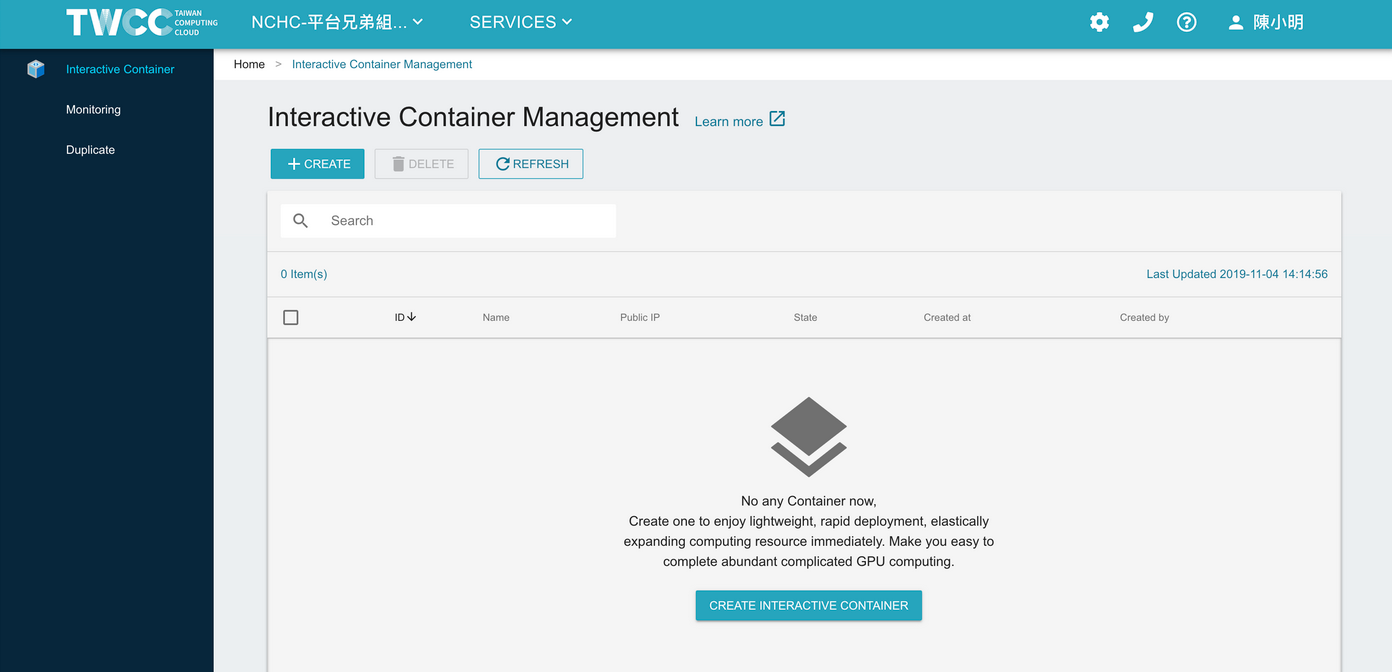
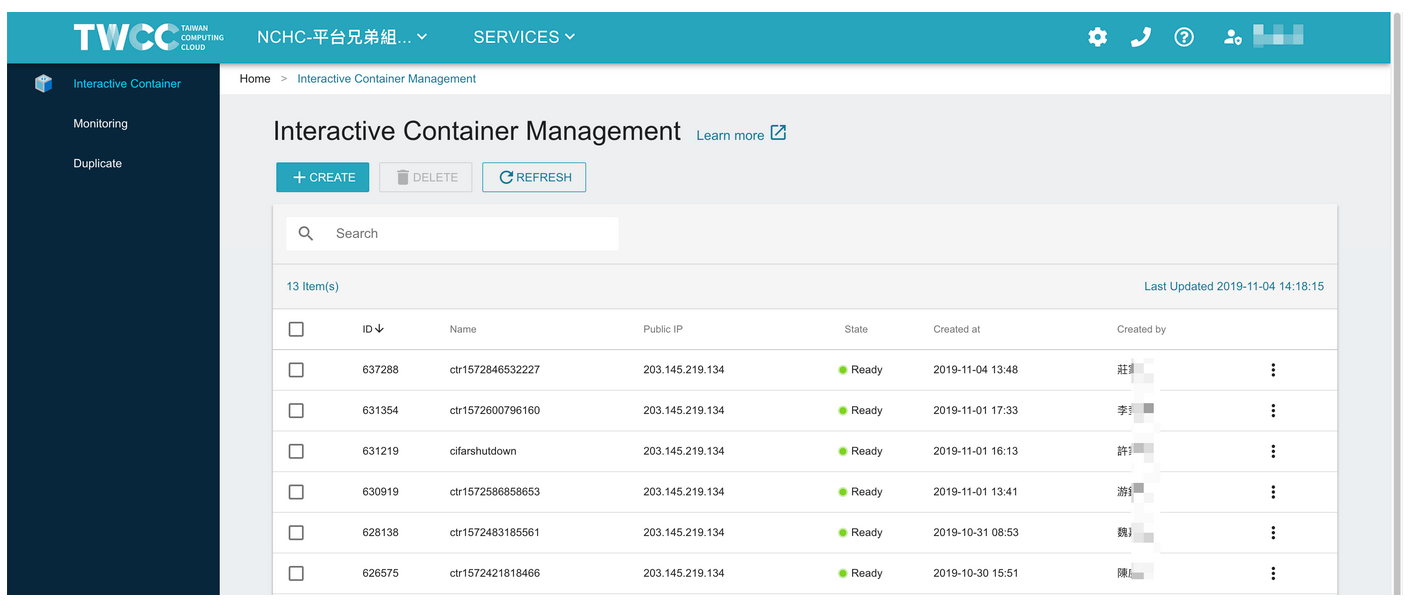
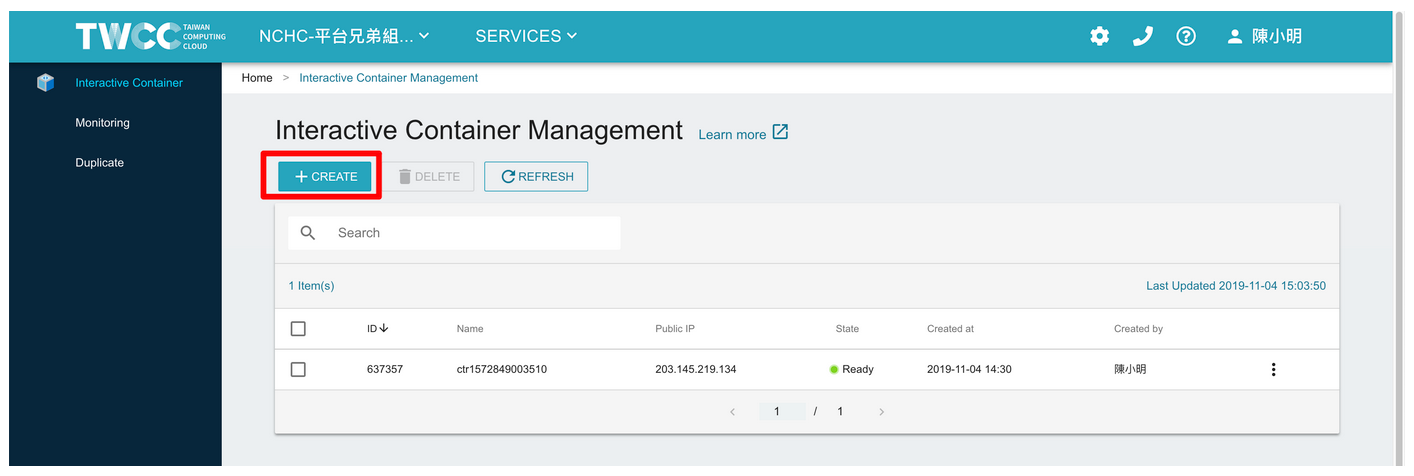
* On the service list, select **Interactive Container**. On the management page, select **+ CREATE**.
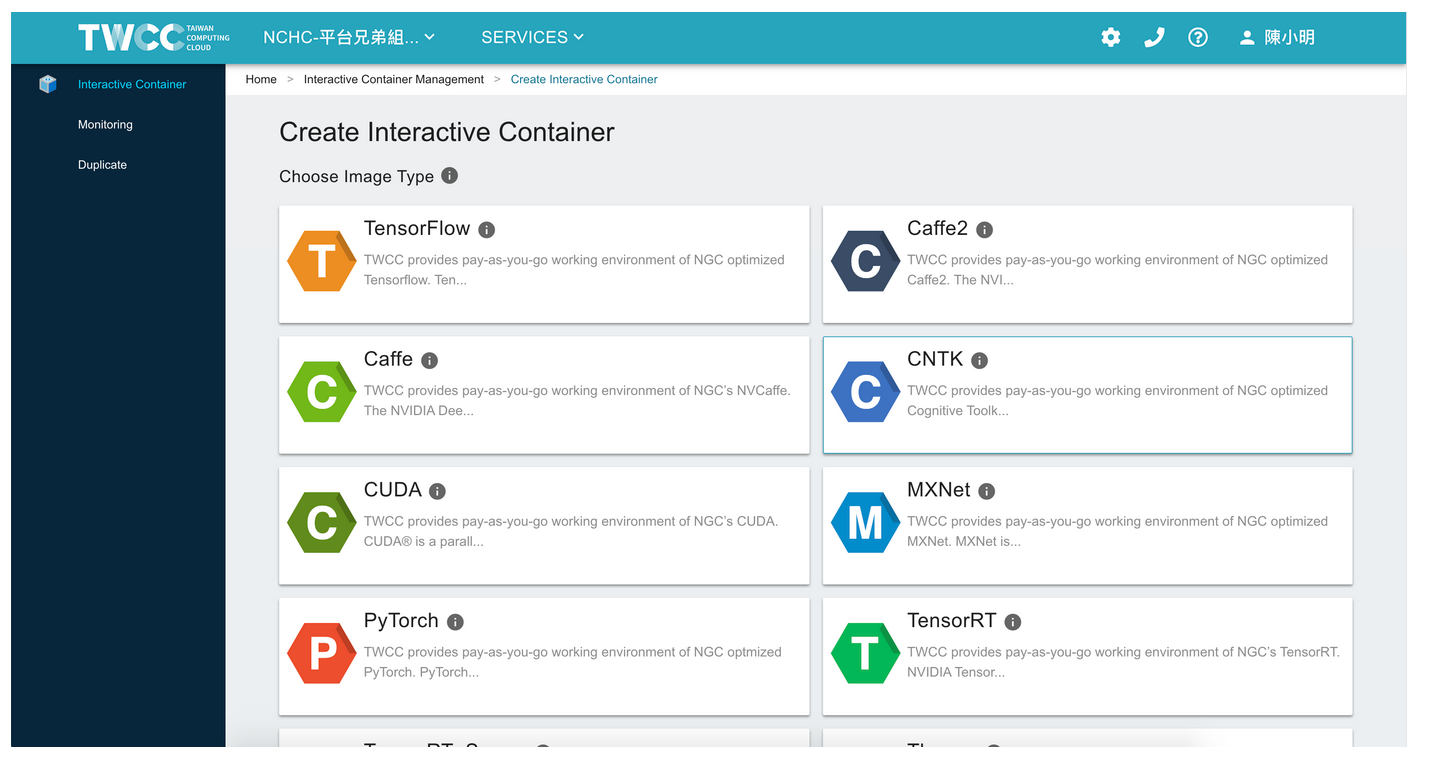
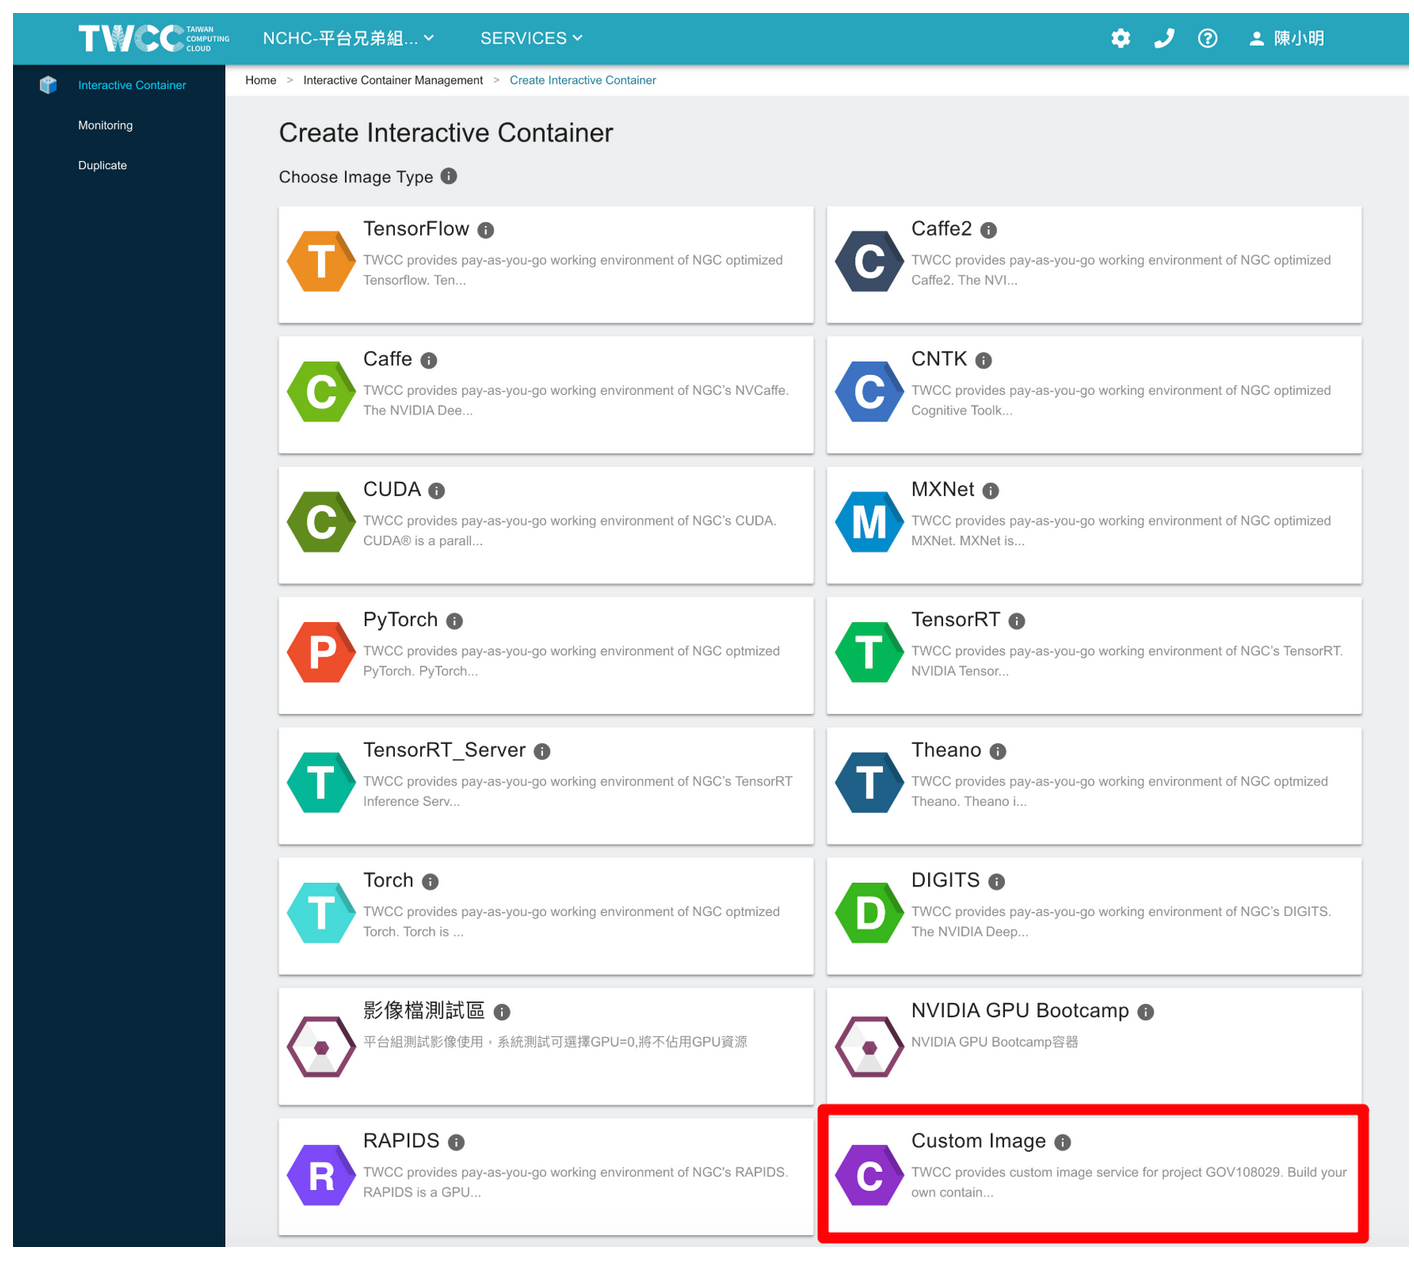
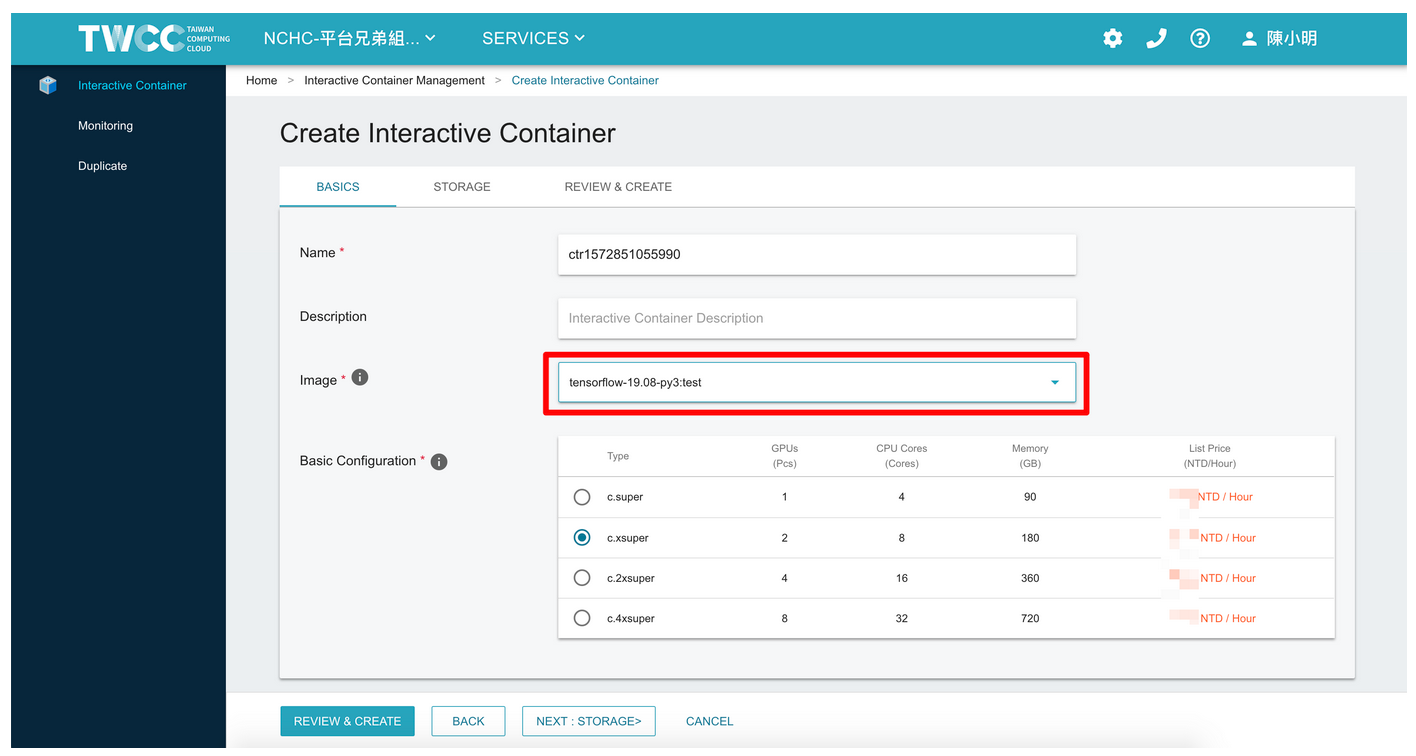
* Select Image Type and NVIDIA optimized AI frameworks.
* Fill in basic configuration and hardware specifications of this container. Select **NEXT: STORAGE**.

* After the container has been created, the system automatically mounts two directories of Hyper File System (/home and /word) on the container to provide users with better performance when running AI computations. Users may also use Cloud Object Storage.
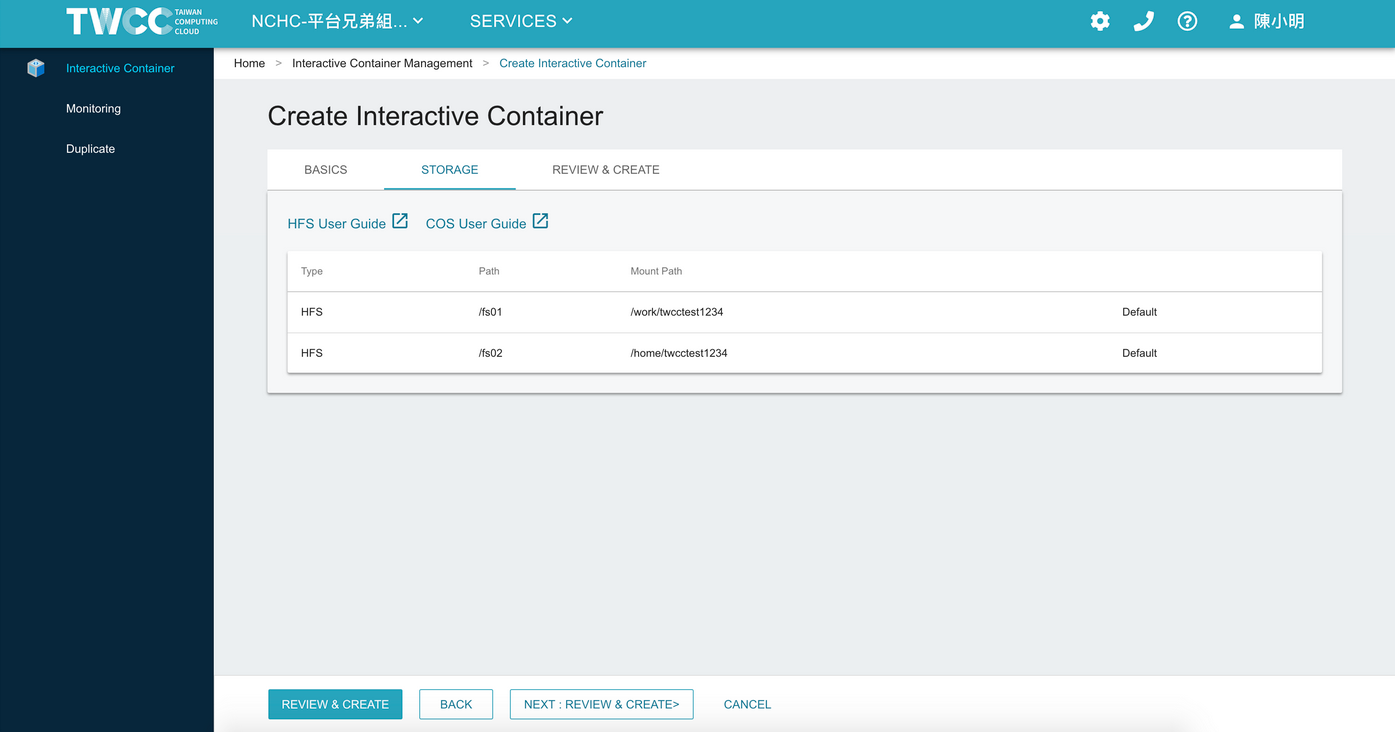
:::info
<i class="fa fa-paperclip fa-20" aria-hidden="true"></i> **Note:**
For more information, see [<ins>Cloud Object Storage</ins>](https://www.twcc.ai/doc?page=object) and [<ins>Hyper File System</ins>](https://www.twcc.ai/doc?page=hfs).
:::
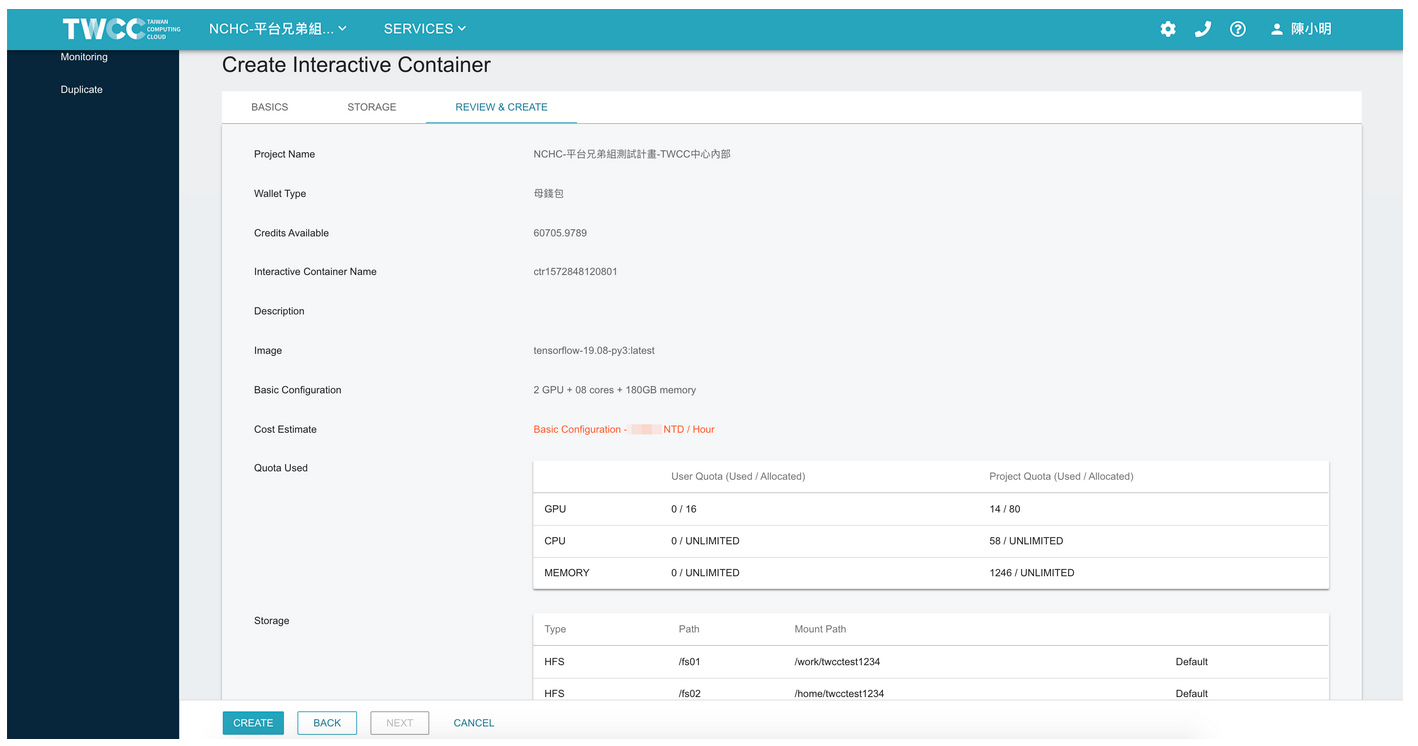
* Click **NEXT: REVIEW & CREATE**. Review the setup of the container. If correct, click **CREATE**.
:::danger
<i class="fa fa-exclamation-triangle fa-20" aria-hidden="true"></i> **Important:** After creating the interactive container, billing will continue until you delete the container.
:::
## Manage interactive containers
* After the container has been created, it will appear in the interactive containers list. Select a container in the list, and you can view information about container configuration or resource usage monitoring.
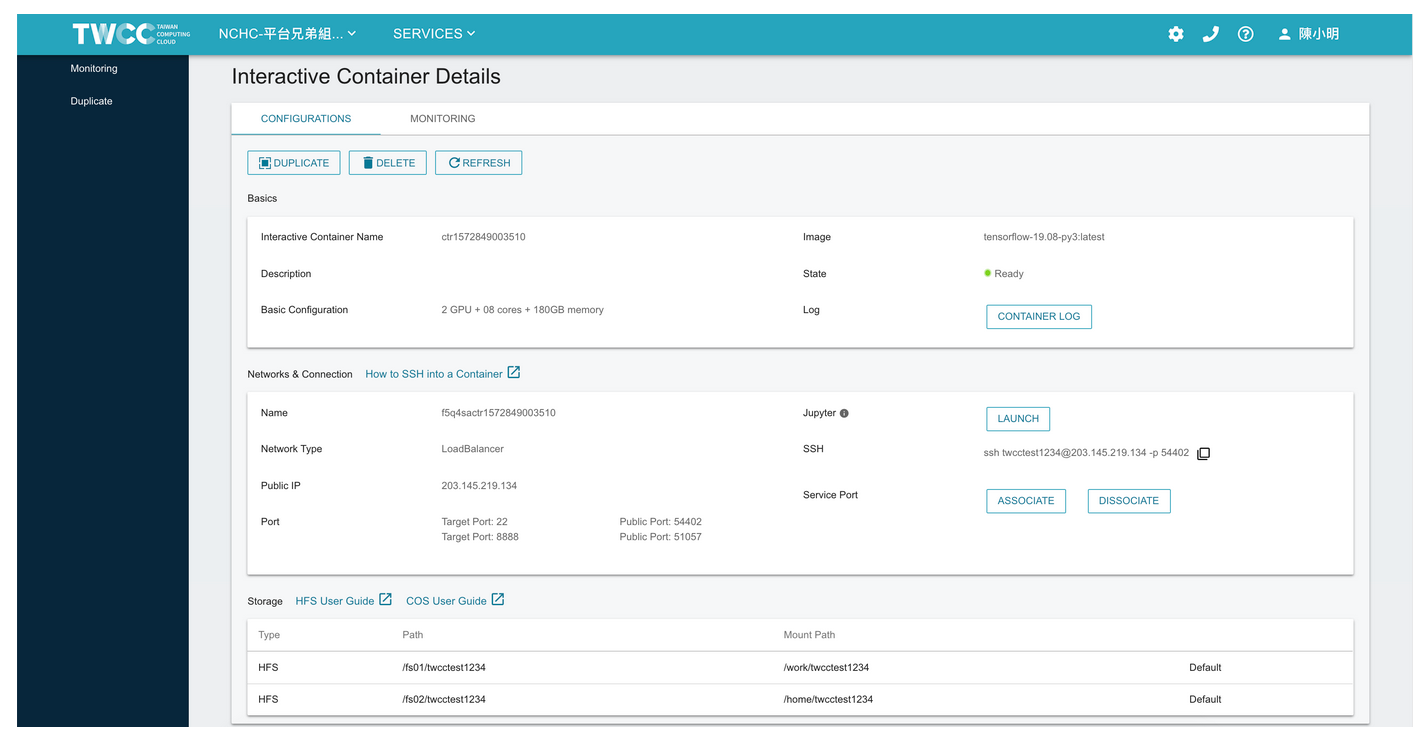
* In the **Configuration** tab on container detailed information page, you may view the container’s basic information of configuration, network & connection, storage, etc. You may also connect to the container, Duplicate or Delete the container, Refresh the page, or view the container log.
## Connect to the interactive containers
* A container is available when it is in **Ready** state. An interactive container offers Jupyter Notebook webpage and SSH through which to connect.
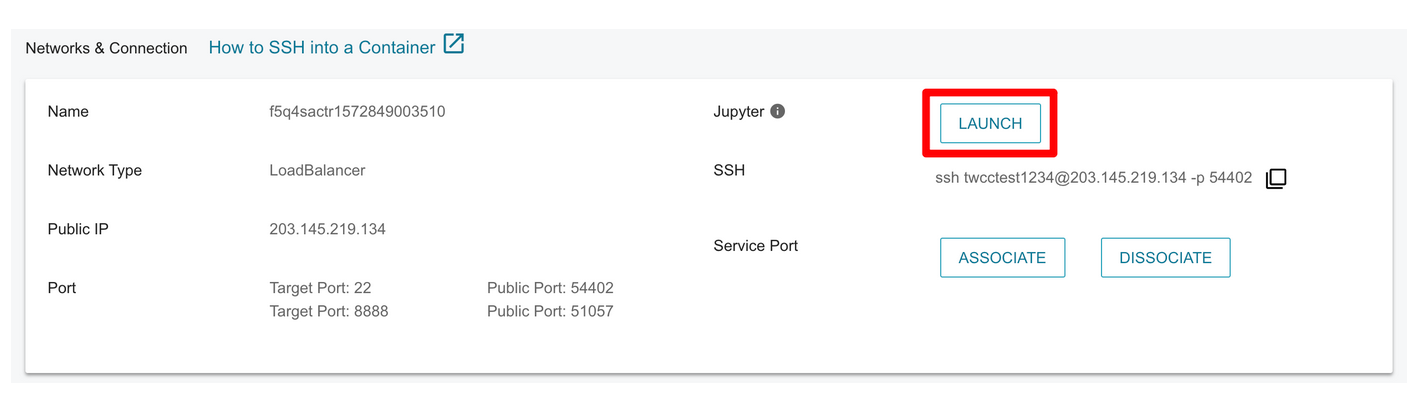
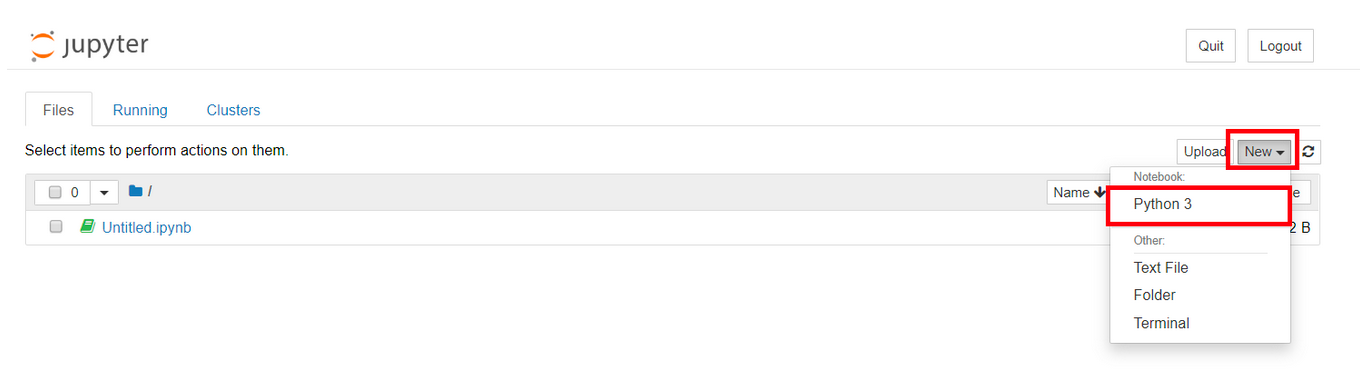
### Using Jupyter Notebook
* Select **Launch** to open the Jupyter Notebook webpage and begin your AI computation tasks.
### Using SSH
* Click the duplicate icon to rapidly copy the login command (ssh + hostname + password + IP address). On your local computer, open the terminal enter the SSH command, system account and system password for connecting to containers (no need to enter OTP). The [<ins>system account and system password</ins>](https://man.twcc.ai/@twccdocs/guide-service-hostname-pwd-otp-en) was established in iService Member Center. You can also use other third-party software such as PuTTy to connect to your container.
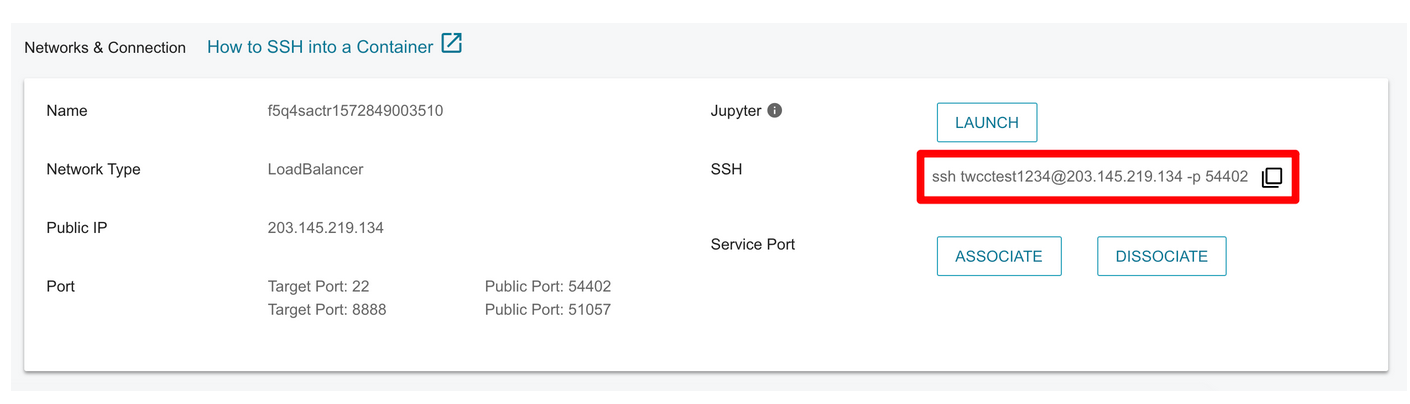
* Open Terminal. Refer to the sample below as you input system-provided SSH login information and the host access password.
<div style="background-color:black;color:white;padding:20px;">
C:\Users\Janice_Chiang><span style="background-color:#fcf8e3; color: #000; padding:3.2px">ssh twcctest1234@203.145.219.134 -p 54402</span>
The authenticity of host ‘[203.145.219.129]:51606 ([203.145.219.129]:51606)’ can’t be established.
ED25519 key fingerprint is SHA256:aQDdNUjlKy7QB93iKTOO4FCq8hExe2EwSam9Y70oAbg.
Are you sure you want to continue connecting (yes/no)? <span style="background-color:#fcf8e3; color: #000; padding:3.2px">yes</span>
Warning: Permanently added ‘[203.145.219.129]:51606’ (ED25519) to the list of known hosts.
janice2019@203.145.219.129’s password:
Welcome to Ubuntu 16.04.5 LTS (GNU/Linux 3.10.0-862.el7.x86_64 x86_64)
Documentation: https://help.ubuntu.com
Management: https://landscape.canonical.com
Support: https://ubuntu.com/advantage
Note: Read and write permission with superuser access in '/home/'
and ‘/work’ directories has been disabled in this environment.
Please avoid running such commands using ‘sudo’ under those directories directly.
If possible, use ‘sudo -s -H [command]’ instead of ‘sudo’ to avoid them.
init: Setting environment variables
janice2019@h8crcfjc01-5mldt:~$
</div>
<br>
:::info
<i class="fa fa-paperclip fa-20" aria-hidden="true"></i> **Note:** [<ins>What do I do if I forgot my host access password?</ins>](https://man.twcc.ai/@twccdocs/guide-service-hostname-pwd-otp-en#%E9%87%8D%E7%BD%AE%E4%B8%BB%E6%A9%9F%E5%AF%86%E7%A2%BC)
:::
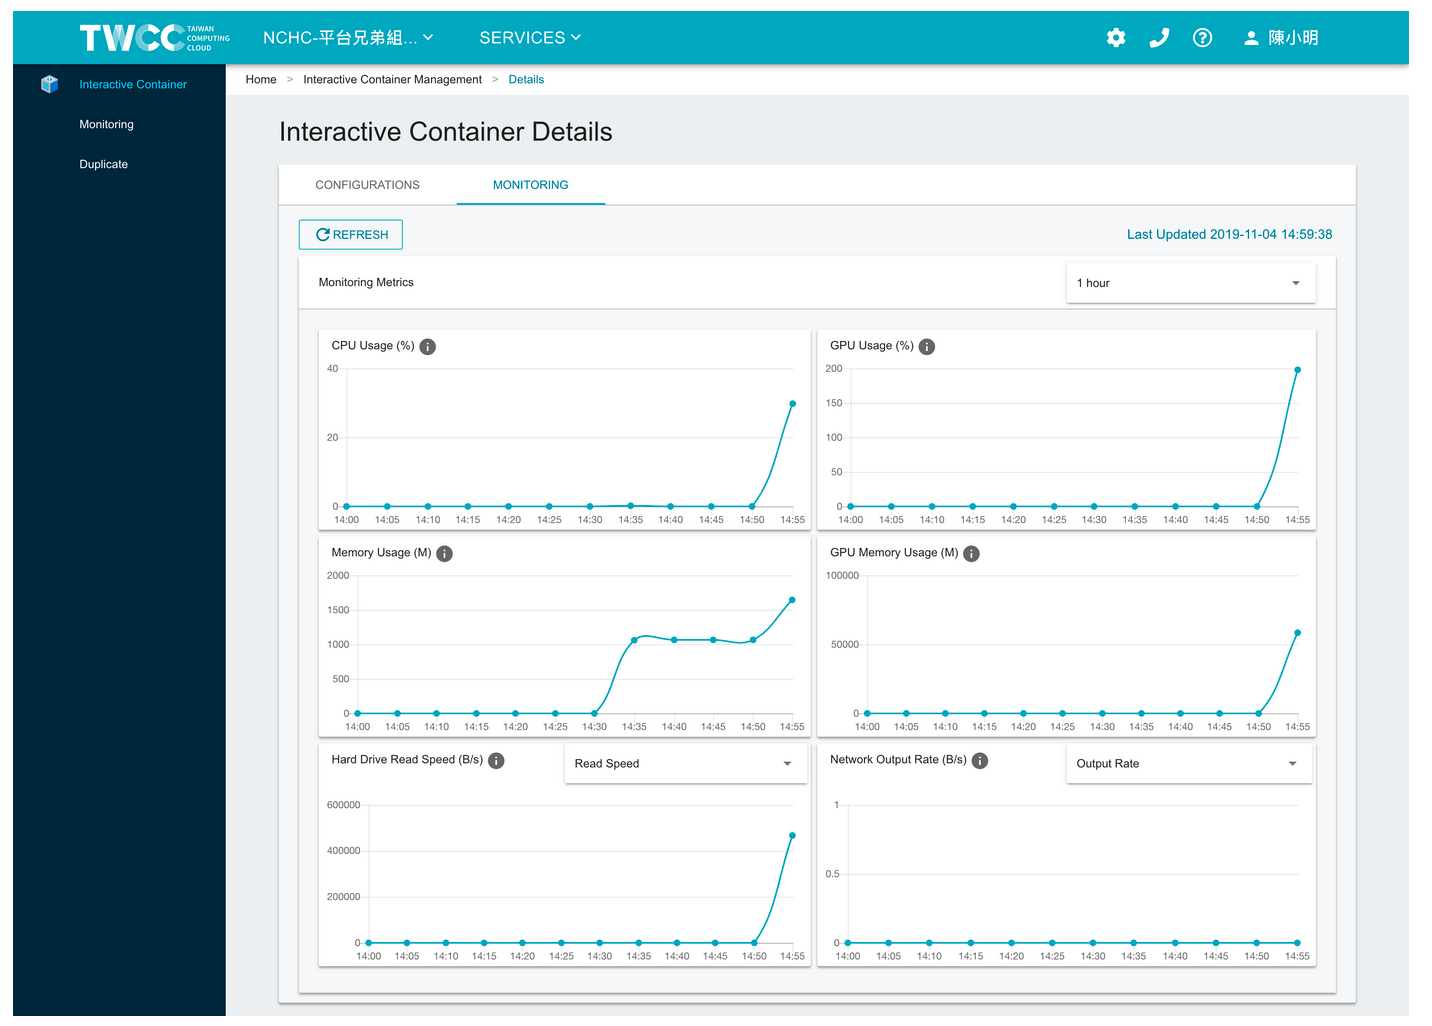
## Monitor interactive containers
* Select **MONITORING** tab to view the information monitored for the container, including CPU and GPU usage volume, memory and GPU memory usage, hard disk read/write speed, and network output speed rate.
:::info
<i class="fa fa-paperclip fa-20" aria-hidden="true"></i> **Note:** Tenant Users in the project can see their own resource usage information while Tenant Admins can see that of all users in order to monitor, control, and manage resource usage and credits for the project.
:::
## Duplicate interavtive containers
A duplicate of the interactive container allows the user to create and keep a self-deployed container image; With duplicate, you only deploy all software once, and all users in the project can share the duplicate for quick deployment of the same work environment.
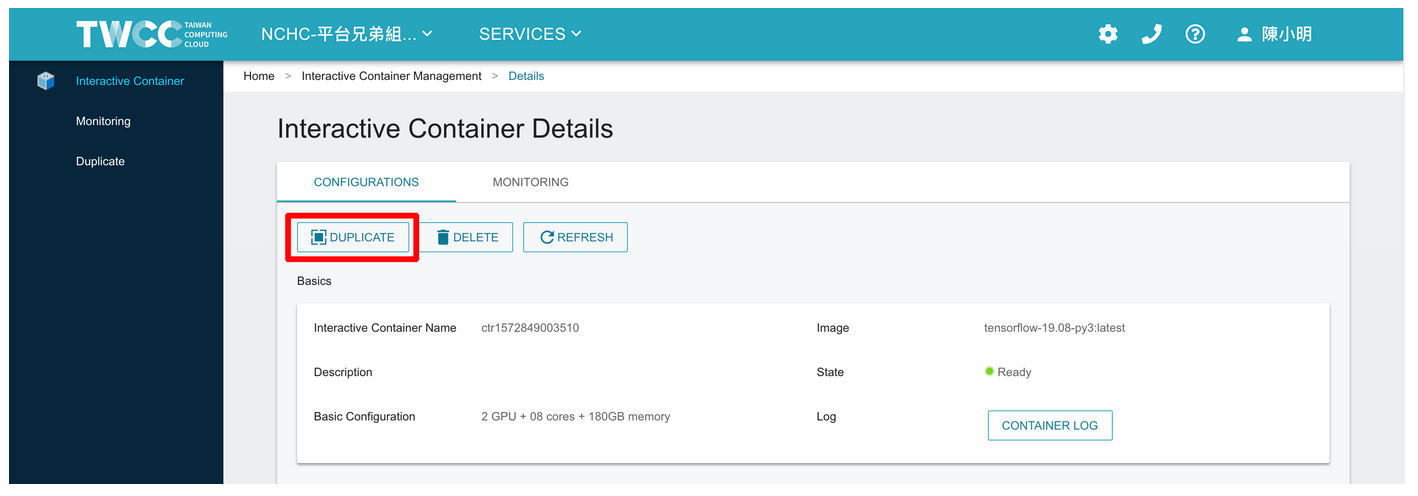
### Create duplicates
* In the **Configuration** tab in Interactive Container Details page, select the **DUPLICATE** button above.
* Enter the tag for the duplicate and click **OK**.
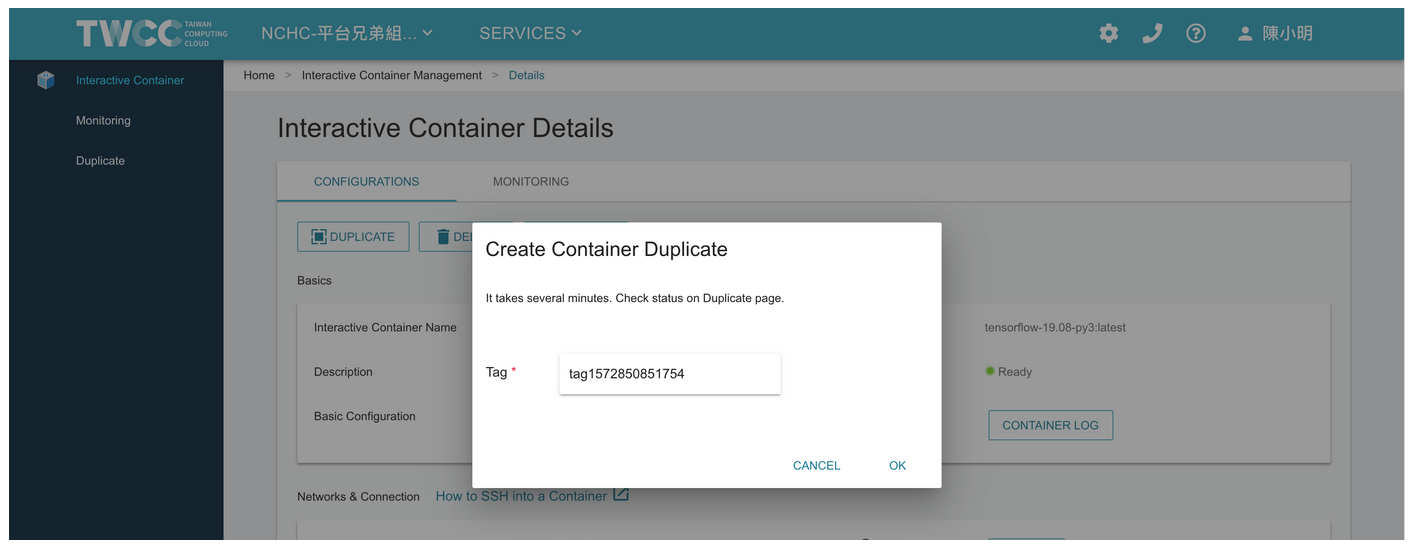
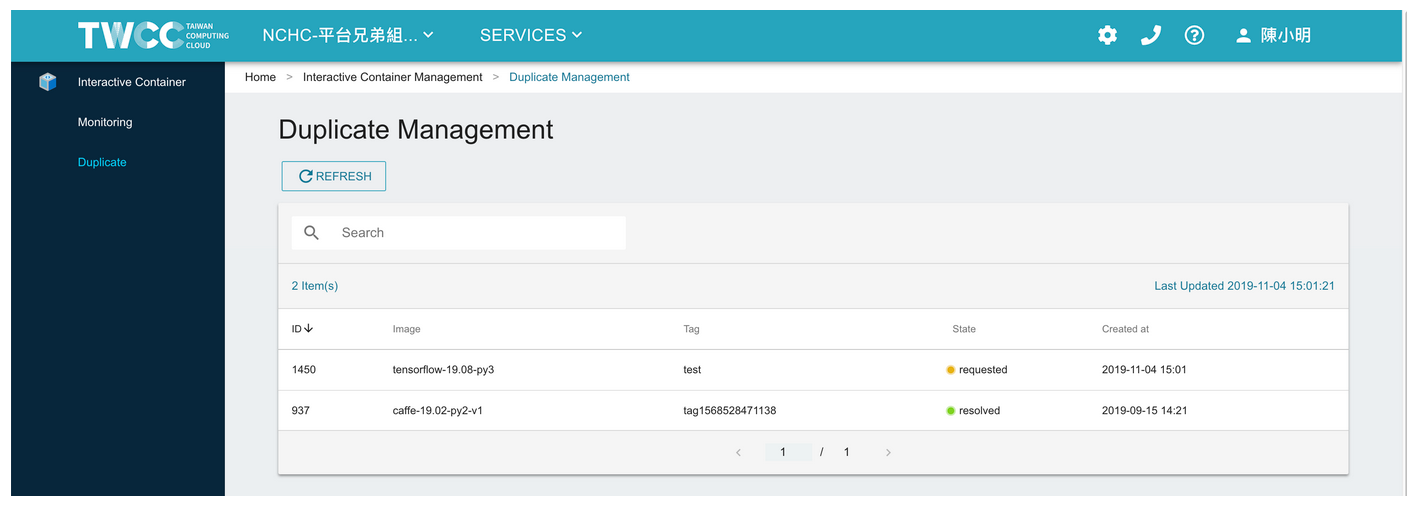
* After the container duplicate is created, it will appear in the list. It takes a few minutes to create the container duplicate, and now the duplicate is in `Requested` state.
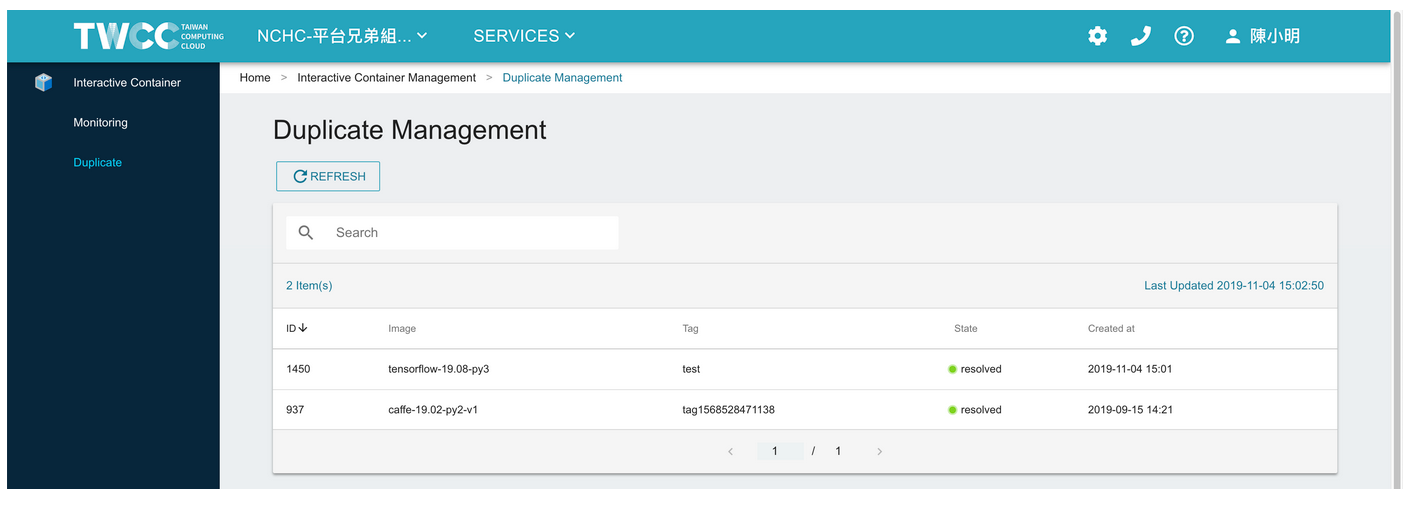
* After a few minutes, when the duplicate is in `Resolved` state, you can start using it.
:::info
<i class="fa fa-paperclip fa-20" aria-hidden="true"></i> **Note:** The container duplicates cannot be deleted.
:::
### Create a custom image
* Select Interactive Container from the service list, and select **+CREATE** on the Interactive Container Management page.
* On the Image Type page, select **Custom Image**.
* Fill in the container basic information and hardware specifications, and select the custom image file, then click NEXT: STORAGE>. The other steps are the same as creating an Interactive Container.
:::info
<i class="fa fa-paperclip fa-20" aria-hidden="true"></i> **Note:** Container duplicates are shared resources, so all users in the project can use the duplicates. You can see all the duplicates in the image drop-down list.
:::