###### tags: `TWCC` `Software`
# Building your own BIOVIA computing enivornment with pre-installed image on TWCC
## Submit an application for accessing image file
- Add `acyang@narlabs.org.tw` in to your project and promote that account to Administrator privileges(Project manager).
- Email to `acyang@narlabs.org.tw` with the suject `Ask for BIOVIA image for MSTxxxxxx`.
- Once your project is eligible for using BIOVIA software, NCHC will share the image file into your project.
- The shared image files are not allowed to be distributed to other projects.
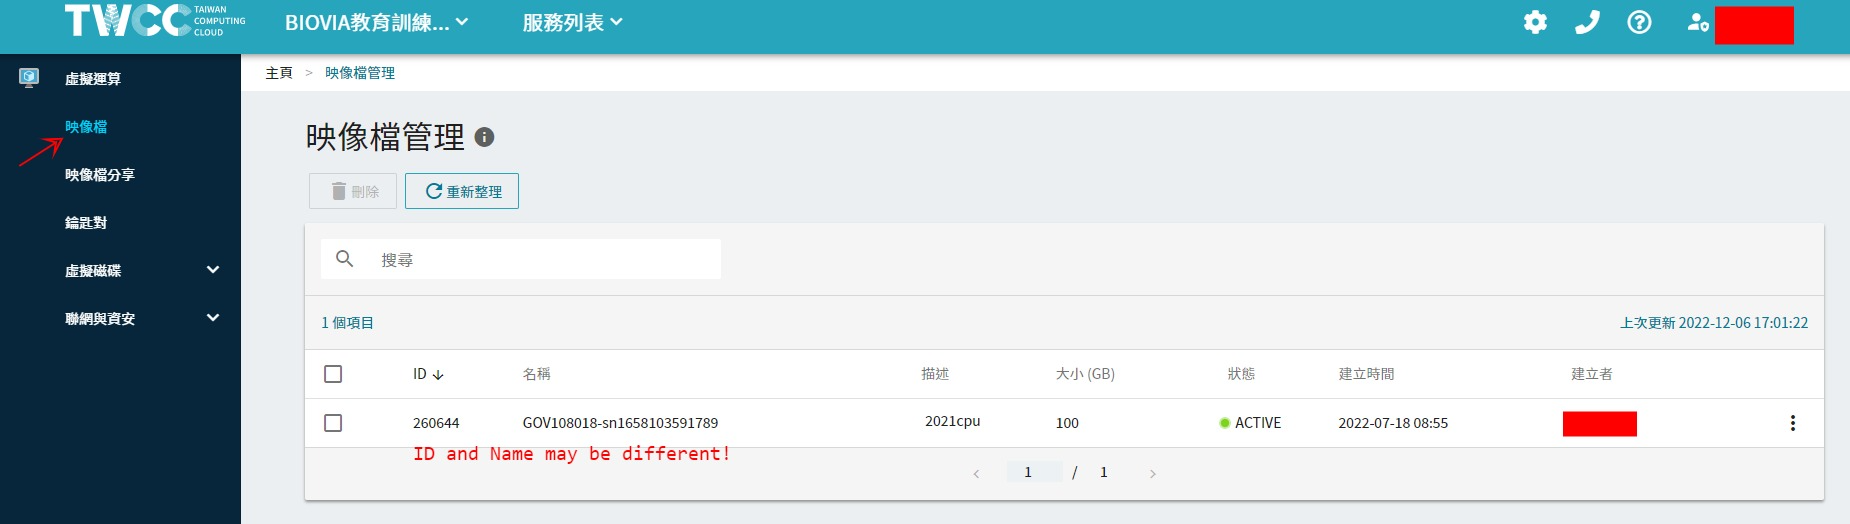
- Unless one was granted Administrator privileges(Project manager), they can't see the private shared image files.
## Creating a VCS instance
Virtual Compute Service (VCS) is a kind of computing resource provided by TWCC.
:::danger
:warning: Disclaimer Clause:
- Please note that this is a alpha version of the Virtual Compute Service platform.
- Virtual Compute Service on TWCC is still undergoing final testing.
- The platform, its software and all content found on it are provided on an “as is” and “as available” basis.
- NCHC does not give any warranties, whether express or implied, as to the suitability or usability of the website, its software or any of its content.
- NCHC will not be liable for any loss, whether such loss is direct, indirect, special or consequential, suffered by any party as a result of their use of TWCC, its software or content.
- Any downloading or uploading of material to the website is done at the user’s own risk and the user will be solely responsible for any damage to any computer system or loss of data that results from such activities.
- Should you encounter any bugs, glitches, lack of functionality or other problems on TWCC, please let us know immediately so we can rectify these accordingly.
- Your help in this regard is greatly appreciated!
- You can write to us at this address [isupport@twcc.ai](mailto://isupport@twcc.ai)
:::
- Select an activated project.

- Click Virtual Compute Service (VCS) icon.

- Enter Virtual Compute Service. On the VCS instance management page, click “+CREATE”.

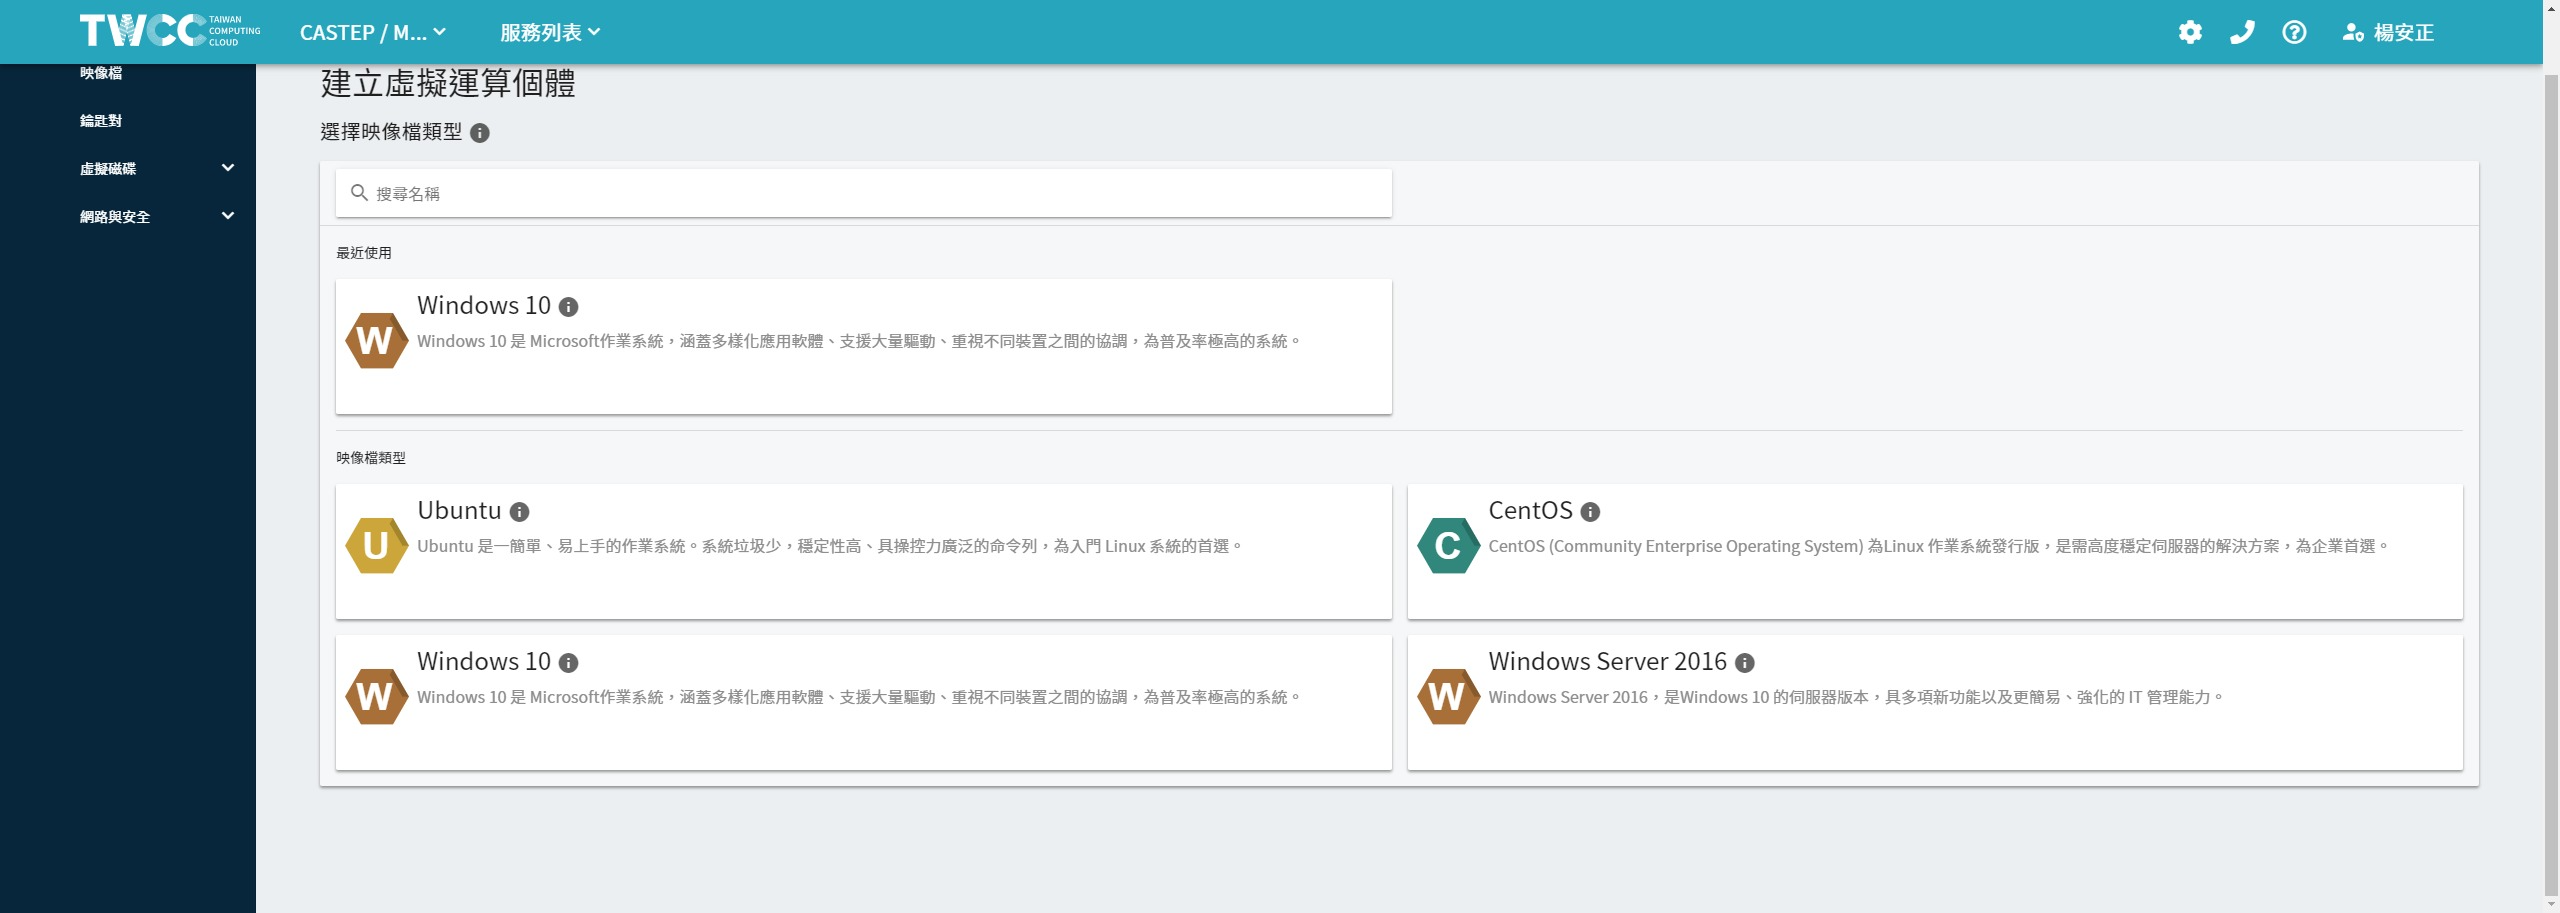
- Select an Image Type. TWCC offers OS image templates that are frequently used so that they may be used once a VCS instnace has been created. Choose “Windows 10”.
- On the basic information page,
1. Fill in the name and description of the instance.
2. Select the the image that you want to create your VM. Choose "(public)win10pro_v3" for clean windows environment, choose "(private)GOV108018-xxxxxxxxx" for BIOVIA installed windows.
3. Select the specifications of the needed hardware, including different combinations of number of CPUs, memory size, storage volume.
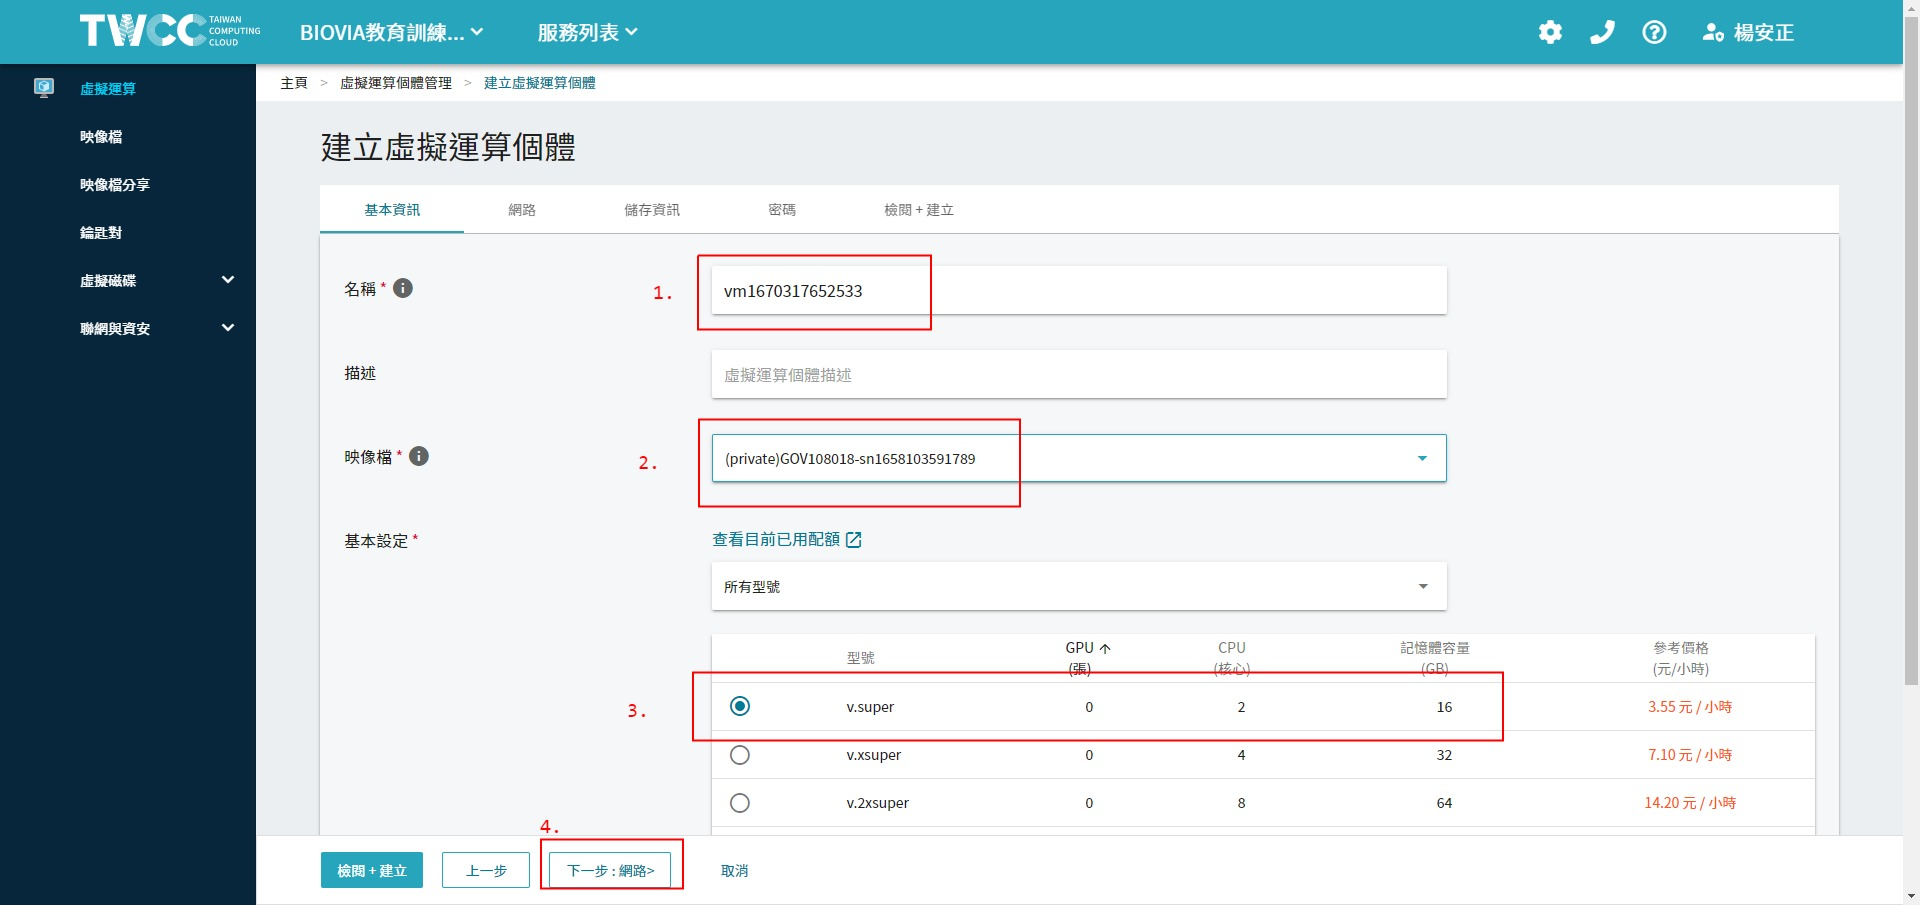
4. Click “NEXT: NETWORK>”
:::info
:bulb: Hint: 100 GB system disk space (built-in volume) is provided.
:::
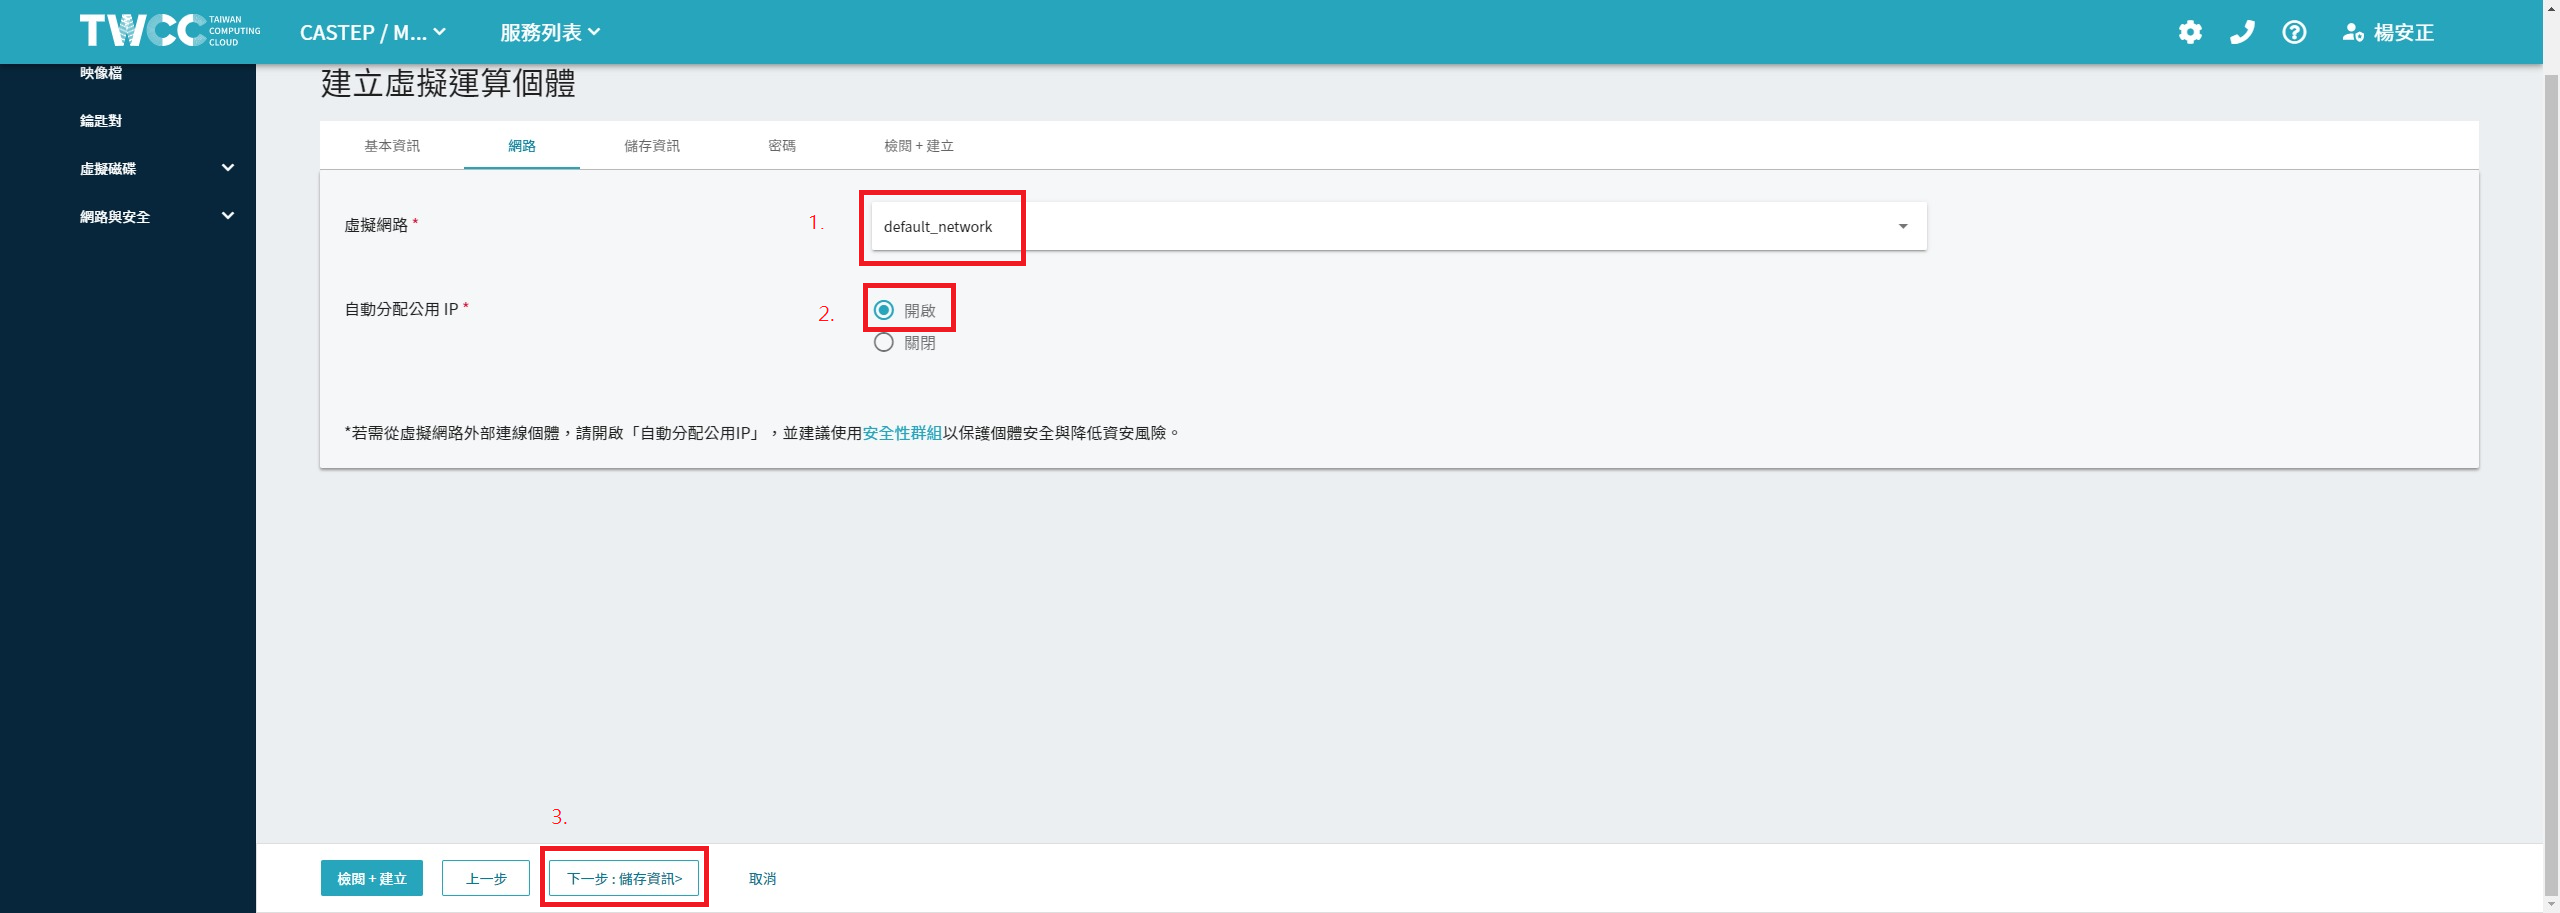
- On the network setup page, You may use the system default network, named “default_network” or create your own virtual network(Project Administrator only).
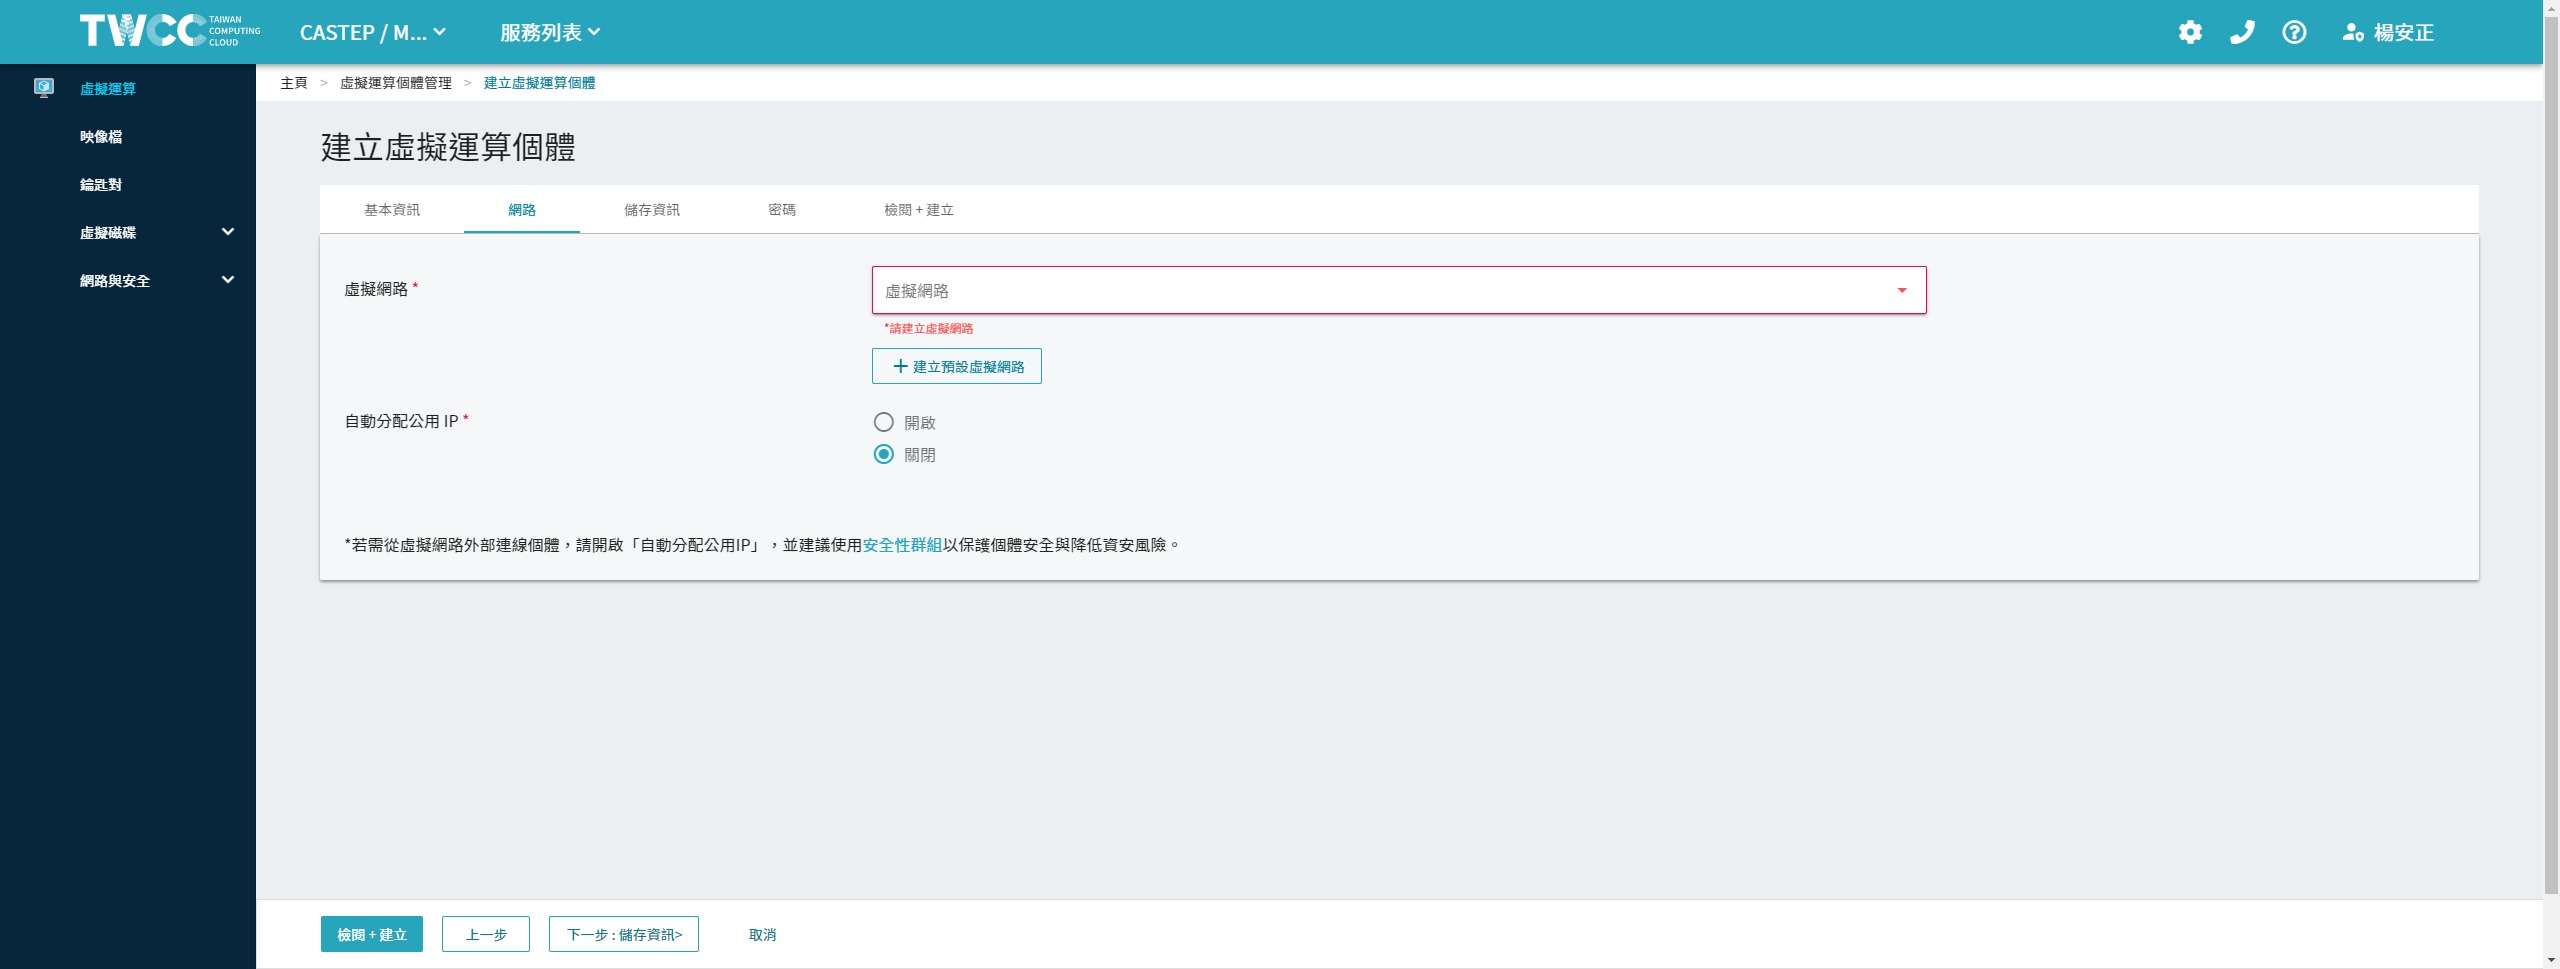
- Choose one of the network and enable automatic distribution of public IP. Click “NEXT: STORAGE>”.
- On the storage information page, specify the size of volume in GB and choose volume type. Click “NEXT: PASSWORD>”.

:::info
:bulb: All additional storage will be charged. Use it carefully.
:::
- On the password information page, fill in the password of windows administrator. Copy & Paste function are disable in this two field. Click “NEXT: REVIEW & CREATE>”.

- Review the entire VCS instance setup and estimated usage credits, click “CREATE” to finish the process.

- Wait a few minutes. When the instance status is changed to “Ready”, the instance is ready to be connected and used.

## Managing the VCS instance
- The VCS instance management page lists information on all the instances, including ID, name, public IP, state, creation time, and who created it. The instance created most recently is listed on top. Click a column name sorts the list by the values in that column or toggle between ascending and descending order.
- Clicking  allows you to execute such functions as start, stop, and delete. Check the checkboxes on the left to apply the start, stop, or delete action to all the checked instances.

- The detailed information page shows basic information of the instance, detailed specifications, and network and storage information.
- Click “Connect” to see the way to connect to the instance or carry out start, stop, snapshot, delete, and refresh.

:::info
:bulb: Hint:
- When you stop an instance, the following happens:
-- We remove the instance from the host, and deallocate the resources.
-- The RAM is erased. The data in boot volume (100 GB) and additional volumes id kept.
-- Instance state transitions: Ready > Shelving > NotReady.
- When you start an instance, the following happens:
-- In most cases, we move the instance to another host.
-- Instance state transitions: NotReady > Queueing>Unshelving >Ready.
-- **A VCS instance continuous charge even the guest OS is poweroff.**
-- **To avoid continuous charge, use Stop or Delete function.**
- When you delete an instance, the following happens:
-- The boot volume (100 GB) is also erased, and please refer to Snapshot for preserving your data.
-- Additional volumes are preserved and detached from the instance.
-- Instance state transitions: Deleting > Disappear from the list on the management page.
:::
## Connecting to the VCS instance
:::info
:bulb: Please note that the instance only can be connected in the “Ready” state.
:::
### Windows instance
- By default, we enable RDP service in Windows VM. So user can connect to Windows VM with RDP client.

- Enter the password you set when you created this VM. Now you are ready to use your application.

## PS:
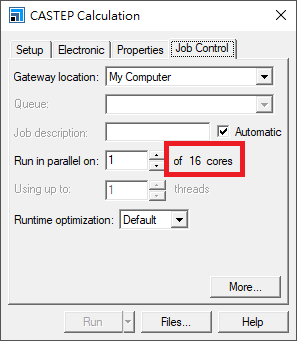
Our pre-installed image of BIOVA software is built with 2 cores and 16GB memory. If you built a VM with different number of cores, but you still only see 2 available cores in job control tab in each module.
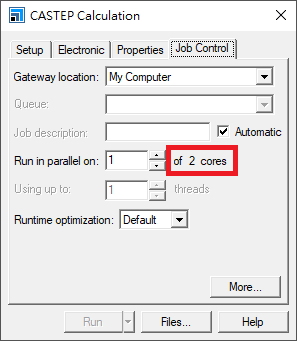
You can modify the issue by following these instructions.
### Open browser
Open browser and enter `http://localhost:18888/`
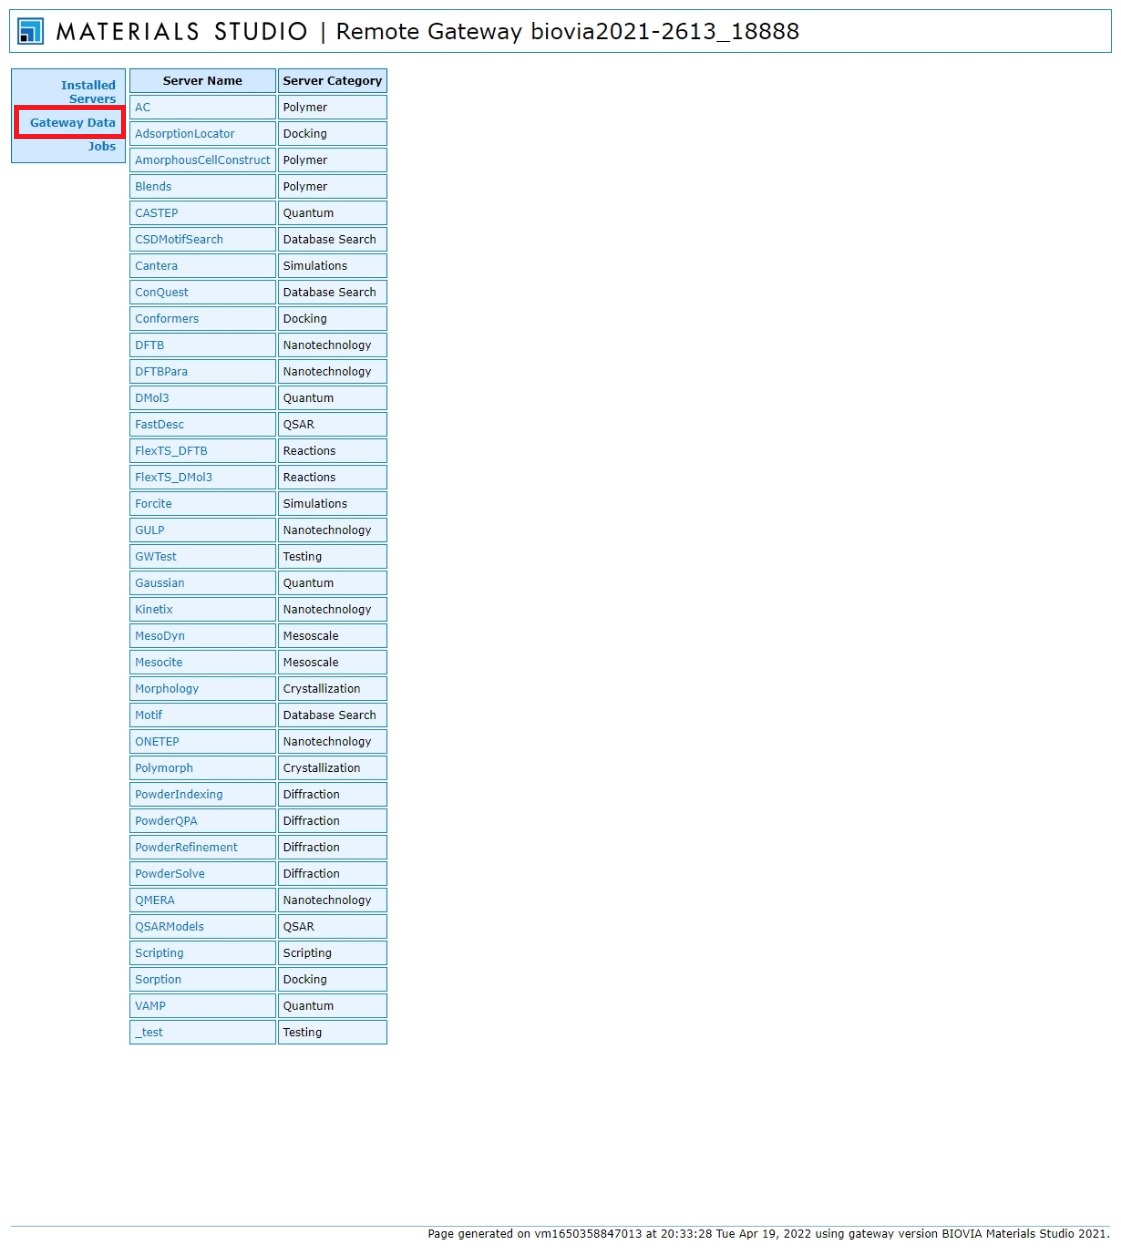
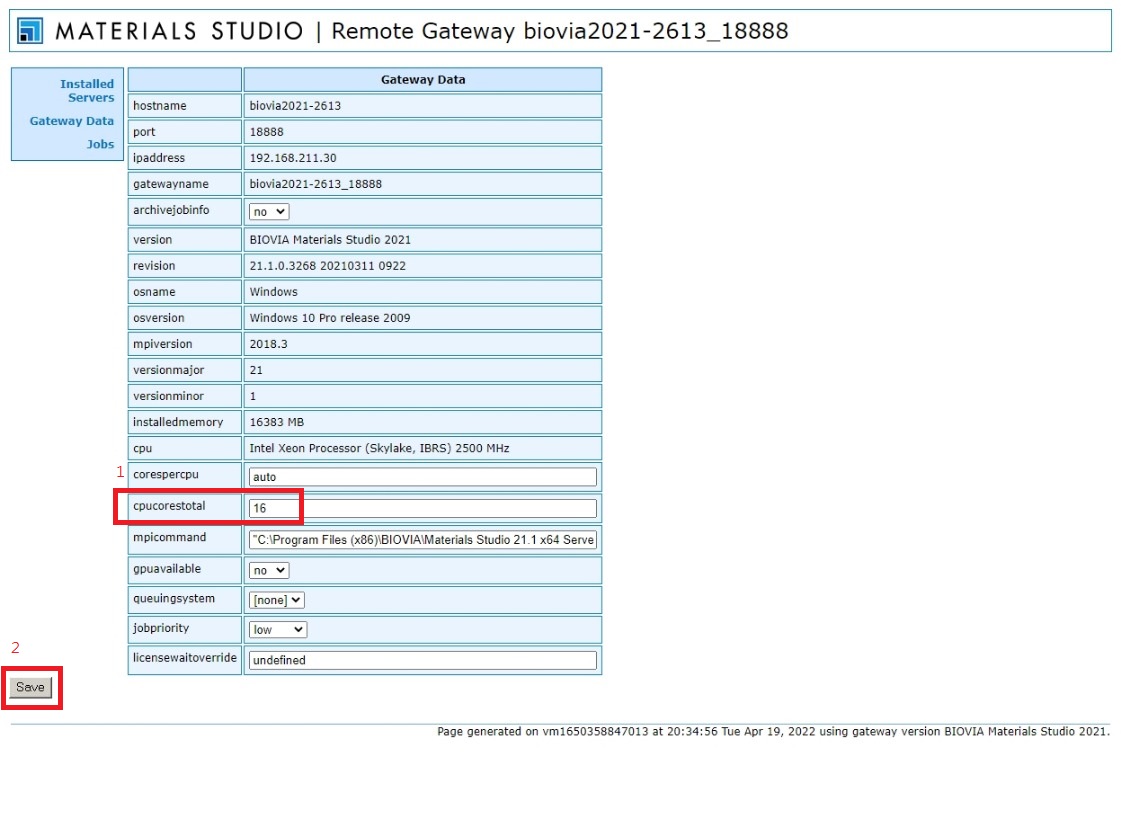
click `Gateway Data`
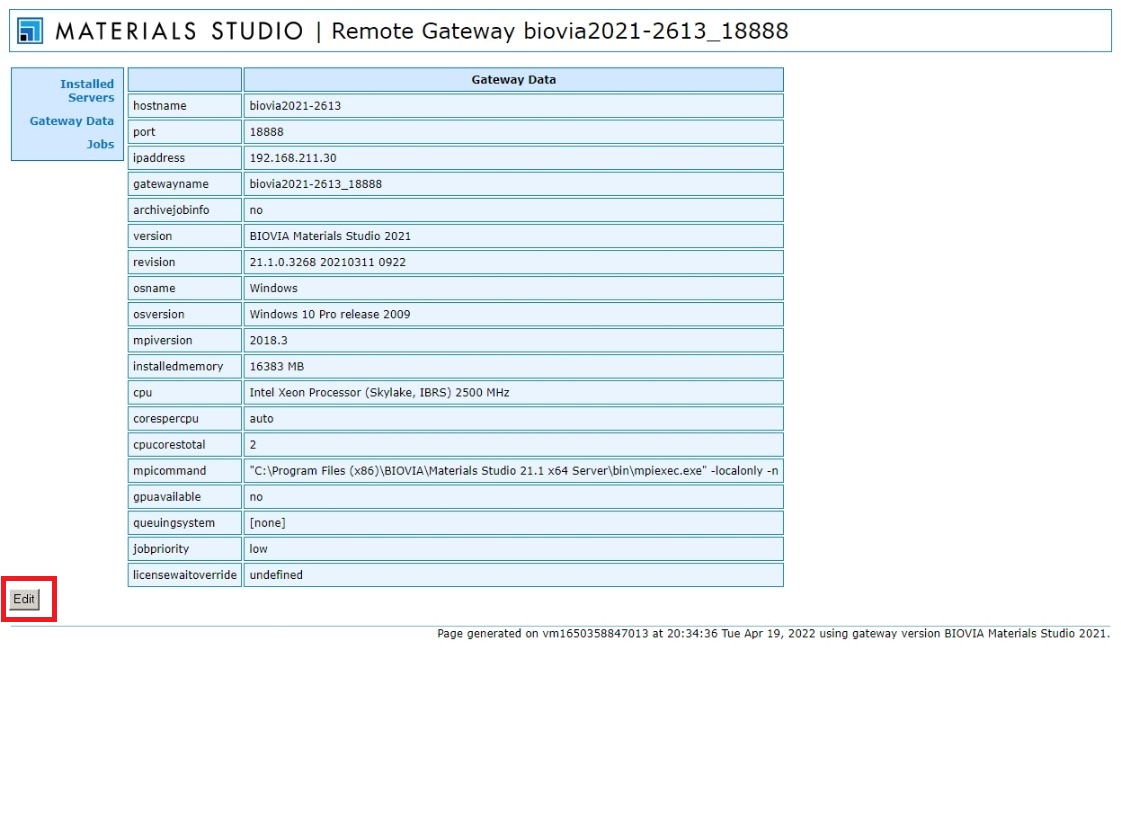
click `Edit`
If a authentication dialog box pop out enter `gatekeeper` in username and leave password field blank(If you didn't set password before).
Modify the `cpucorestotal` field to fit your VM. Then click `Save` button to save configuration.
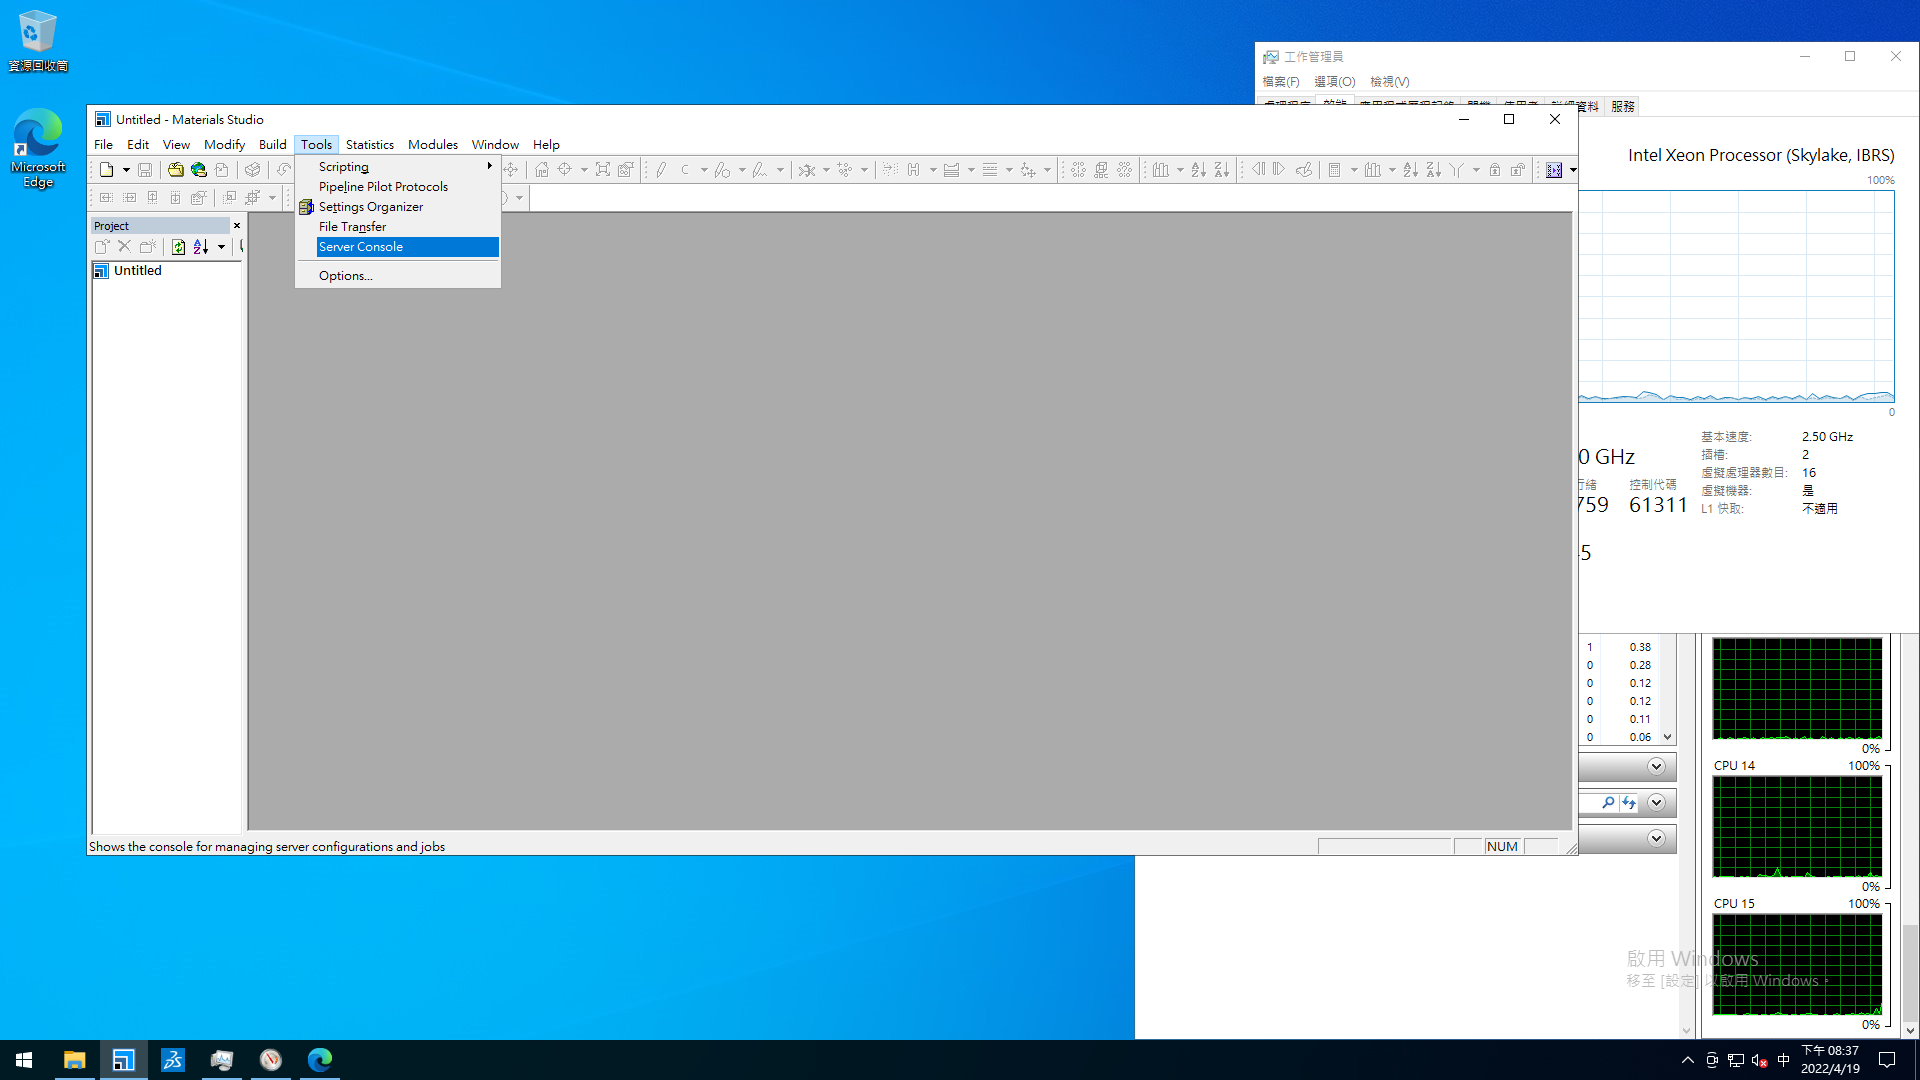
Open MaterialStudio IDE and open `Server Console` in `Tools` menu.
Right click on `Server Gateways` and choose `Refresh Gateway Data`.
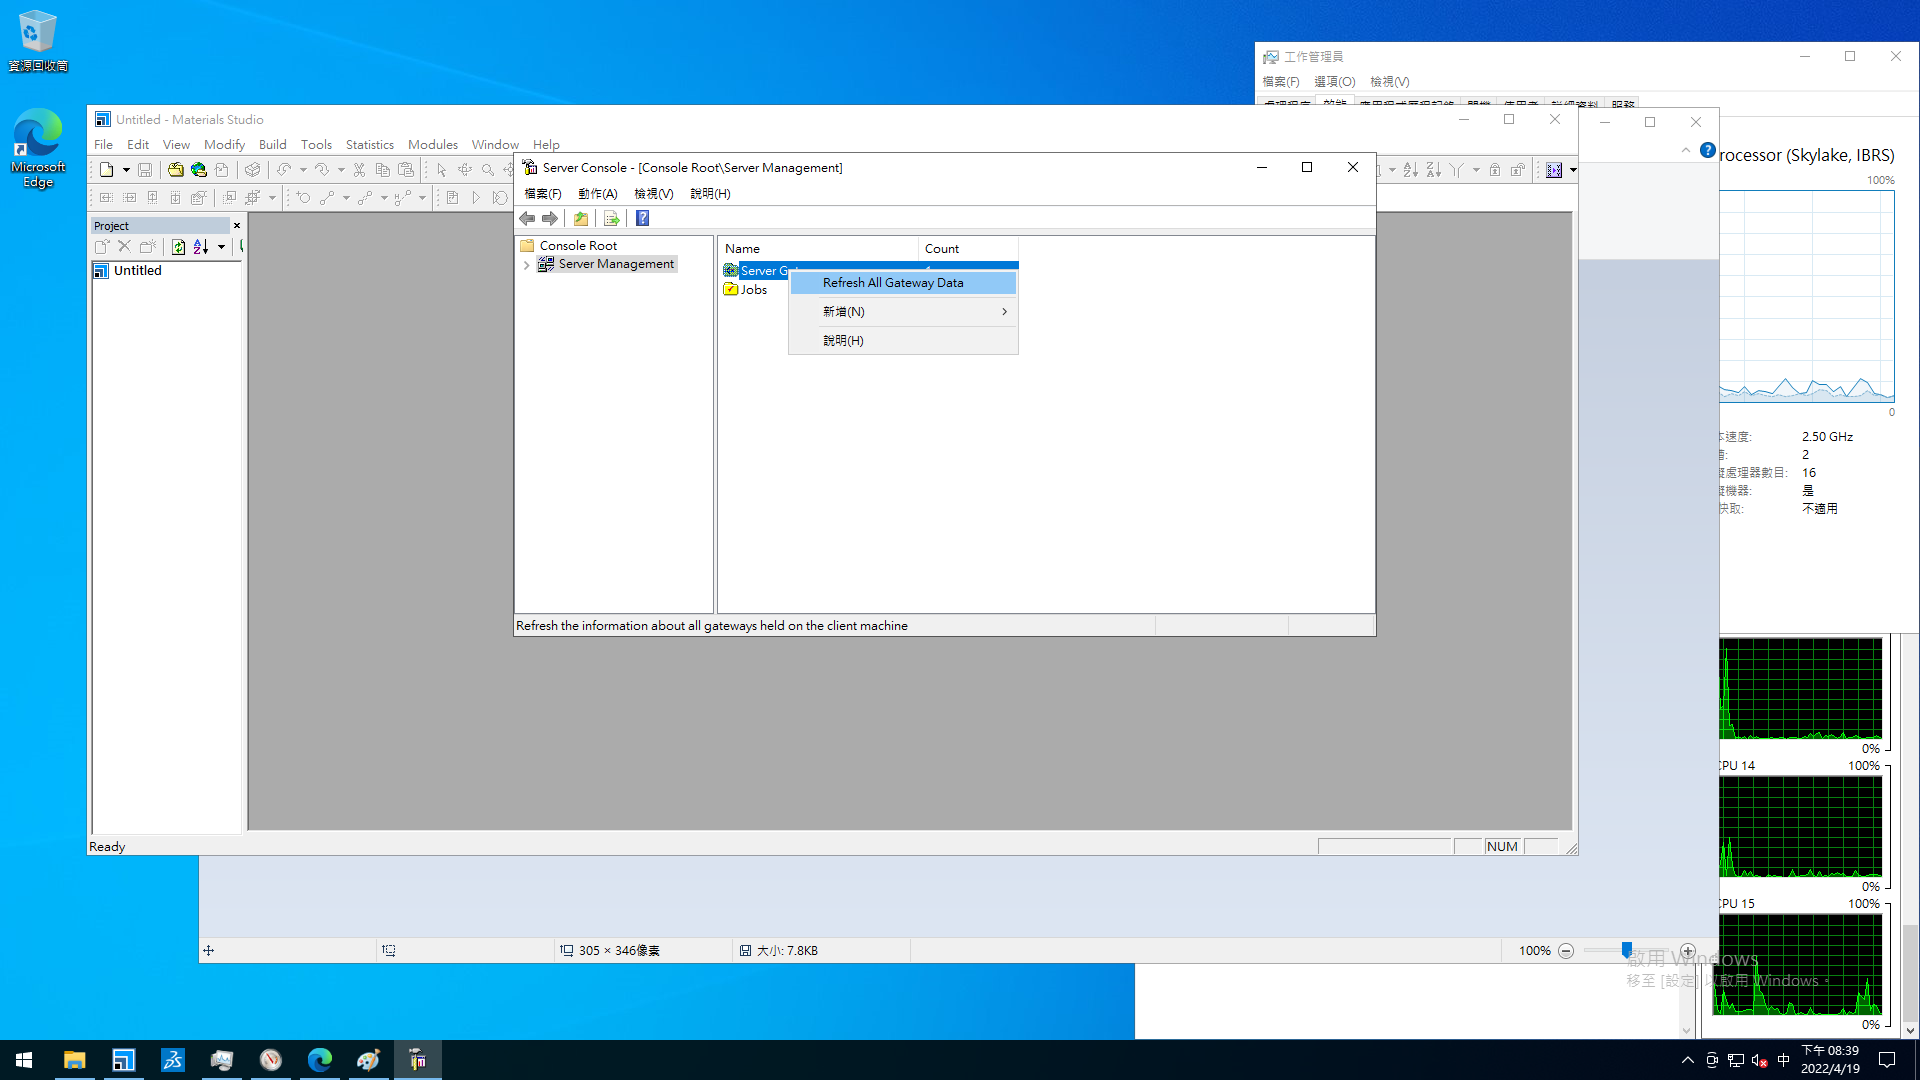
Once finish, the number of cores will be updated.
## PPS:
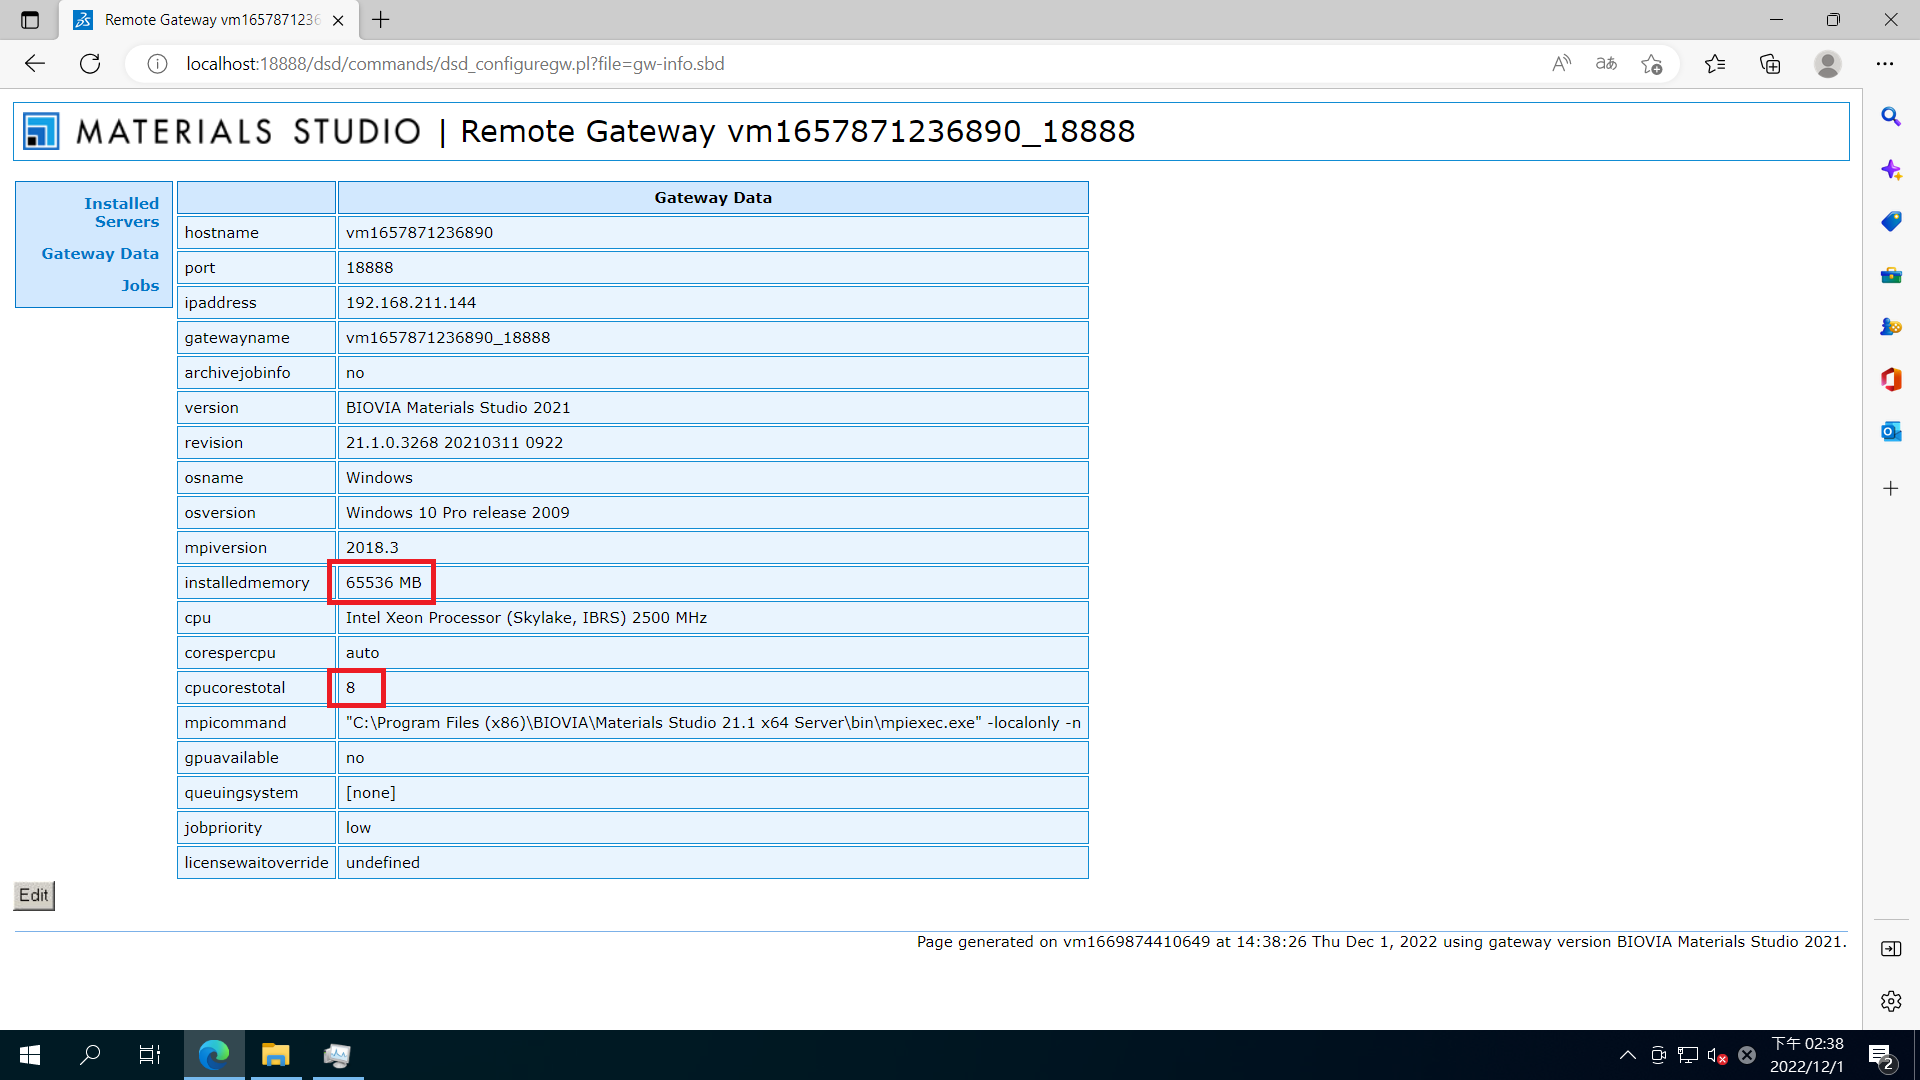
You can modify the number of cores that BIOVIA awared via msgateway setting page. But it still can't modify the size of installed memory.
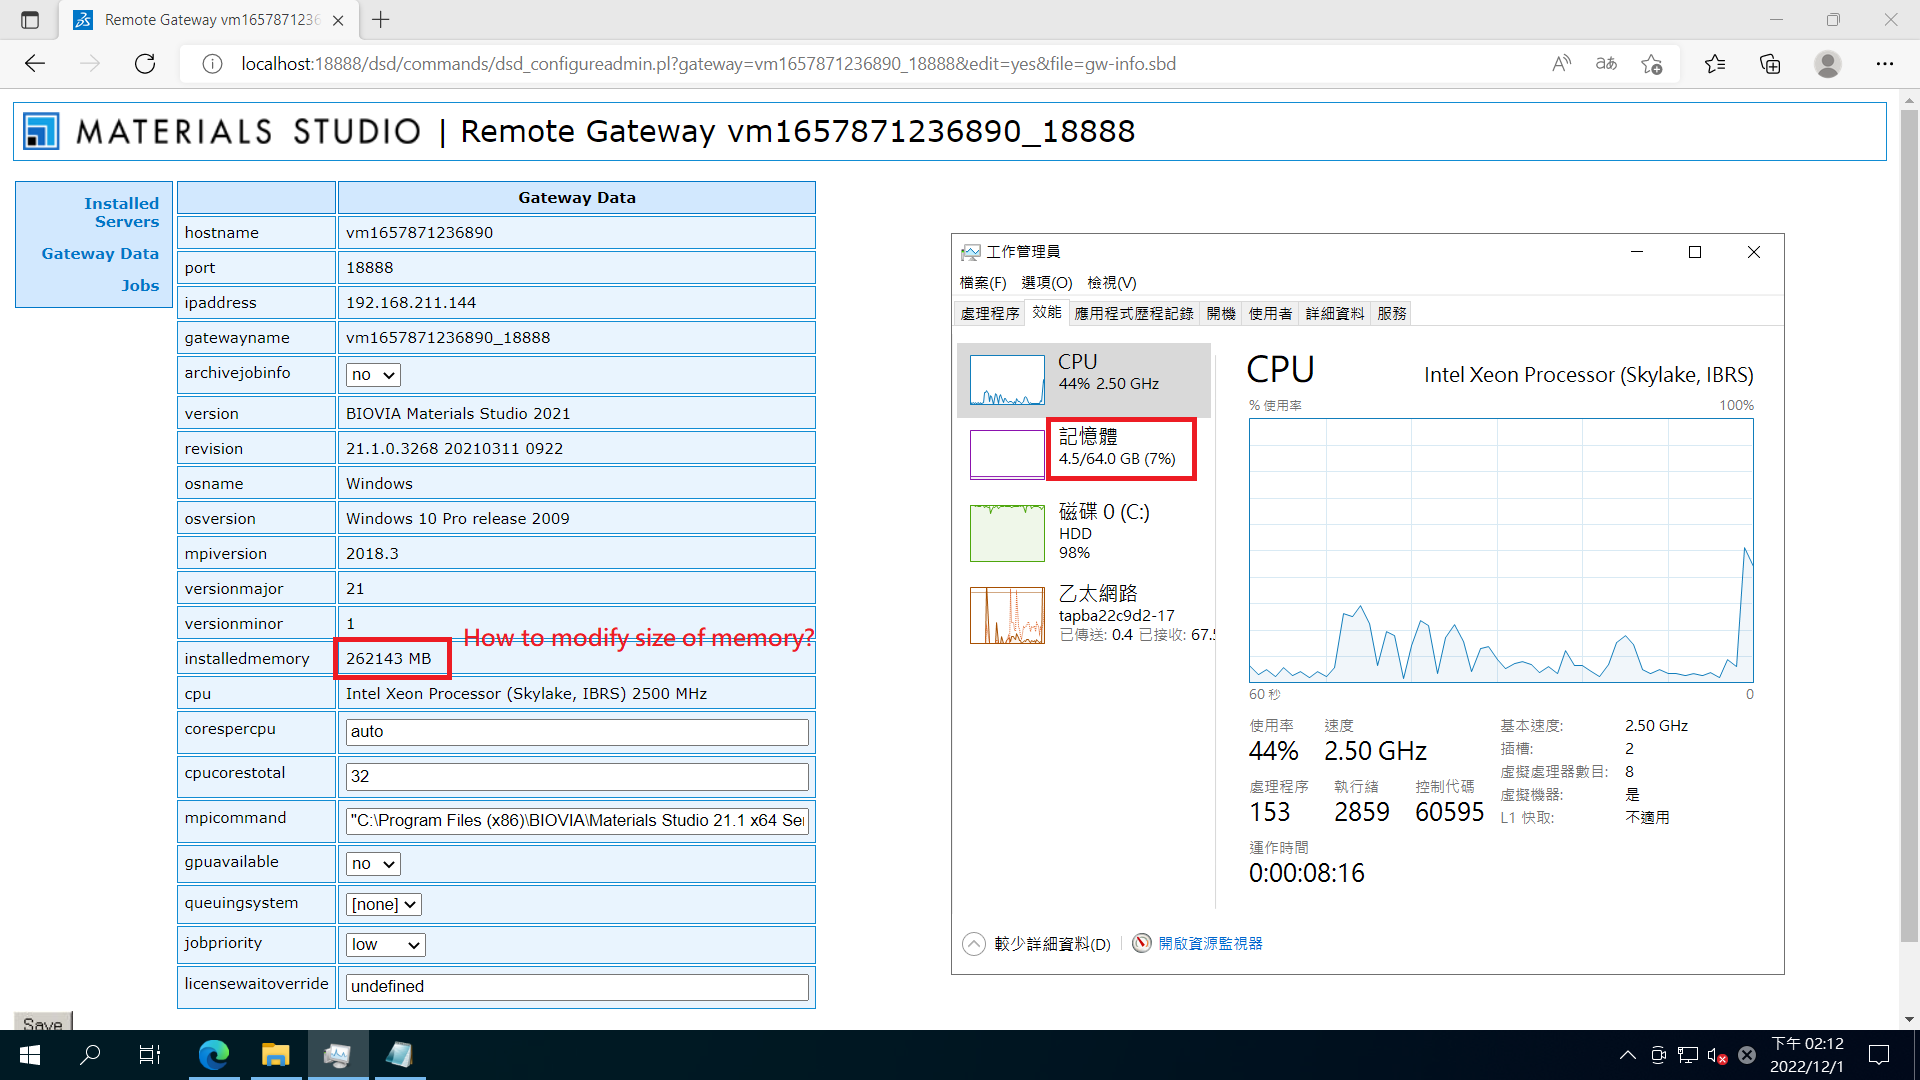
If you built a VM with more than 16GB memory, but you only see 16GB in msgateway. Try the following step to fix it.
1. Open File Explorer from the taskbar.
2. Select View > Options > Change folder and search options.
3. Select the View tab and, in Advanced settings, select Show hidden files, folders, and drives and OK.
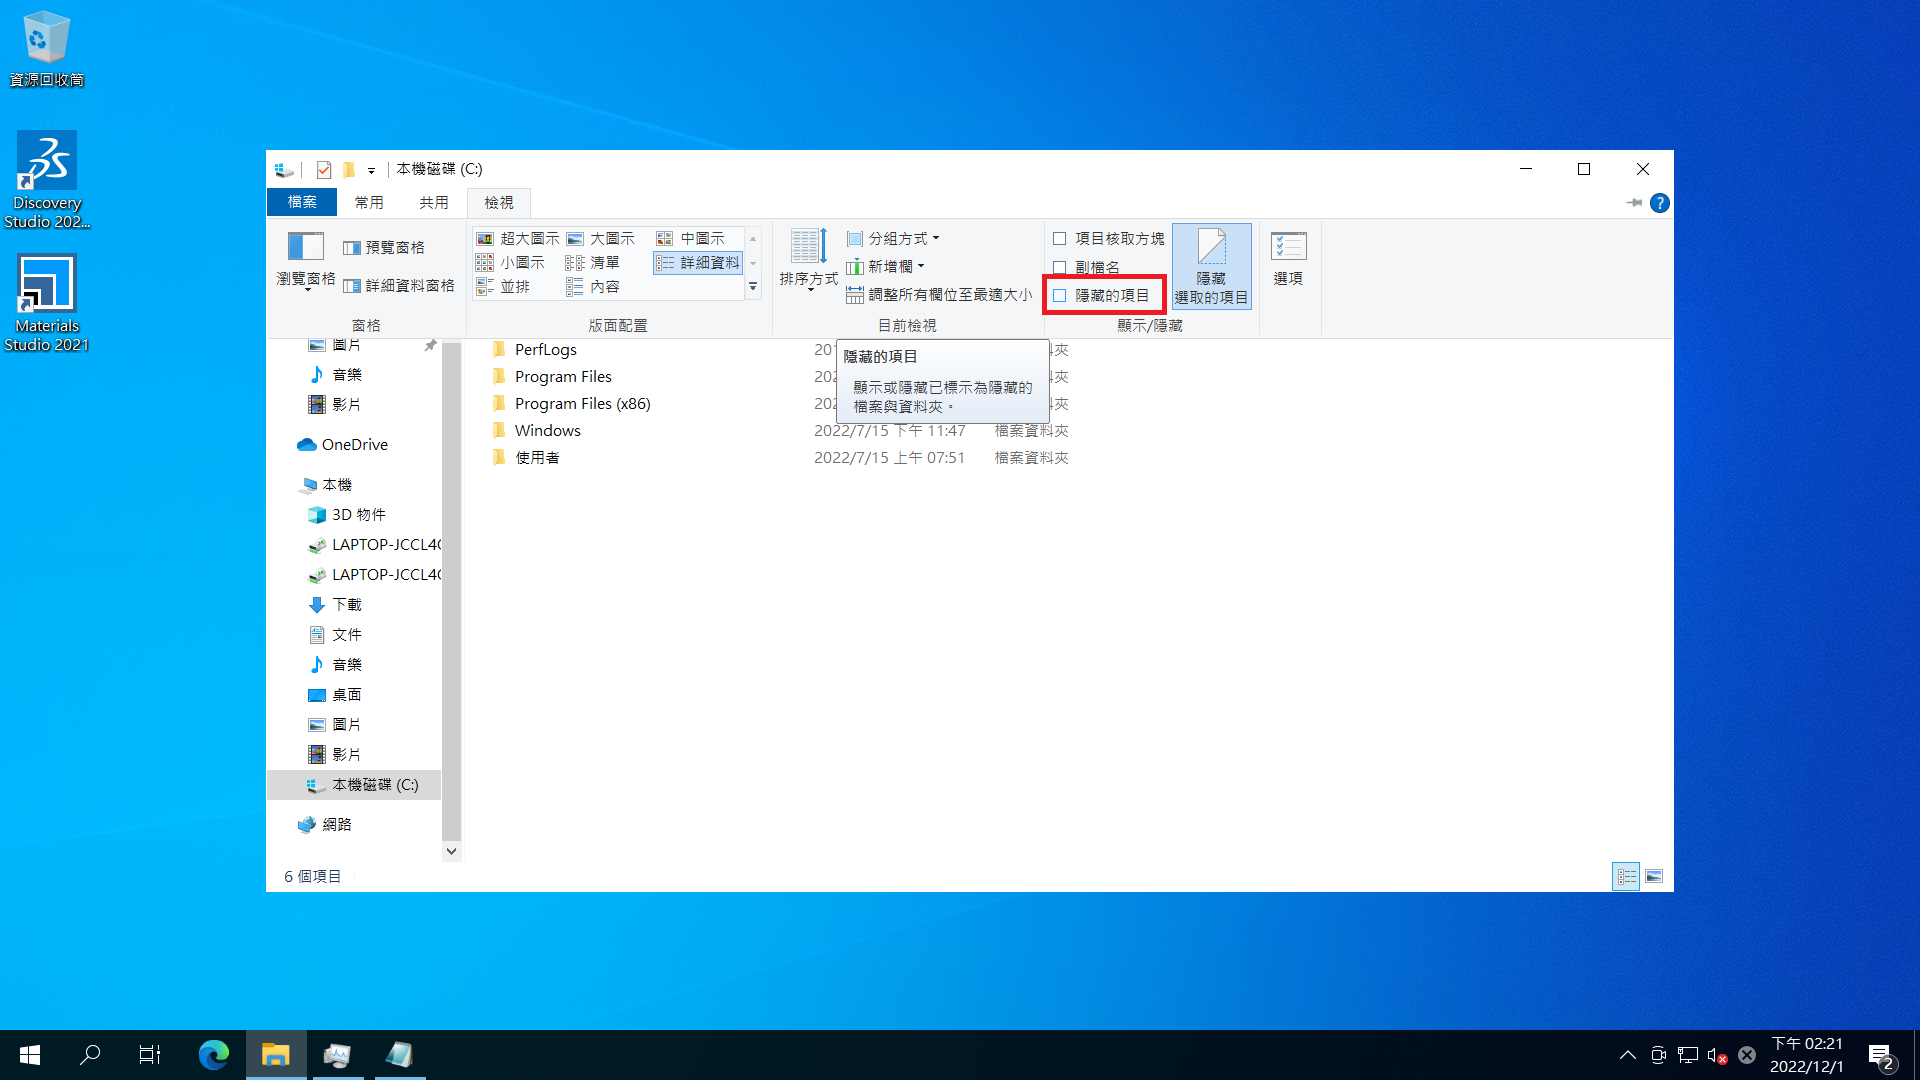
Now you can see hidden ProgramData in C:\.
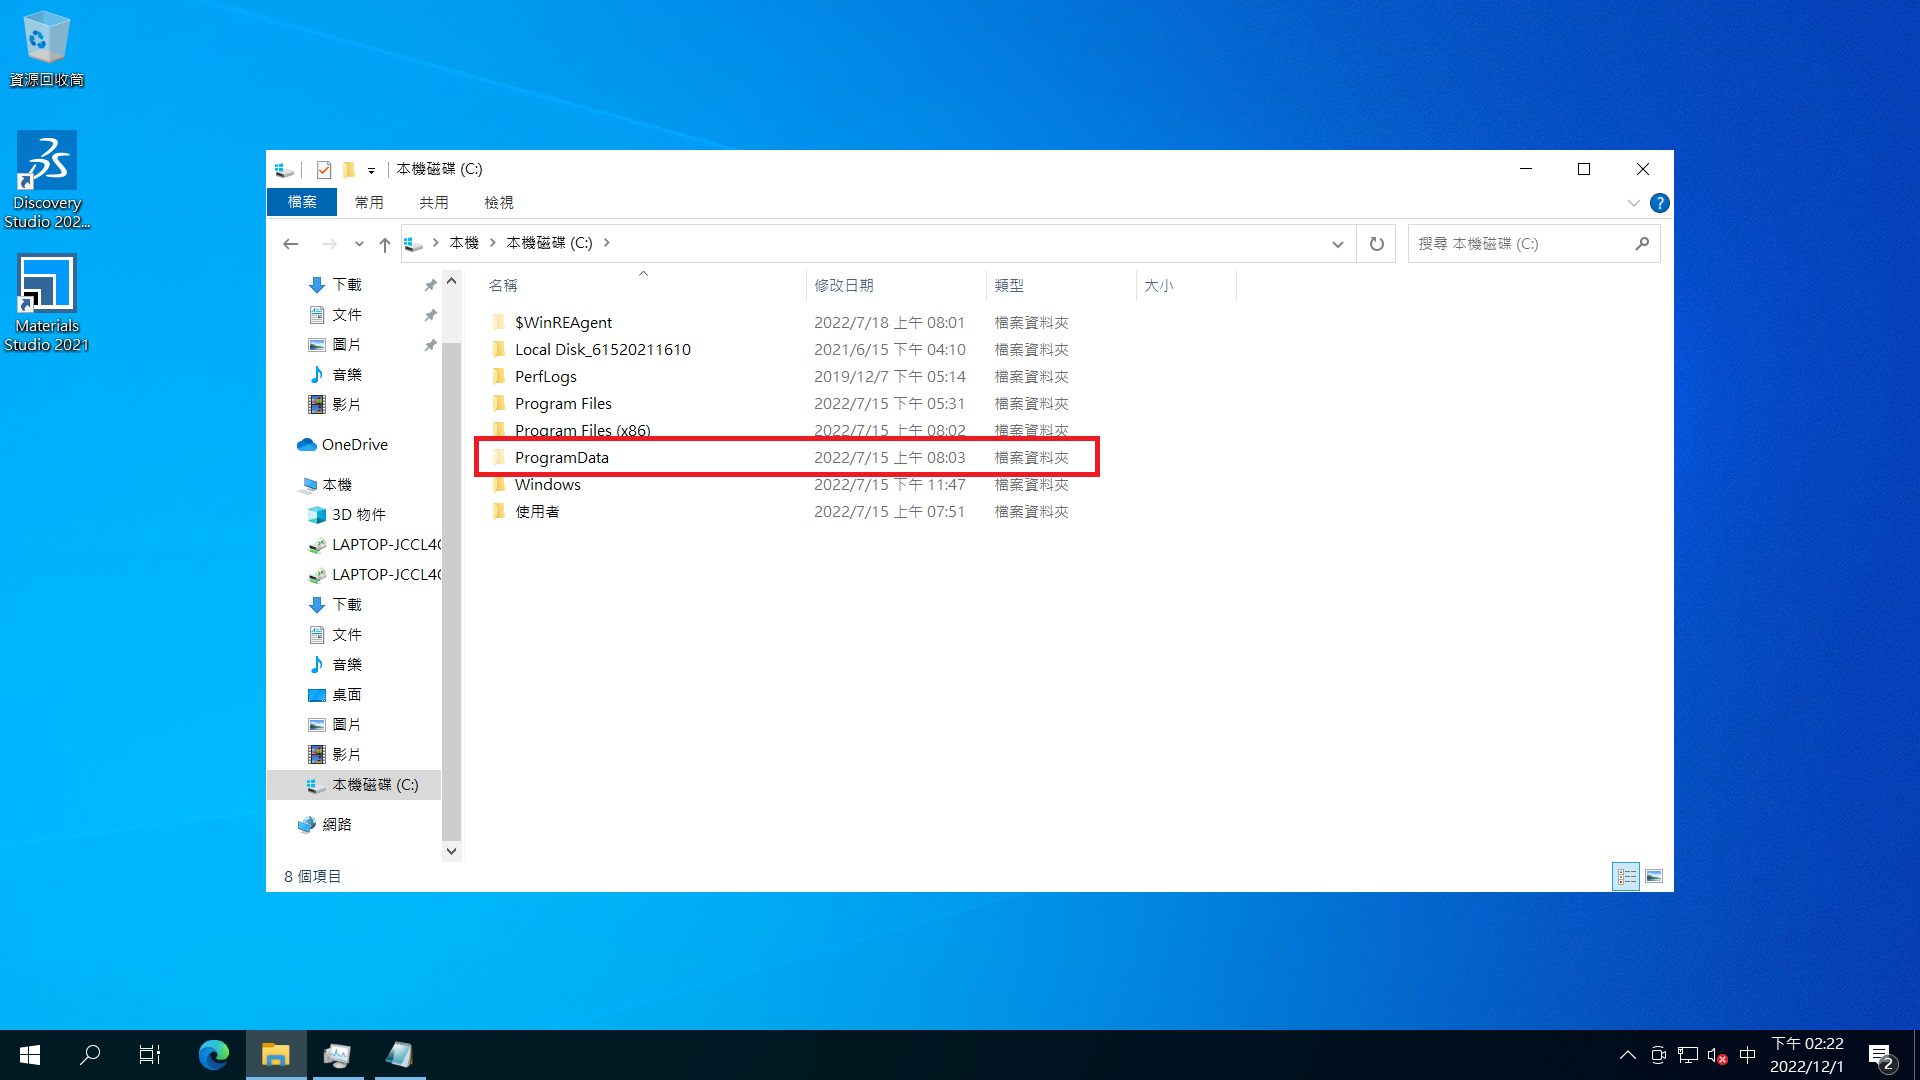
Goto `C:\ProgramData\BIOVIA\Materials Studio\21.1\Gateway-x64\root_default\dsd\conf`
and open `gw-info.sbd`.
Modify `installedmemory=xxxxx MB` and `cpucorestotal=xx` according to your VM.
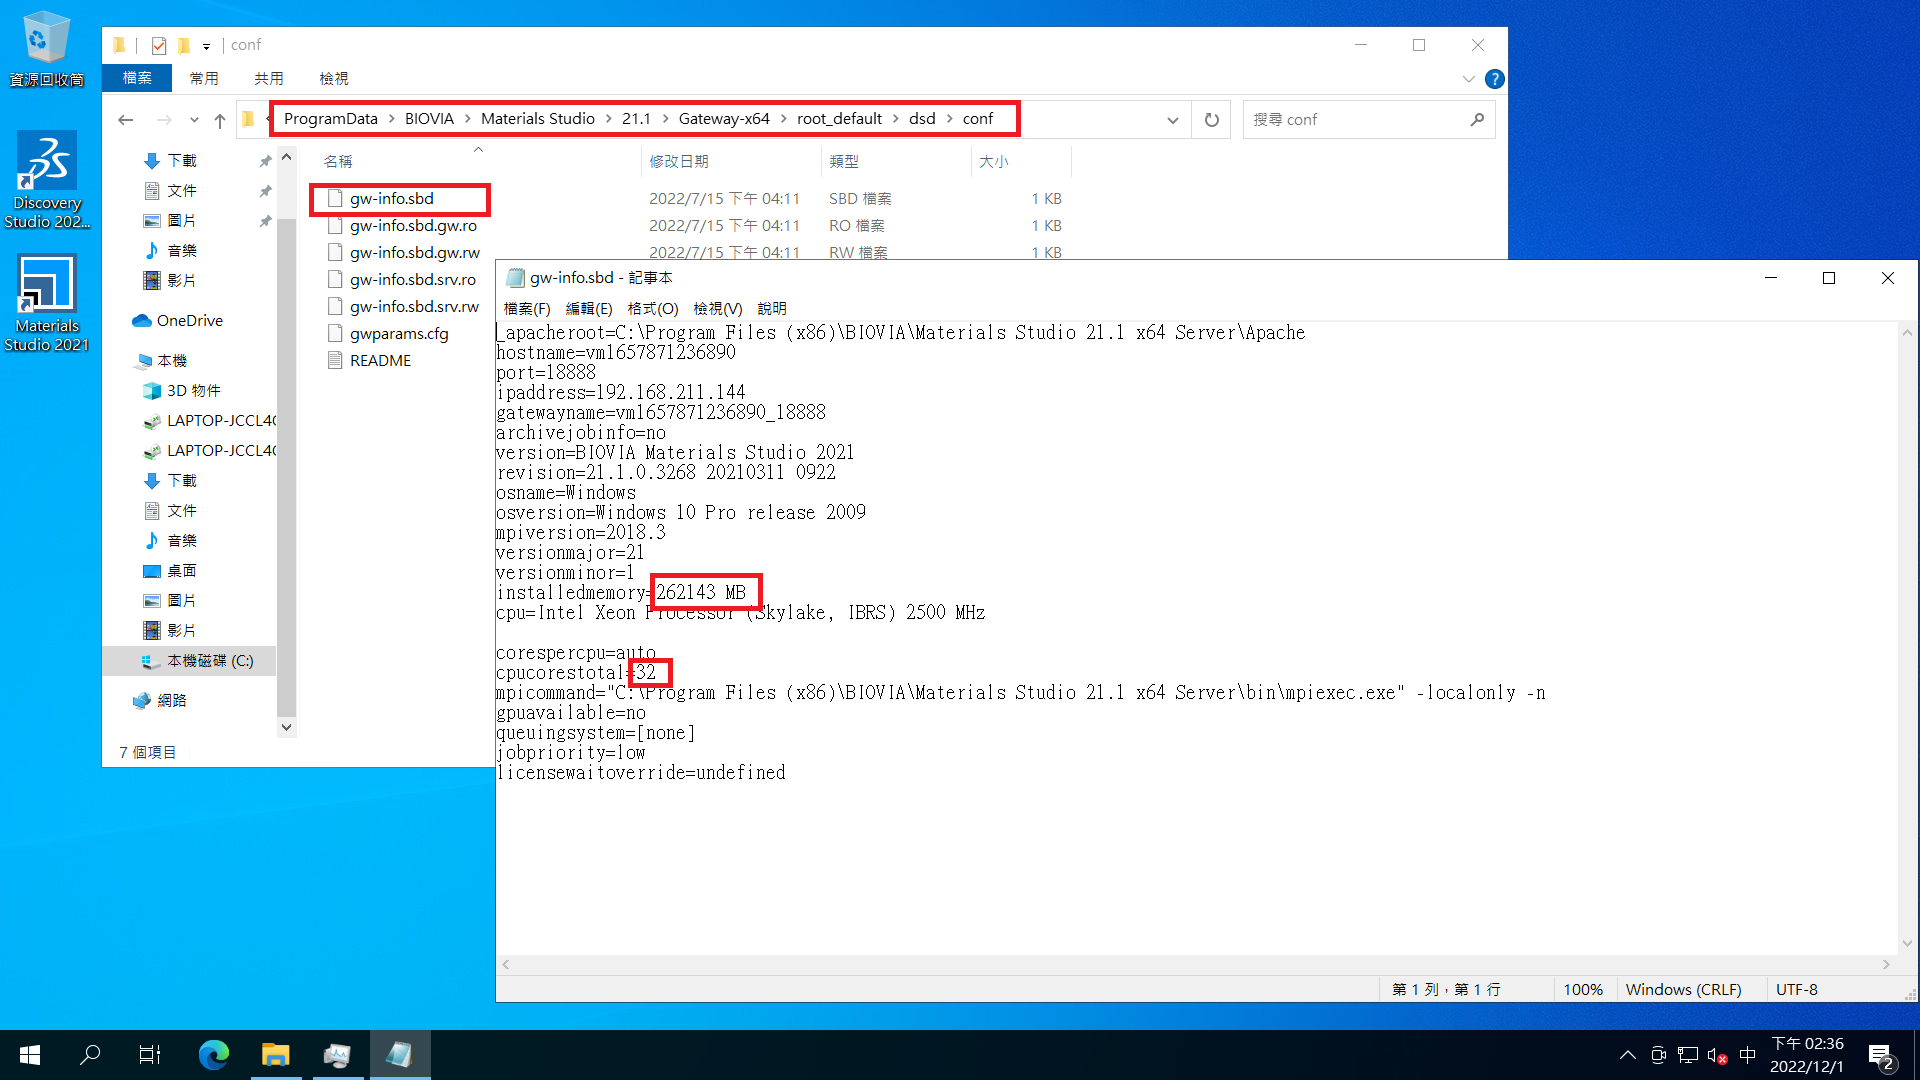
Reboot the VM, then you can see that your VM awared installed core and memory correctly.
## Special thanks
Kuan-Hsuan Su and Shang-Wei Lin from [Hsiao-Ching Yang’s Lab](https://hcyangfjulab.wixsite.com/yangslab) contributed a great document regarding to the tweaking BIOVIA VM
https://hackmd.io/@KuanHsuanSu/B1WF5PPpj