---
title: 建立 Job Script | zh
tags: Guide, TWNIA3, TW
GA:
---
{%hackmd @docsharedstyle/default %}
# 建立 Job Script
可由本地端建立 job script 上傳至<b>台灣杉三號</b>主機,或直接在主機上建立 job script。
## 本地端建立
::: success
::: spoiler <b>Step 1. 使用nano編輯器 </b>
<br>
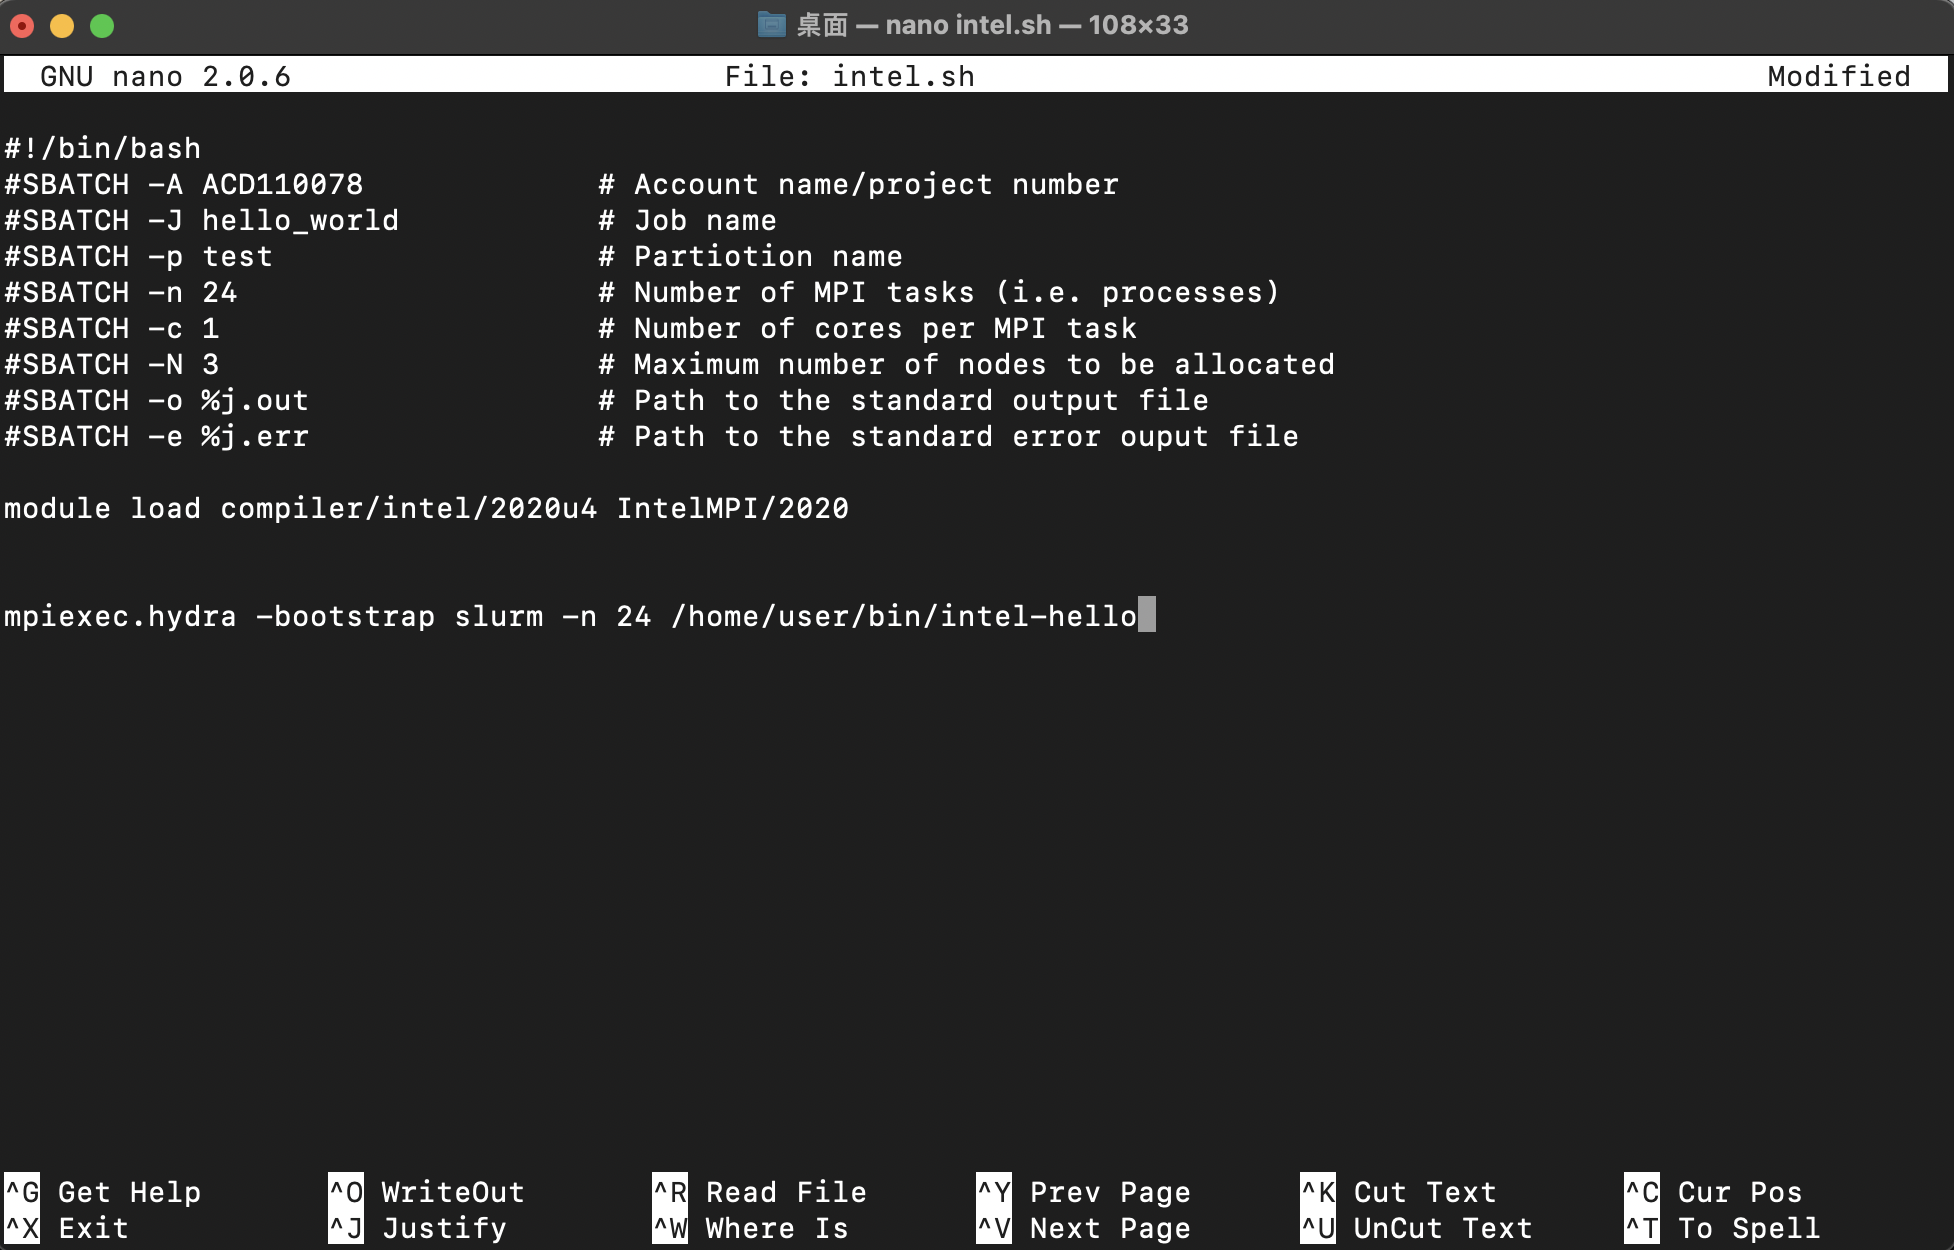
開啟終端機輸入 `% nano intel.sh` ,進入 <b>編輯畫面</b>後輸入
```
#!/bin/bash
#SBATCH -A ACD110078 # Account name/project number
#SBATCH -J hello_world # Job name
#SBATCH -p test # Partition name
#SBATCH -n 24 # Number of MPI tasks (i.e. processes)
#SBATCH -c 1 # Number of cores per MPI task
#SBATCH -N 3 # Maximum number of nodes to be allocated
#SBATCH -o %j.out # Path to the standard output file
#SBATCH -e %j.err # Path to the standard error ouput file
module load compiler/intel/2020u4 IntelMPI/2020
mpiexec.hydra -bootstrap slurm -n 24 /home/user/bin/intel-hello
```
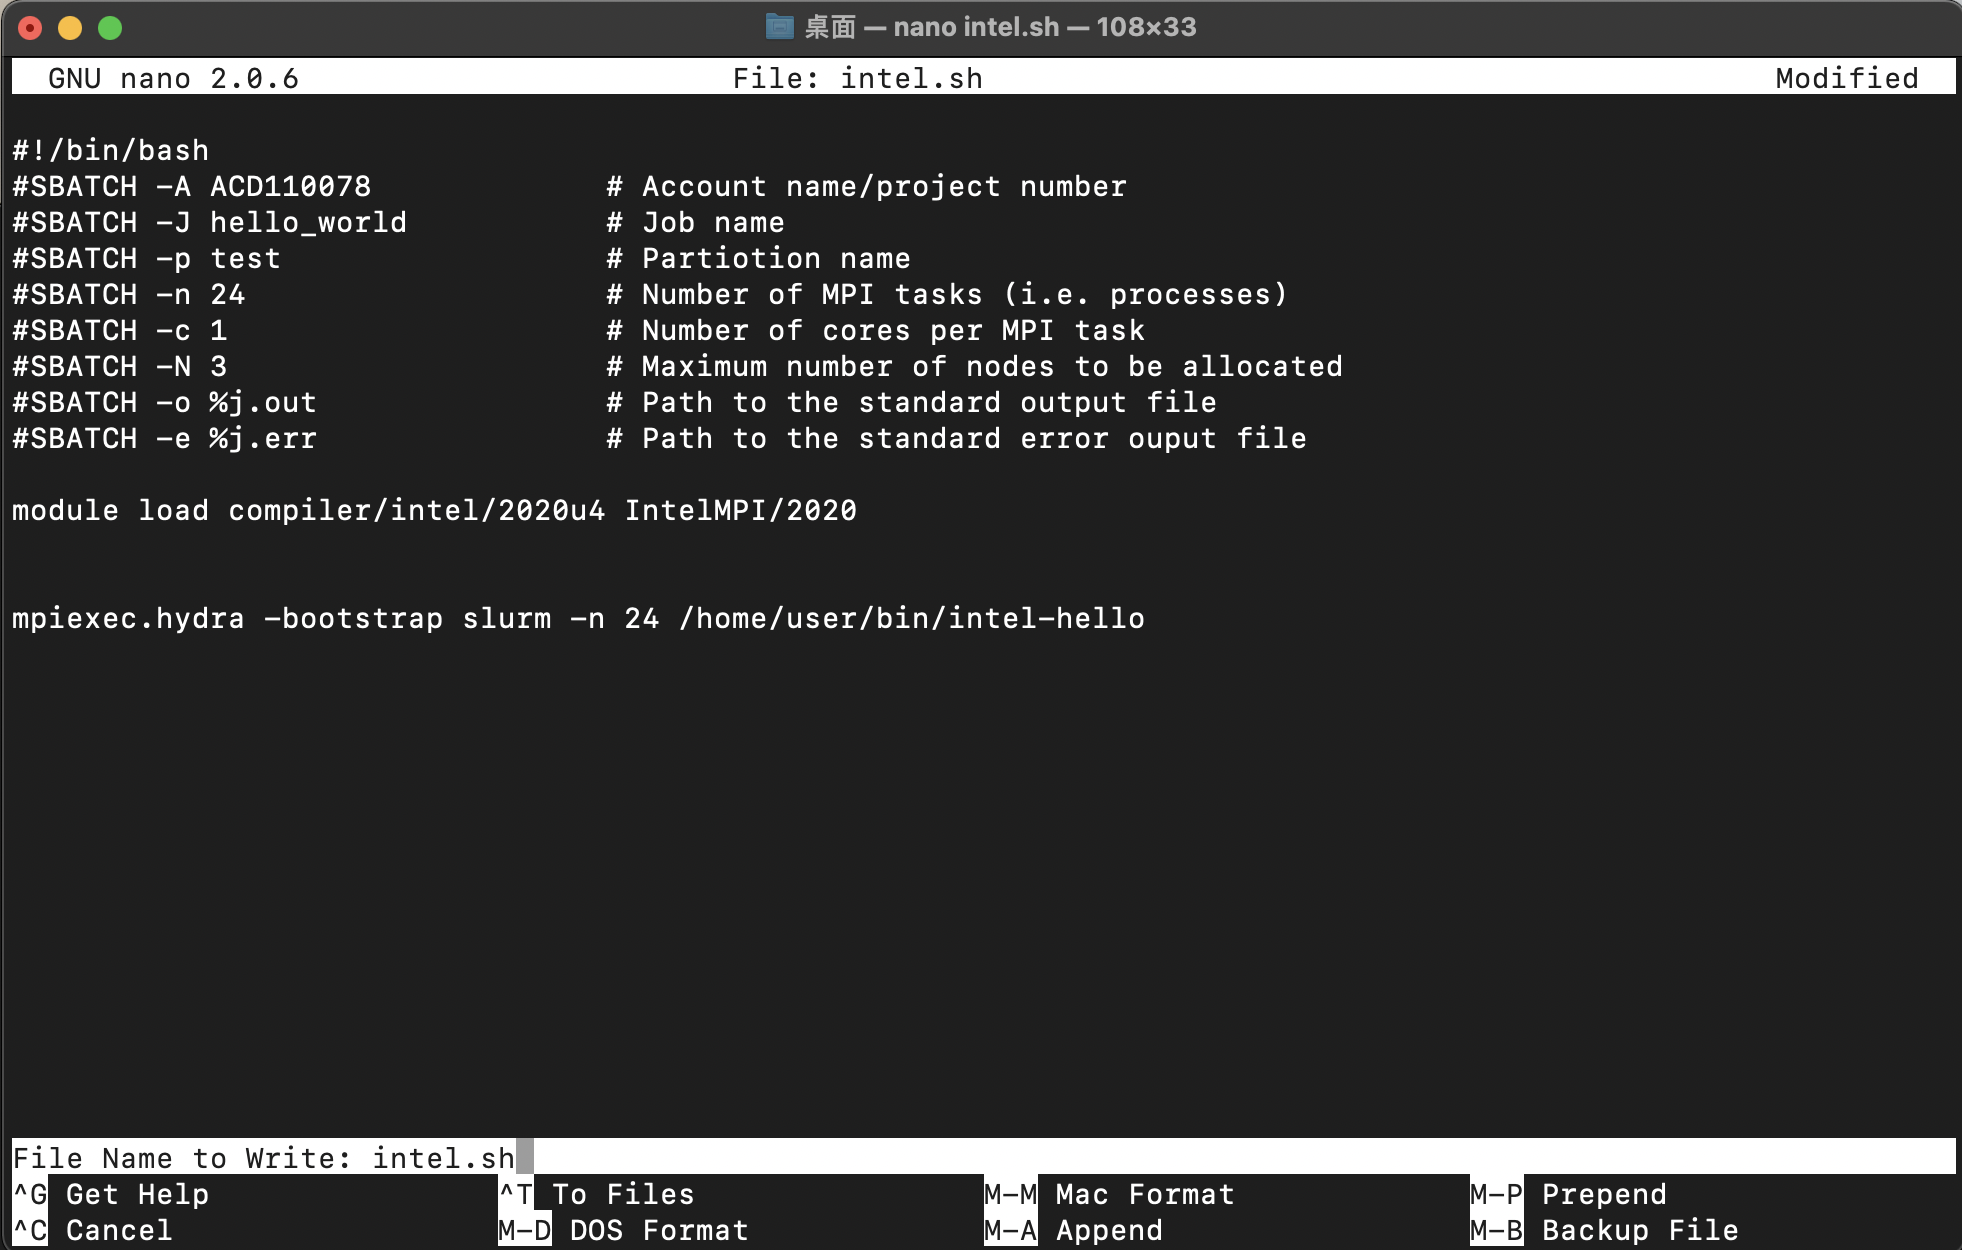
`control + o` 存檔,確認檔名為 `intel.sh` 後按 `enter`
輸入 `chmod +x intel.sh` 更改權限為可執行
```
***@wrl-tc-171 Desktop % ./intel.sh
> zsh: permission denied: ./
***@wrl-tc-171 Desktop % chmod +x intel.sh
```
:::
::: success
::: spoiler <b>Step 2. 上傳至台灣杉三號主機</b>
<br>
終端機輸入 `scp ./*.sh u***@twnia3.nchc.org.tw:~` 要將所有 <b>.sh檔</b> copy一份到
`u***@t3-x1.nchc.org.tw.` 的主機根目錄 `~` 底下。輸入 <b>主機密碼</b> 與 <b>MOTP碼</b> 後自動上傳完成。
```
***@HYdeMacBook-Air Desktop % scp ./*.sh ***@twnia3.nchc.org.tw:~
Password:
Changing MOTP: 3334666
> intel.sh 100% 91 17.0KB/s 00:00
```
:::
::: success
::: spoiler <b>Step 3. 在台灣杉三號主機端確認是否上傳成功 </b>
<br>
- 登入主機端後輸入 `ls` 確認是否成功上傳到 `u***@twnia3.nchc.org.tw.` 的主機根目錄 `~` 底下。
```
[***@lgn302 ~]$ ls
> intel.sh
```
- 或者輸入 `find *.sh` 尋找所有格式為 <b>.sh</b> 的檔案
```
[***@lgn302 ~]$ find *.sh
> intel.sh
```
:::
---
## 主機端建立
::: success
:::spoiler <b>Step 1. 使用vim編輯器</b>
<br>
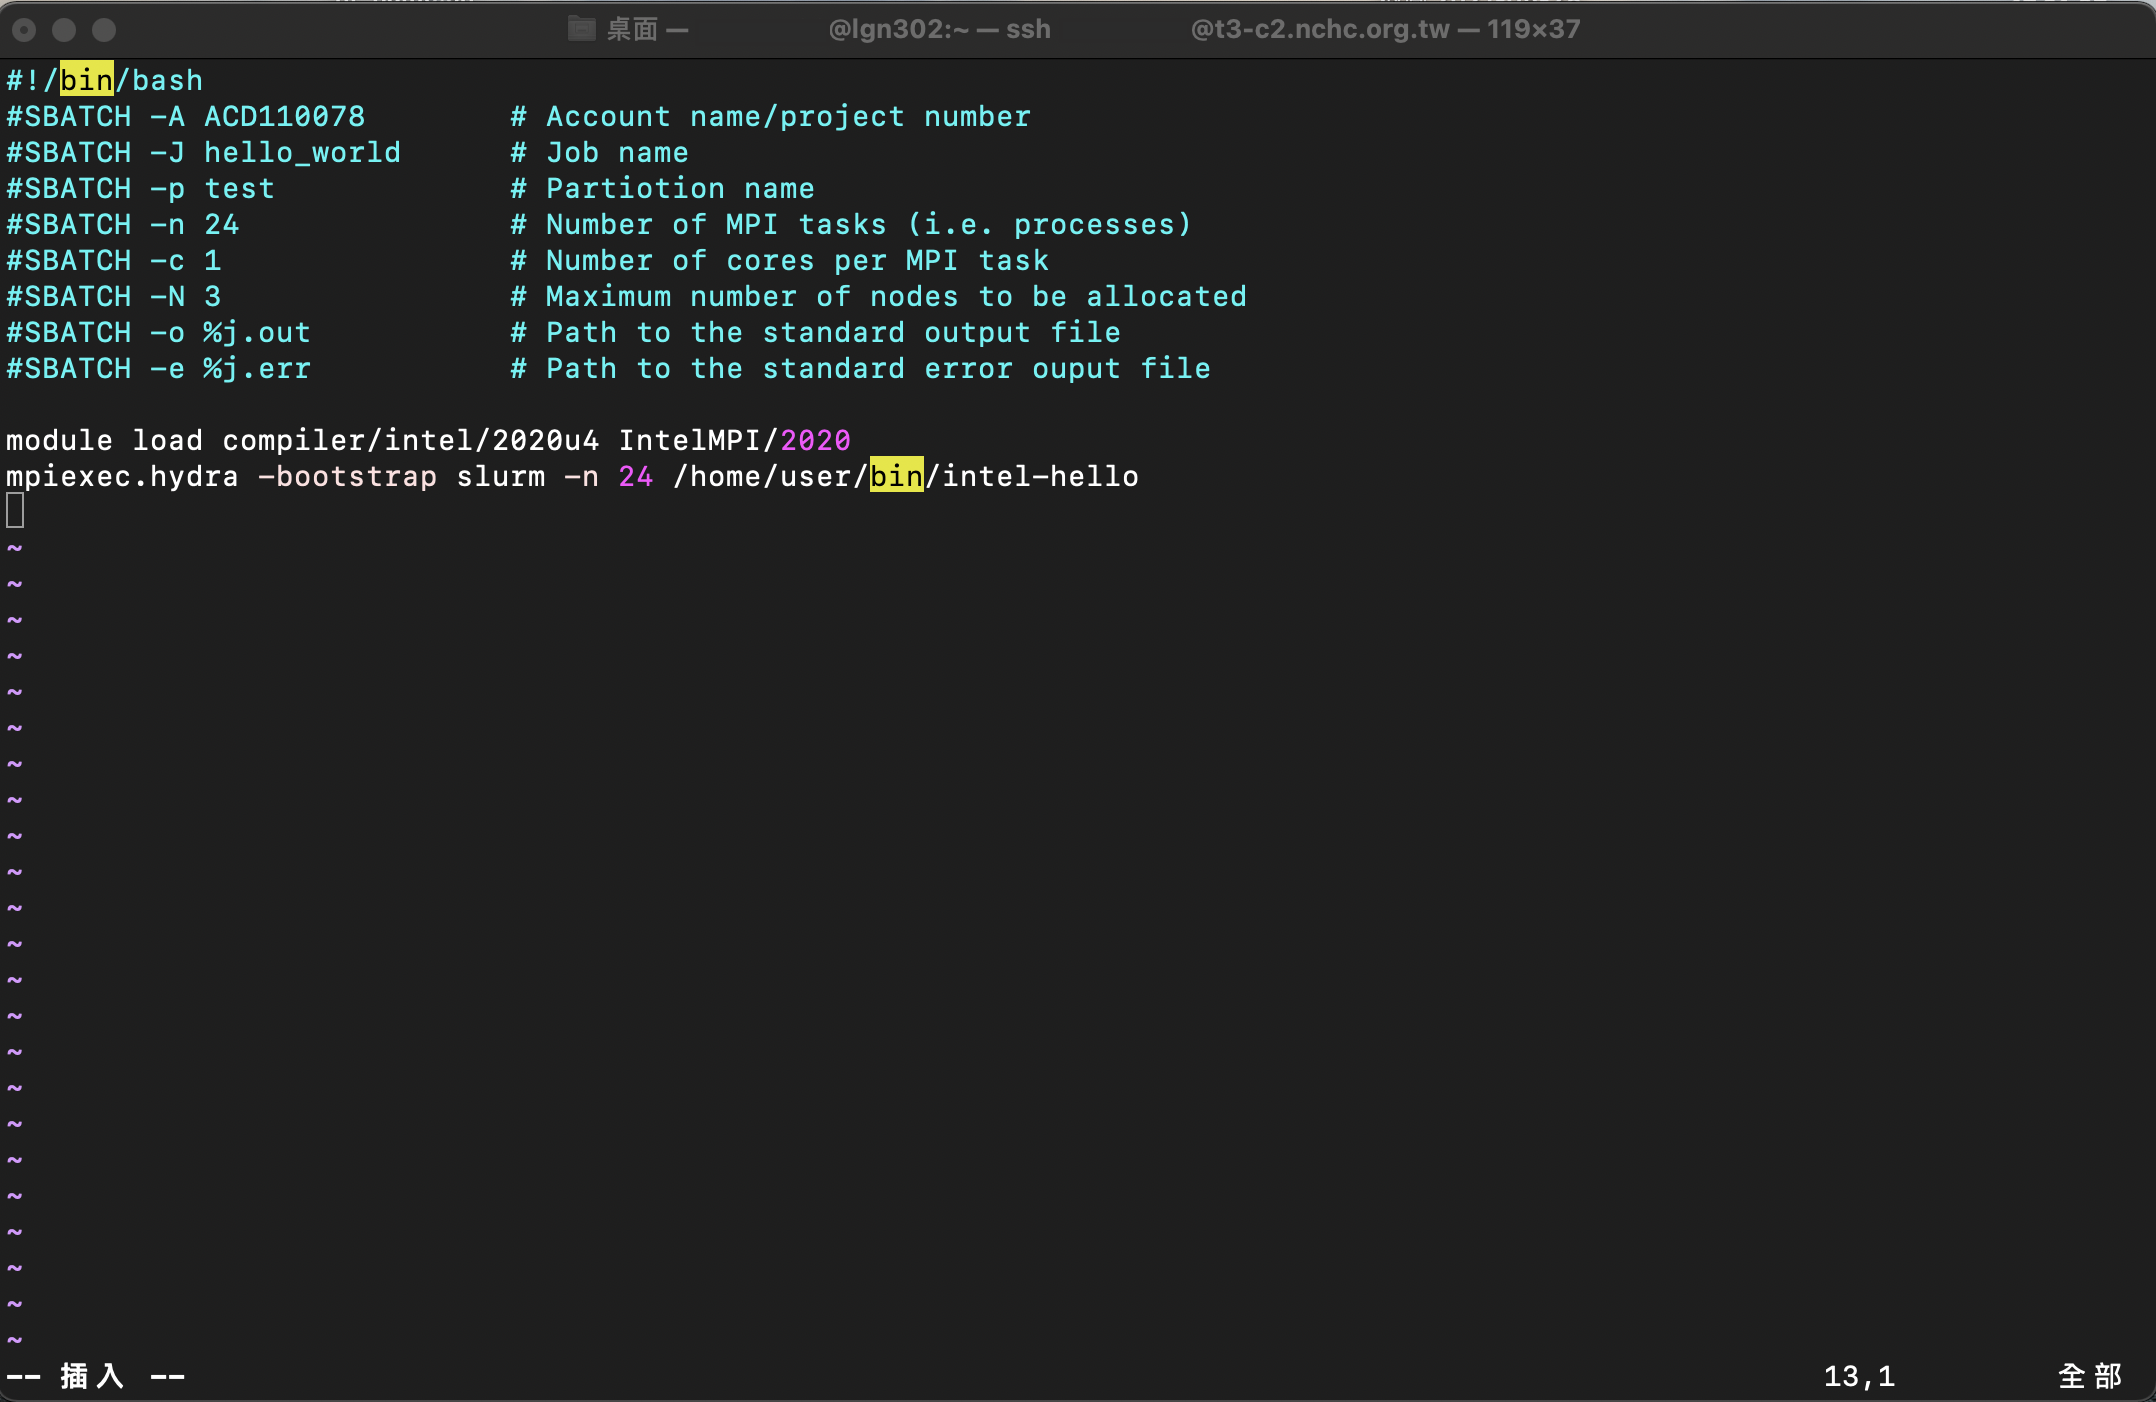
登入主機端後輸入 `vi intel.sh` 開啟 <b>Vim</b> ,按 `i` 進入編輯模式開始編輯。輸入
```
#!/bin/bash
#SBATCH -A ACD110078 # Account name/project number
#SBATCH -J hello_world # Job name
#SBATCH -p test # Partition name
#SBATCH -n 24 # Number of MPI tasks (i.e. processes)
#SBATCH -c 1 # Number of cores per MPI task
#SBATCH -N 3 # Maximum number of nodes to be allocated
#SBATCH -o %j.out # Path to the standard output file
#SBATCH -e %j.err # Path to the standard error ouput file
module load compiler/intel/2020u4 IntelMPI/2020
mpiexec.hydra -bootstrap slurm -n 24 /home/user/bin/intel-hello
```
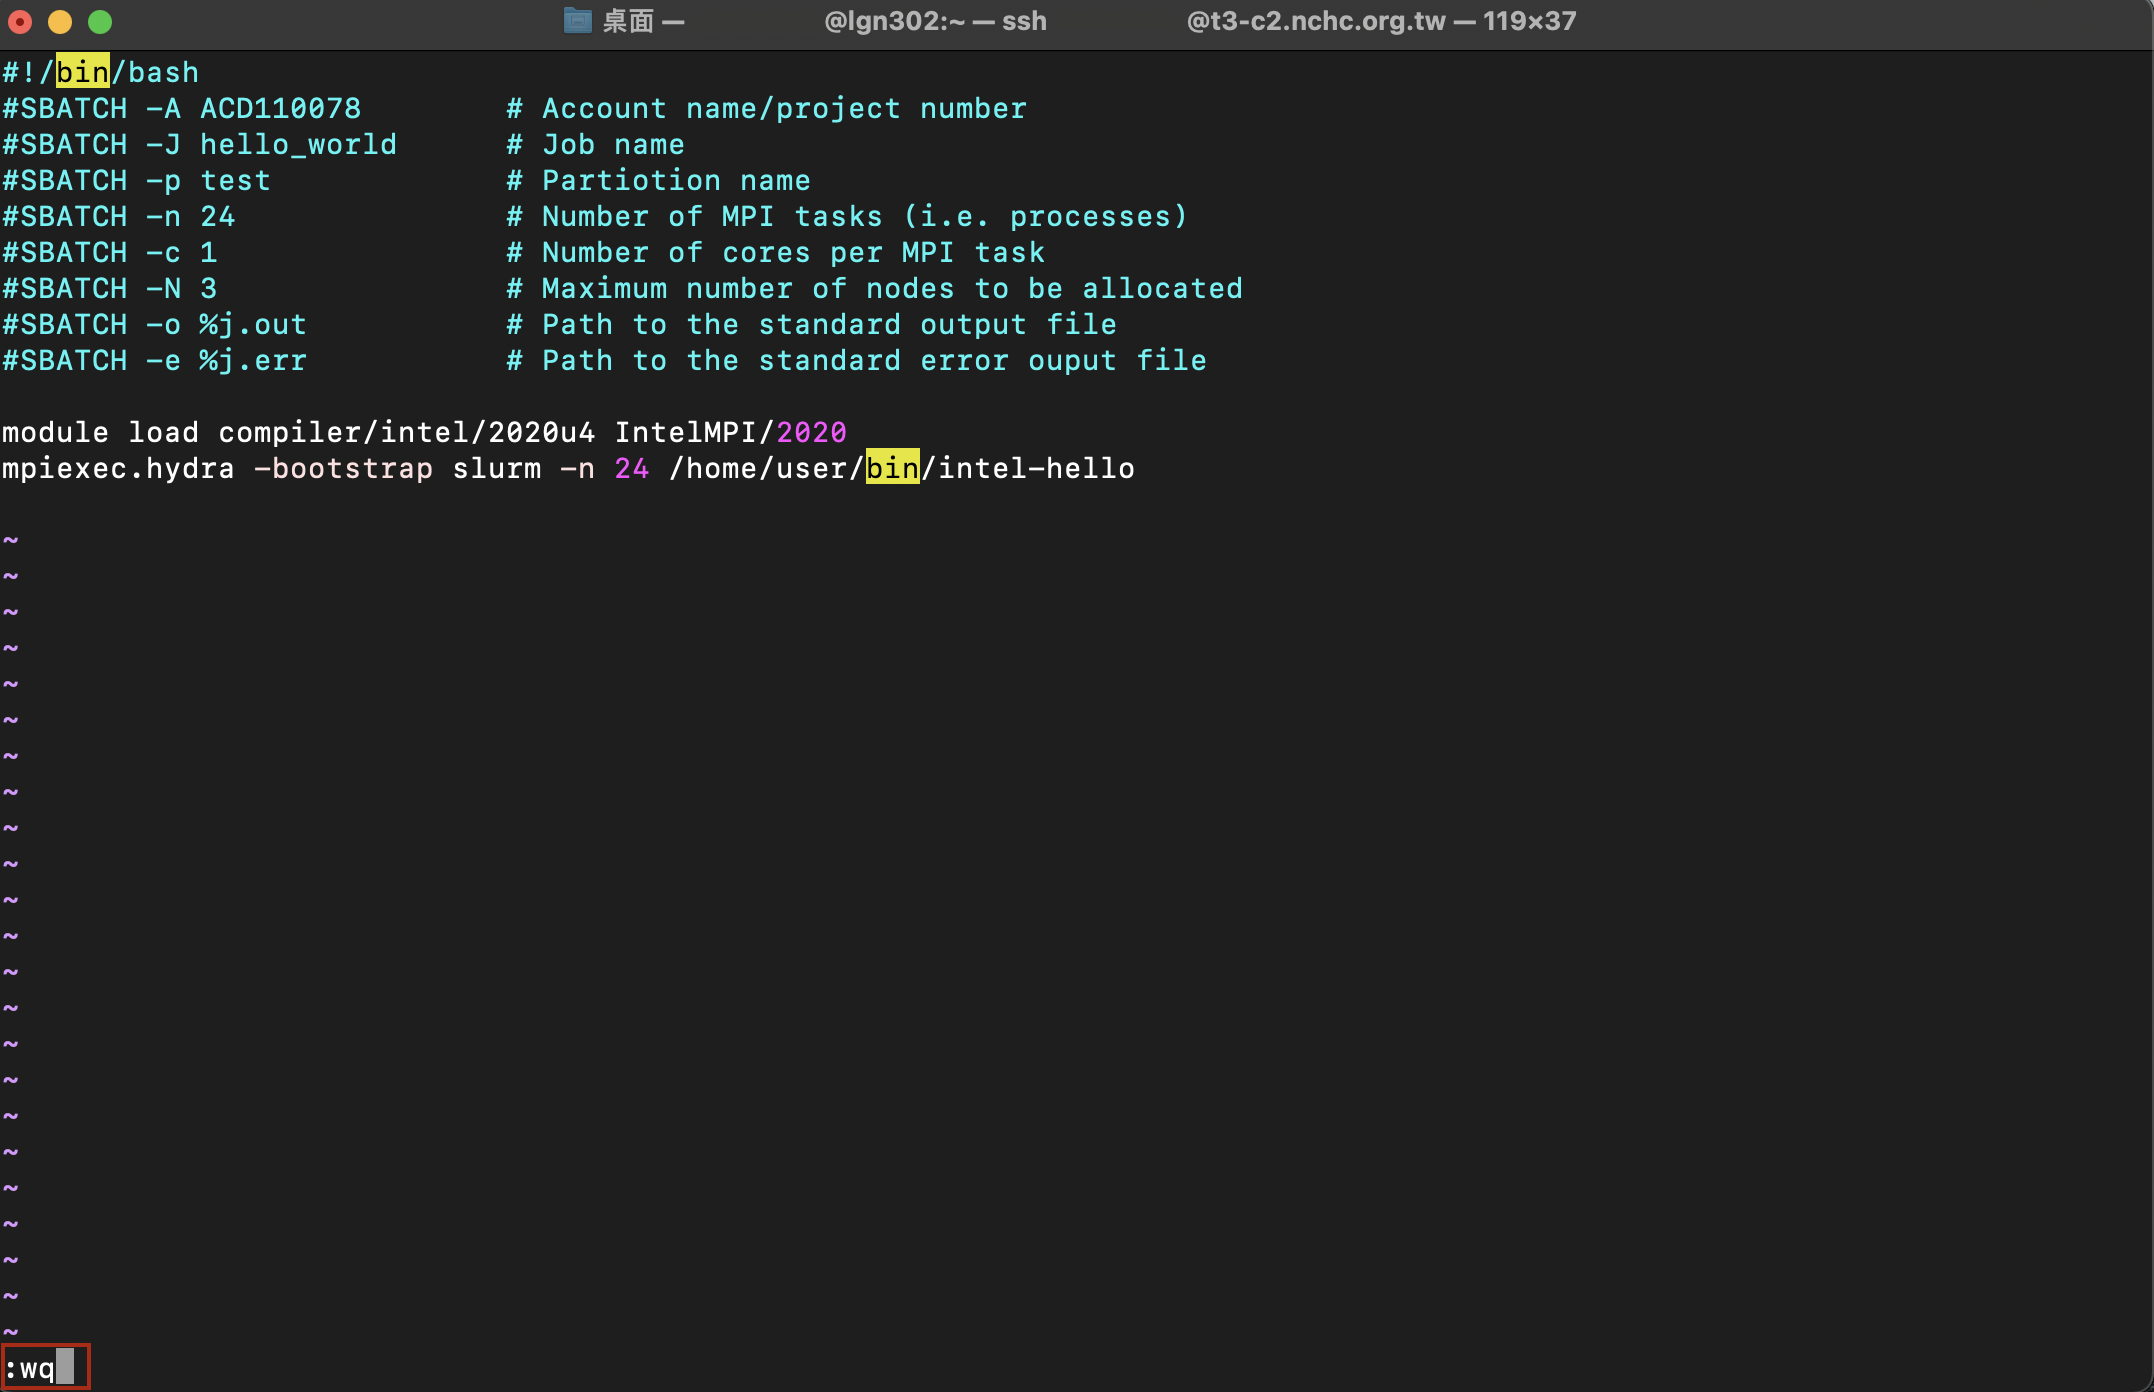
結束編輯時,按 `esc` 跳到命令模式,鍵入 `:wq` 接著按 `enter` 完成存檔。
:::
::: success
::: spoiler <b>Step 2. 確認建檔是否成功 </b>
<br>
- 輸入 `ls` 確認是否出現檔案。
```
[***@lgn302 ~]$ ls
> intel.sh
```
- 若不確定存到哪個目錄時,可輸入 `find *.sh` 尋找檔名為 <b>.sh</b> 結尾的檔案
```
[***@lgn302 ~]$ find *.sh
> intel.sh
```
:::
:::warning
<i class="fa fa-lightbulb-o" aria-hidden="true"></i> **建議:** 避免增加系統負載,先用 `ls` 查詢 ; 若不確定檔案傳輸到哪個目錄,再使用 `find` 。
:::